
Introduction
Node JS is the popular JavaScript framework mainly used for server-side coding, Building APIs, and backend development. Node JS framework enables JavaScript to execute beyond the web browsers.
Amazon Web Services is the set of cloud services provided by Amazon. AWS Cloud is current market leader in cloud computing. AWS Cloud provides scalable, highly available, robust, serverless, pay-as-you-go cloud native services across the globe. The AWS service networks are spread across the globe in several geographic locations called AWS regions. An AWS region is the set of AWS availability zones. An availability zone consists of several AWS data centers.
There are several services AWS Cloud provides us. The main categories of services are as follows:
- Compute Services: AWS EC2, AWS Lambda Functions, Elastic Beanstalk etc.
- Storage Services: AWS EBS volumes, EFS, AWS S3 etc.
- Database Services: AWS DynamoDB, AWS RDS, Amazon Aurora etc.
- In-Memory Data Service: AWS ElastiCache.
- Networking and Content Delivery: Route 53, CloudFront etc.
- Developer Tools: CodeCommit, CodeBuild, CodePipeline, CodeDeploy etc.
- Access Management: IAM, Cognito etc.
- Governance and Management Services: CloudWatch, CloudTrail etc.
There are many more services and categories.
In this article, we will create a web server developed in Node JS framework and deploy it into the AWS EC2 server. AWS EC2 (Elastic Compute Cloud) is the virtual server created in AWS Cloud. We will follow the following steps to deploy a Node JS web application into AWS EC2:
- Create the simple Node JS web app.
- Launch the AWS EC2 into AWS Cloud with proper security groups (like Firewall).
- Connect to the AWS EC2 instance.
- Install the required software into AWS EC2.
- Cloning the GitHub repository and install the dependencies.
- Start the application.
At last, we will use EC2 user data to install the required software and dependencies during launch time. So, we have long way to go. Let us start!!
Create the simple Node JS web app
Creating a simple Node JS web application is quick and easy. The ‘http’ module is used to create the HTTP web server application as follows:
const http = require("http")

// Create the HTTP Web server.

const webServer = http.createServer((req, res) => {

 // Get the HTML content to show.

 let content = getFinalHTML();


 // Write the HTML content.

 res.writeHead(200, { "Content-Type": "text/html" });

 res.write(content);

 res.end();

});;
The function getFinalHTML() is used to get the HTML file index.html and can be implemented in following way:
const fs = require("fs")
const os = require("os");

// Get the host IP address of the server.

function getIPAddr() {

 // For Test into personal laptop with Wi-Fi Connection.
 /*
 console.log(os.networkInterfaces());
 let hostIP = os.networkInterfaces()["Wi-Fi"][1]["address"];
 */

 // For Production - AWS EC2.
 let hostIP = os.networkInterfaces()["eth0"][0]["address"];
 return hostIP;

}

// Get final HTML content: Replace the {HOSTIP} with the server IP Address.

function getFinalHTML() {

 // Get the index file content.
 let htmlContent = fs.readFileSync("./pages/index.html", "utf-8");

 // Get the host IP.
 let hostIP = getIPAddr().toString();

 // Replace the {HOSTIP} with host IP address.
 let finalHTML = htmlContent.replace("{HOSTIP}", hostIP);
 return finalHTML;
};
The function getIPAddr() is used to get the network IP address of the server using ‘os’ module.
Finally, the web server listens to the port number 3000 (Can be any port number).
// Set the Port number
const PORT = 3000;

// The server is listening on PORT.
webServer.listen(PORT, (error) => {
 if (!error) {
 console.log(`The server is started on port - ${PORT}`);
 }
});
You can run the application in your local machine, and it looks as follows:
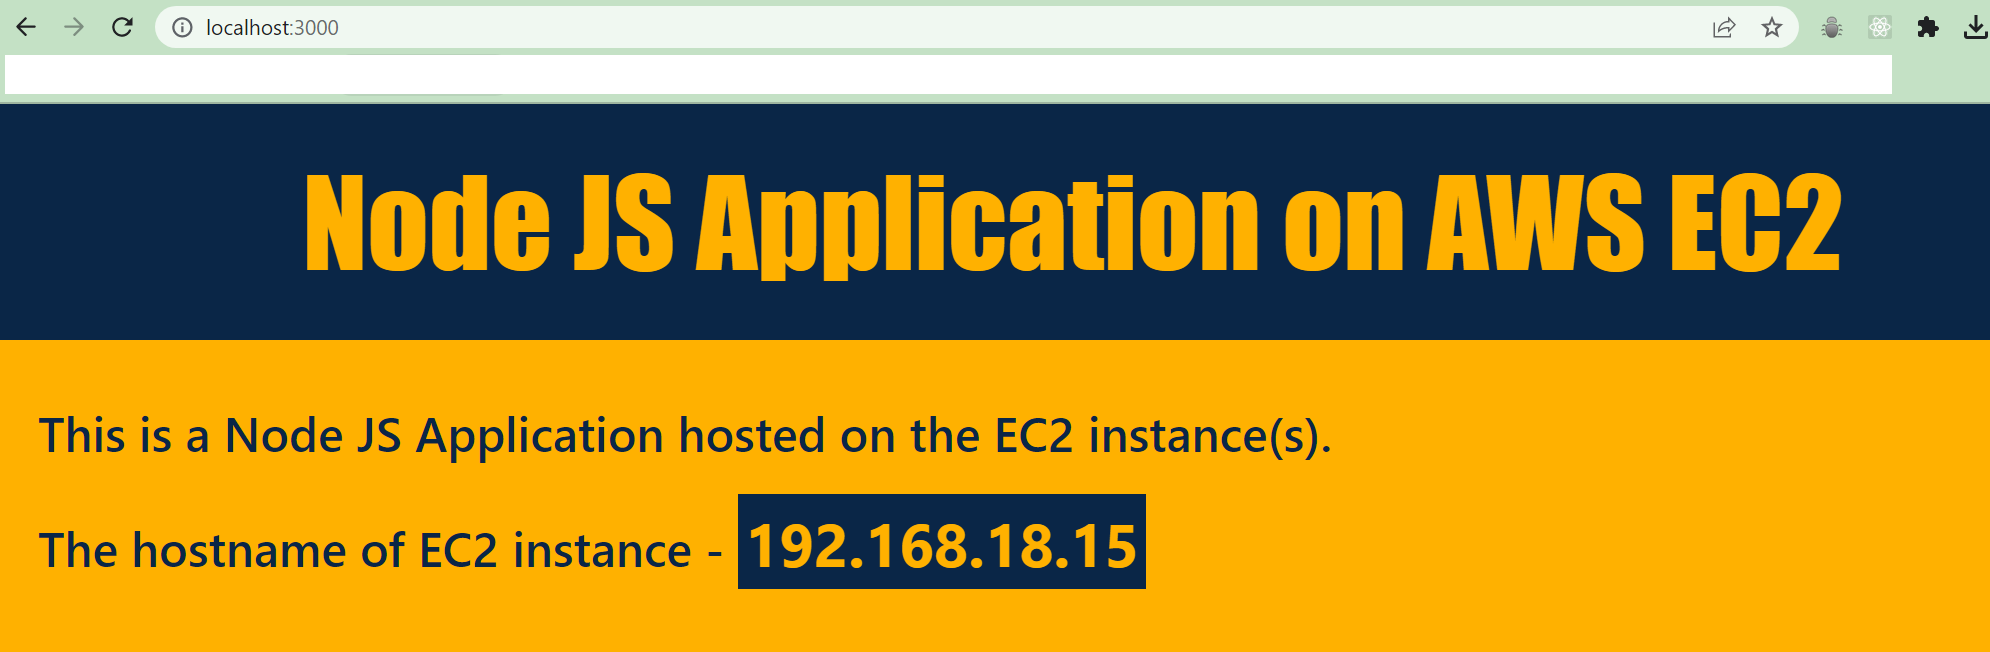 Node JS Application on local machine on port 3000
The hostname is showing my local machine IP address. When we install the application in EC2 instance, it will show the IP Address of EC2 instance.
The source code of the simple Node JS application is available in my GitHub repository - Sample-Node-App.
Please feel free to visit my GitHub repository and make clone in your local machine for practice.
Launch the AWS EC2 instance into AWS Cloud
This is the most important and first footstep into AWS Cloud. AWS provides free-tier access for 1 year for learning and practice. I advise you to make full use of it and create a free-tier account. Please follow the link and create your first free-tier account in AWS:
Now, log in with your AWS free-tier account using username, and password. The AWS console dashboard appears after successful login. On the top of the page, there is a search bar. Search the word: EC2 and the EC2 service dashboard will be launched.
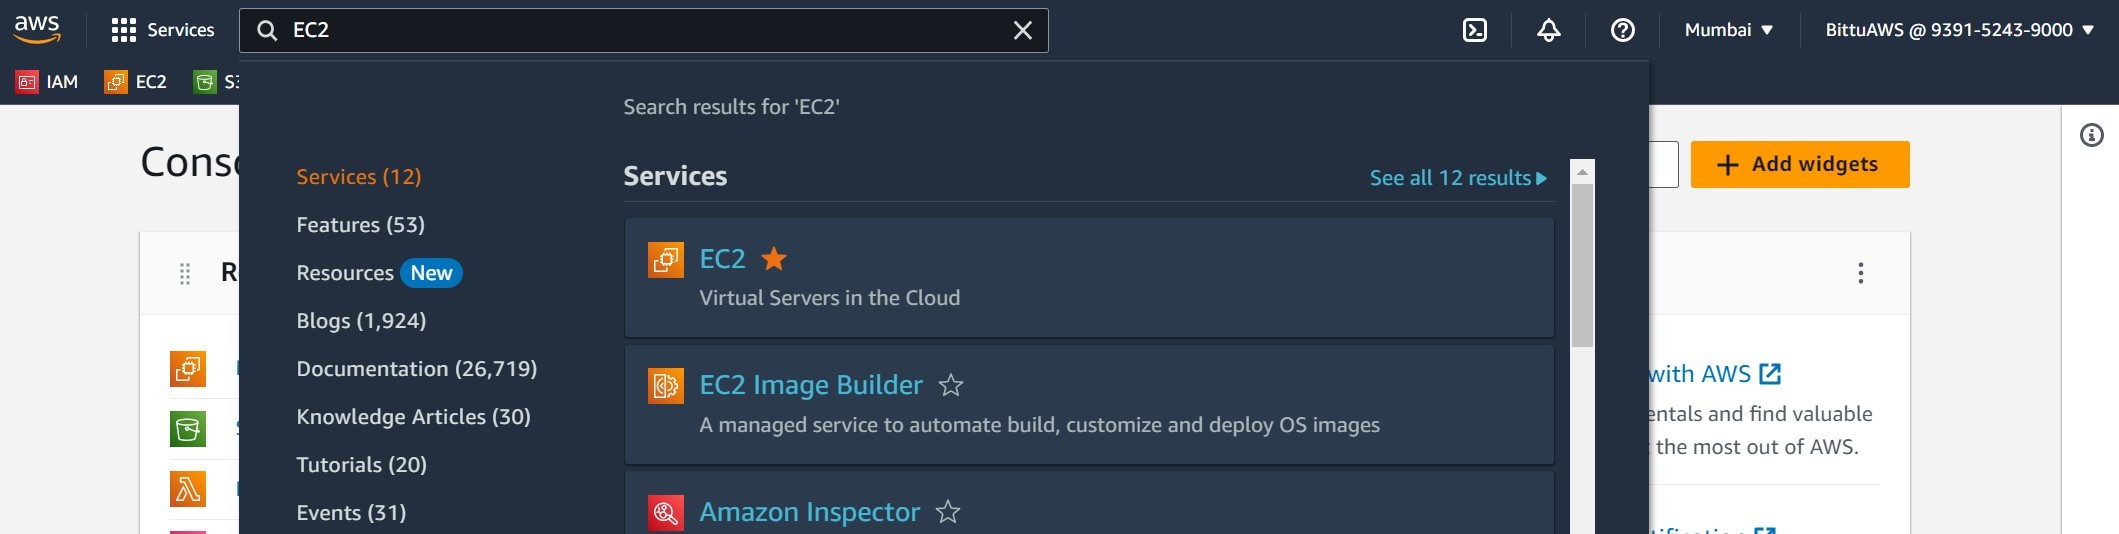 Search "EC2" service in AWS Console search bar
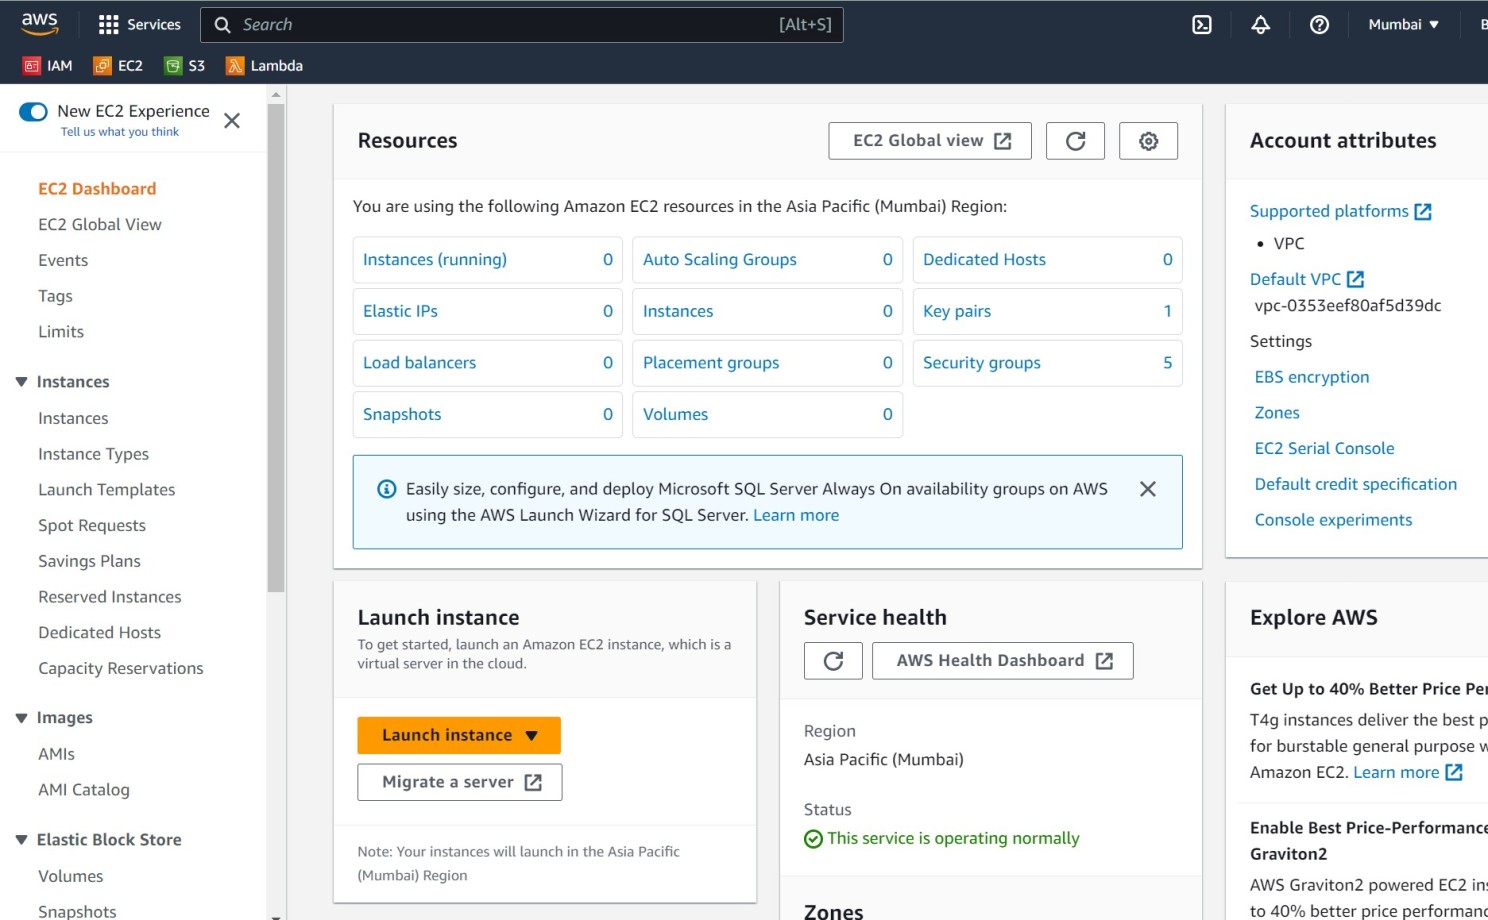 EC2 Service Dashboad
Click on the button “Launch Instance”.
Before launching an instance, let us get familiarized with the minimum features we need to provide to successfully launch an instance.
- Name and tags: Name of the EC2 instances e.g. NodeServer, AppServer. Tags are used to add label to AWS resource using key-value pair, e. g. Environment: Dev, Environment: Prod etc.
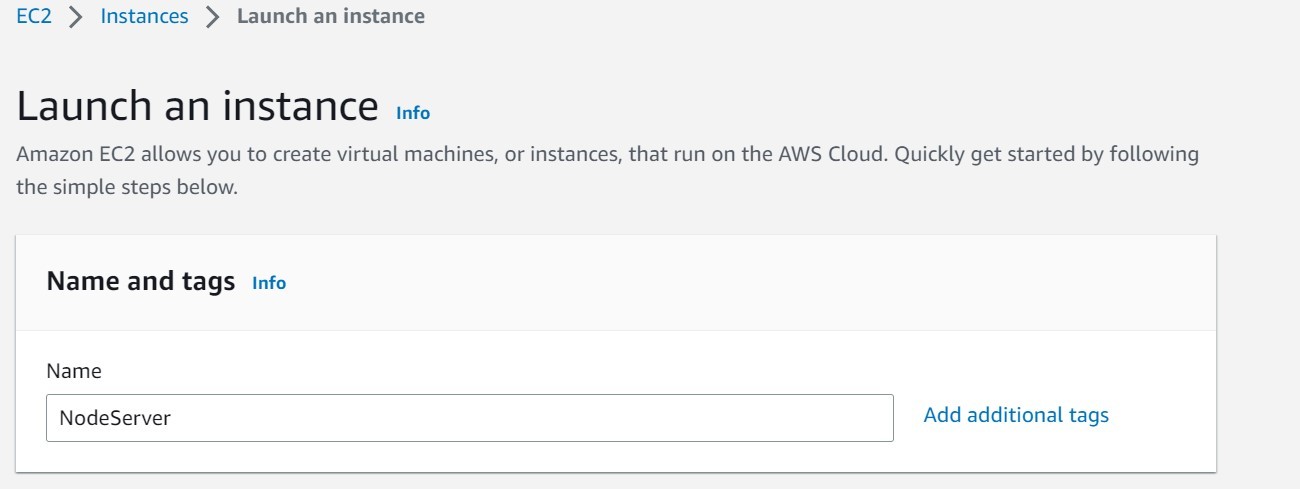 EC2: Name and tags
- Amazon Machine Image (AMI): Templates containing the software configuration of the EC2 instance like operating system, applications used. There are great number of already available AMIs are available in AWS. You can define your own AMIs or purchase AMIs from AWS Marketplace. For example, we will use AMI – Ubuntu Server 22.04 LTS in this article.
 EC2: Amazon Machine Image (AMI)
- Instance type: The CPU and memory (RAM) configuration of EC2 instance. Based on CPU and memory configurations, there are several EC2 instance types are available: Compute Optimized, Memory Optimized, Storage Optimized. We will use instance type - t2.micro with 1 vCPU and 1GiB memory, as it is free-tier eligible.
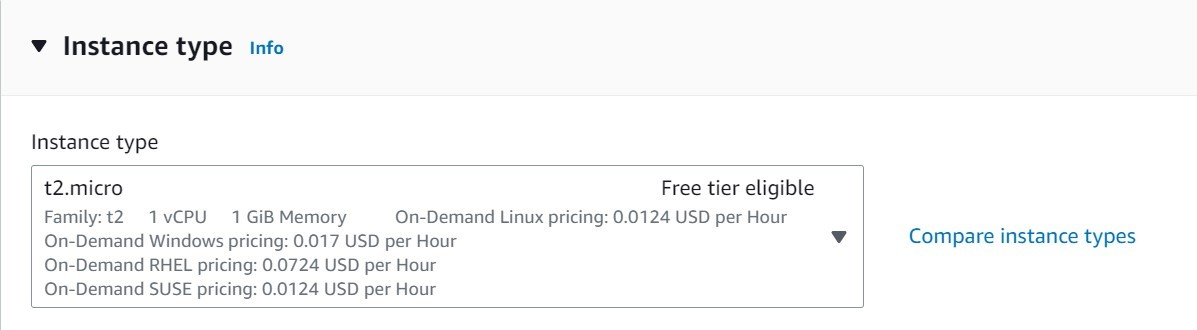 EC2: Instance type
- Key pair: Key pair is the RSA key pair to securely log on to the EC2 instance using SSH. You can create a new keypair or use the existing one (if any). I recommend to create a new keypair. When you create the new keypair, it will be downloaded into your machine for later use for login.
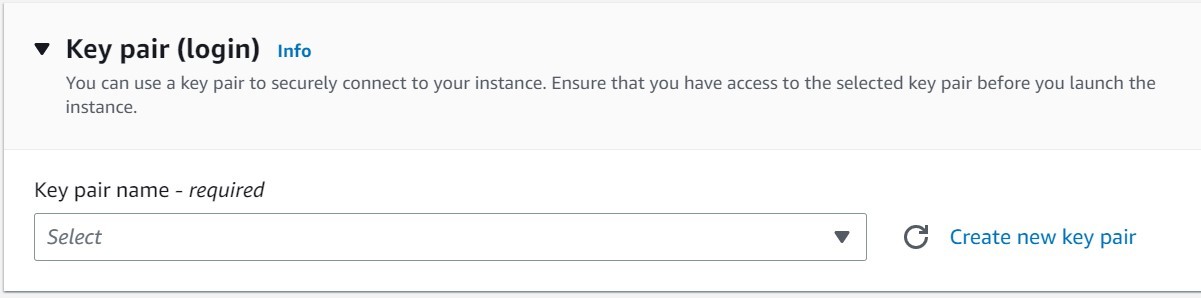 EC2: Keypair
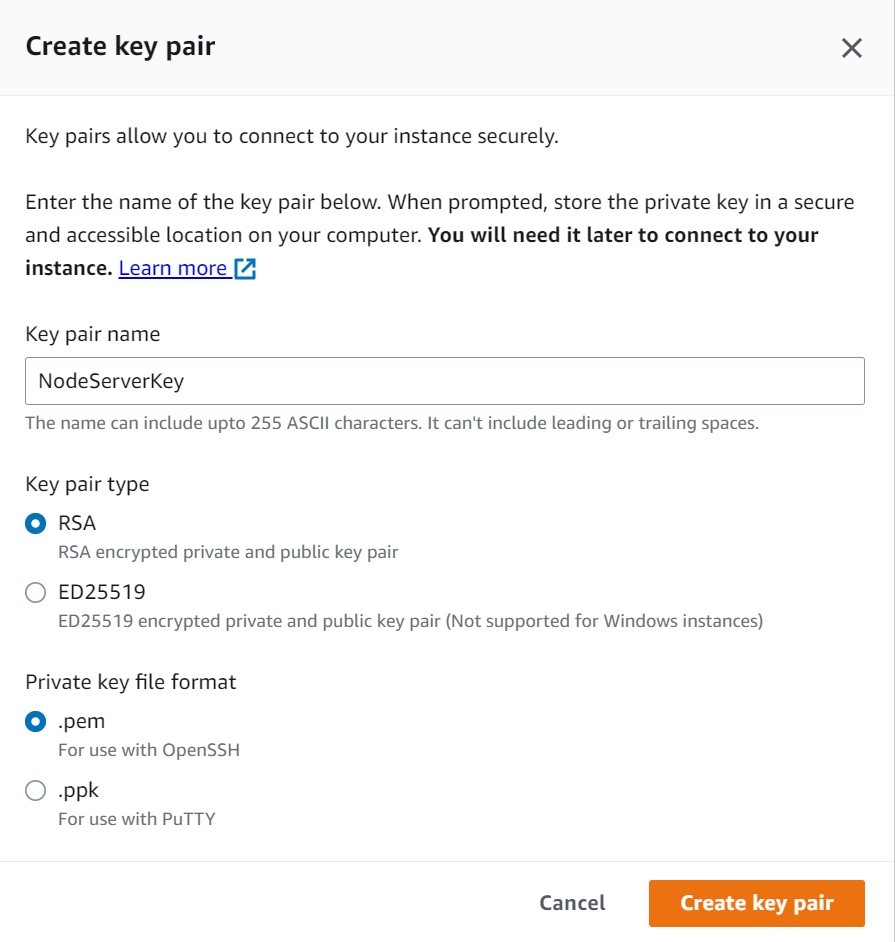 EC2: Generate Keypair
- Network Settings & Security Groups: In the network settings you need to assign security groups to the EC2 instance. Security Group is a new concept in AWS world and acts like network firewalls. Security group allows inbounds traffic to the EC2 instance based on inbound rule. It allows all the outbound traffic from EC2 instance by default. So, Security groups are NOT stateless like network firewalls.
You can create a new security group by allowing all the inbound rules during launch of the EC2 instance or you can create security groups earlier and assign those in the newly launched EC2 instance.
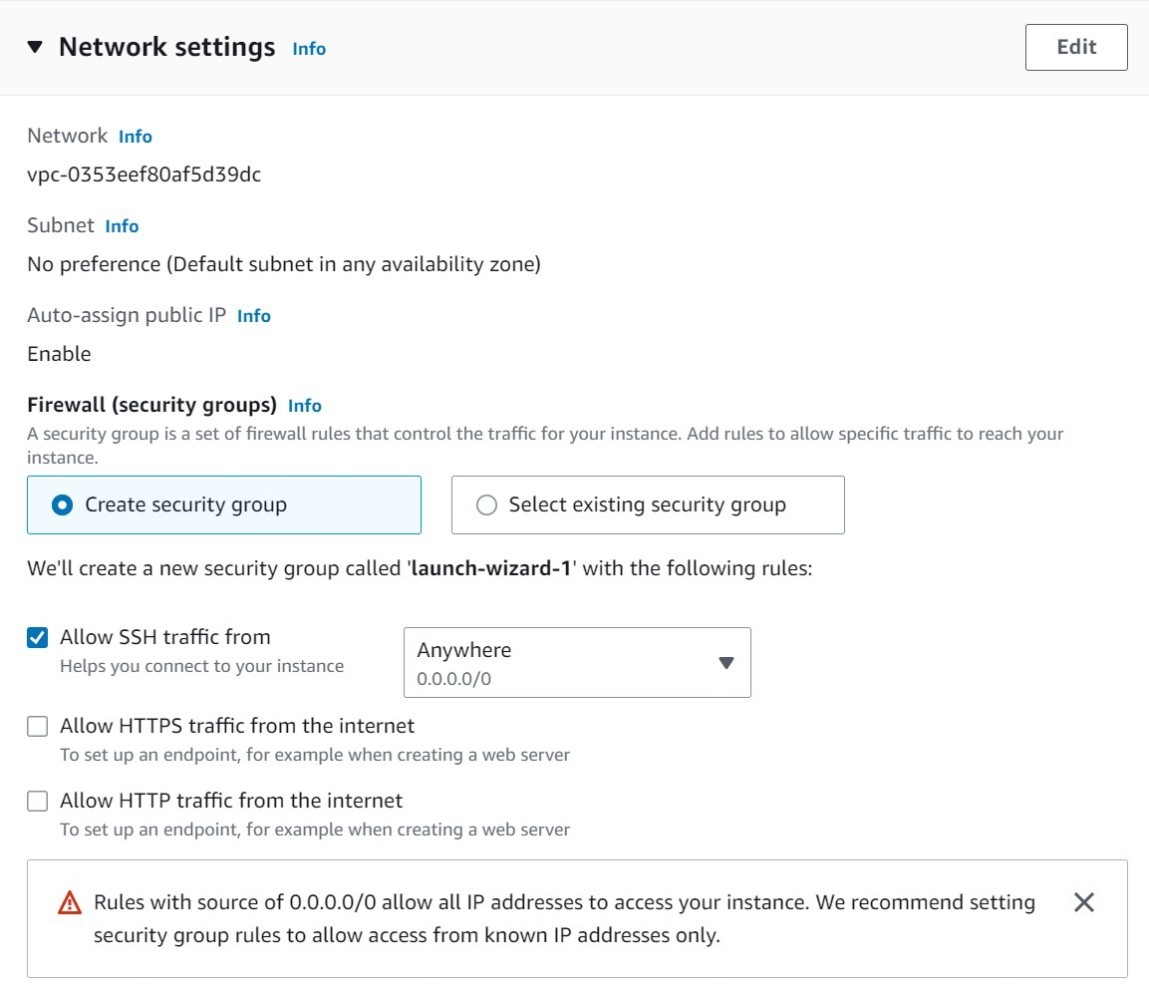 EC2: Network settings
Now, we need following inbound rules for our EC2 instance:
- Allow SSH traffic from anywhere. (To login to EC2 instance from your local machine using keypair)
- Allow HTTP/HTTPS traffic from the internet. (For installing applications from internet)
- Allow custom TCP traffic for the port 3000 from anywhere. (Our NodeJS application listen to the port 3000)
You can create security group for each of the above rules and attach those to the newly Launched EC2 instance. I have already created three security groups in advance.
SSHSecurityGroup
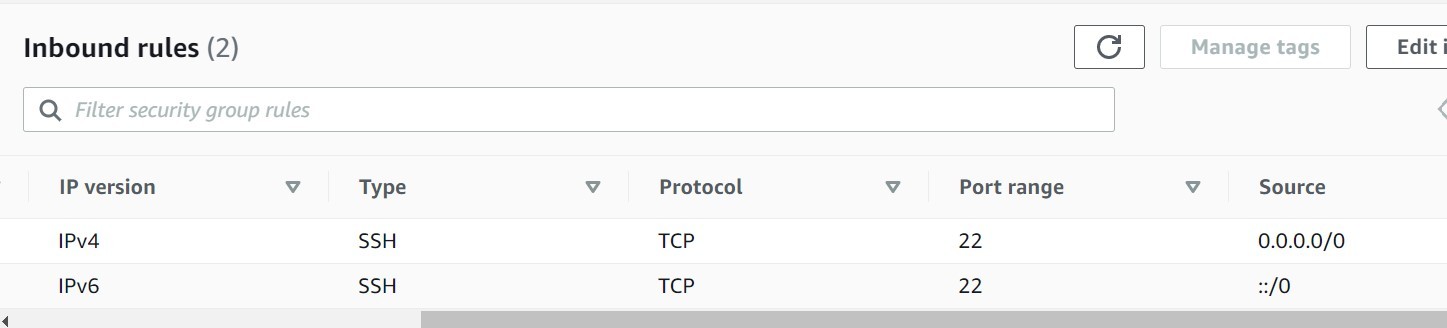 EC2: SSHSecurityGroup
WebSecurityGroup
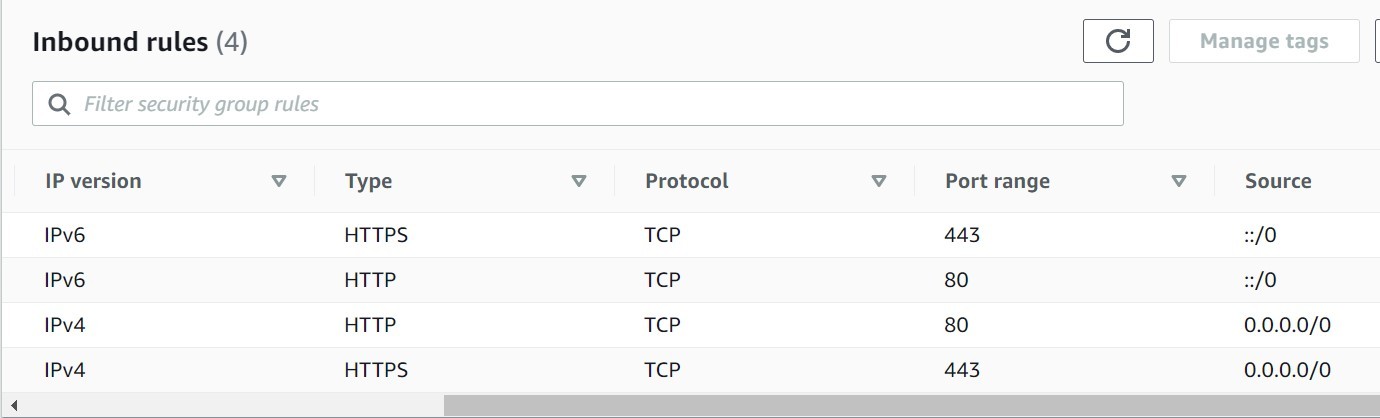 EC2: WebSecurityGroup
CustomTCP3000
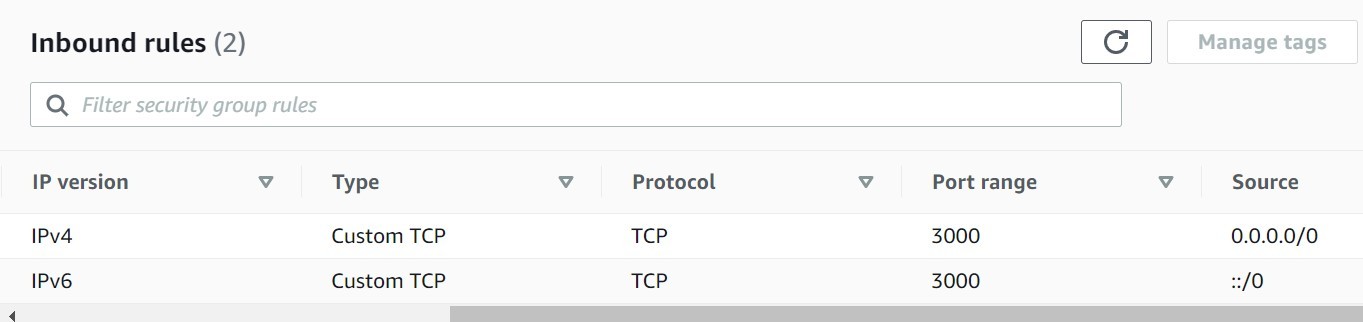 EC2: CustomTCP3000
Now, we attach the above security groups to the EC2 instance.
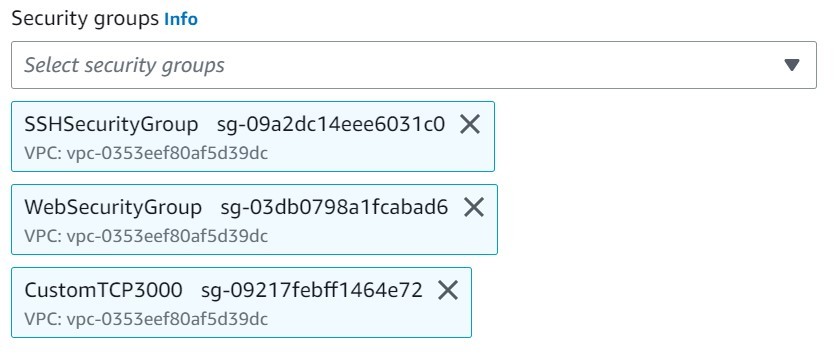 EC2: Security Groups Attachment
- Storage Configuration: We need to mention disk memory storage size and type. Here we can add File System (EFS) as well. We will use only one 8 GiB General purpose SSD volume for our purpose.
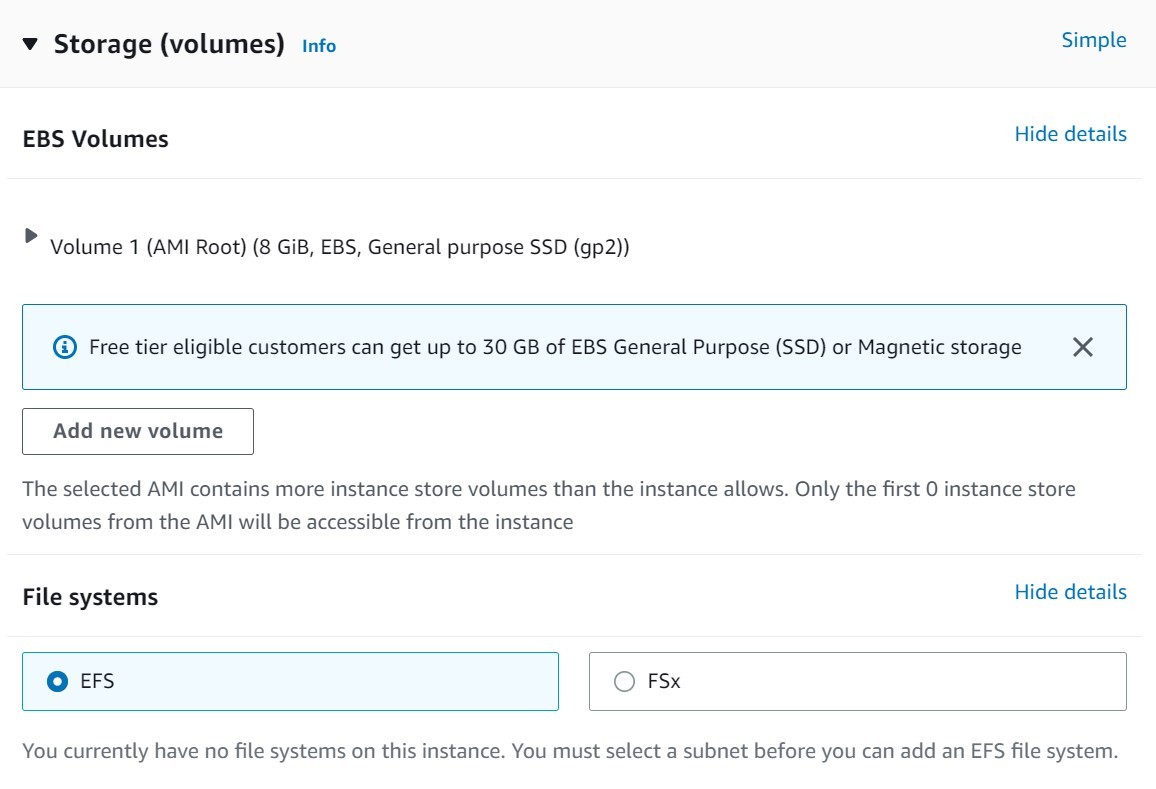 EC2: Storage
- Advance Details: As-of-now, we will not touch the advance details section. We will use it later to add booting scripts in “User Data”.
Finally, we launch EC2 instance. It will take some time to make its state pending to running.
 EC2: Launch
Now, we can click the checkbox at the left side of the EC2 instance to browse several configurations in several tabs in the bottom of the screen.
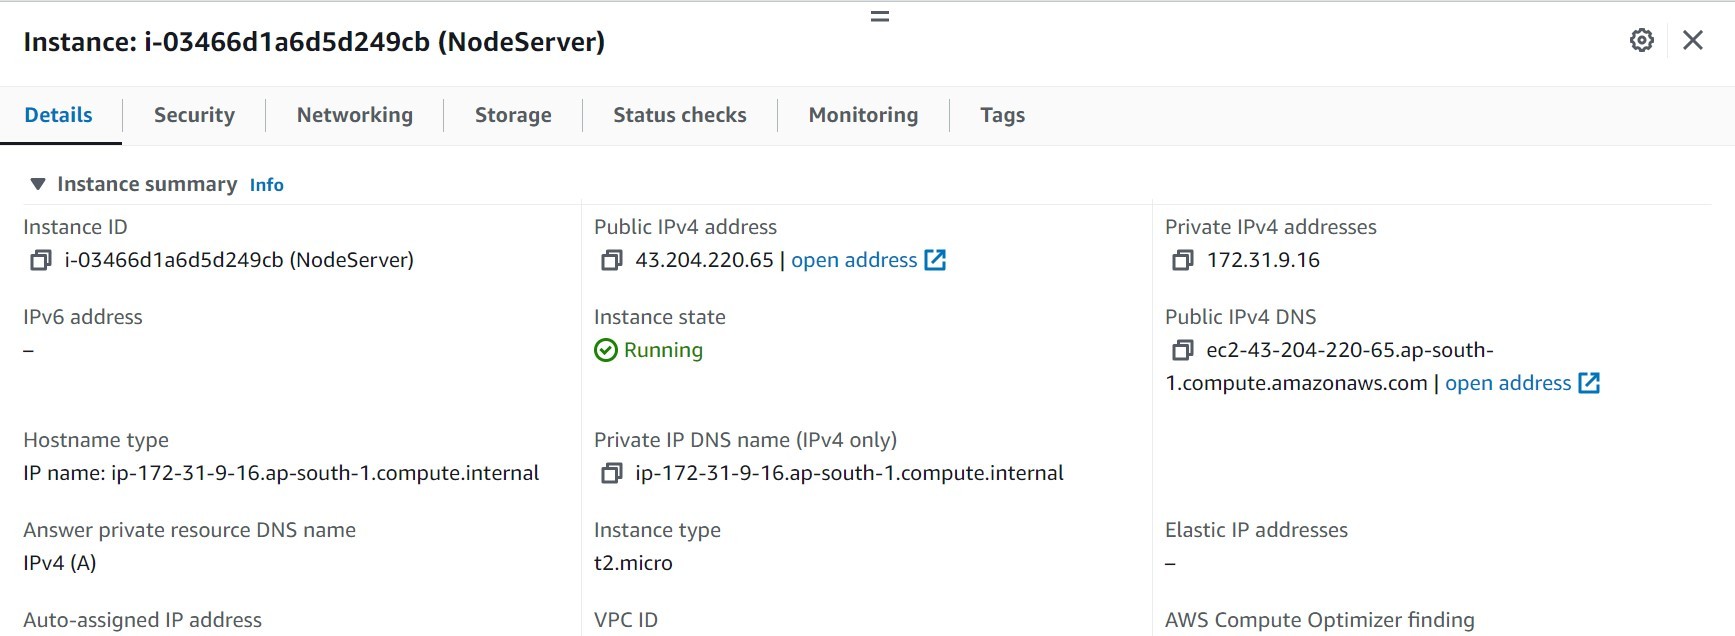 EC2: Configurations
For more detailed knowledge, please visit the AWS official documentation for EC2.
Connect to the AWS EC2 instance
Now, we need to connect to the EC2 instance, we have just launched. We have downloaded the keypair of the EC2 in our local folder. We need to open the folder and open a power shell for Windows or Terminal for MacOS or bash console for Linux Distros in that folder. Then, we need to connect to EC2 using following command.
ssh -i "NodeServerKey.pem" ubuntu@ec2-3-111-41-113.ap-south-1.compute.amazonaws.com
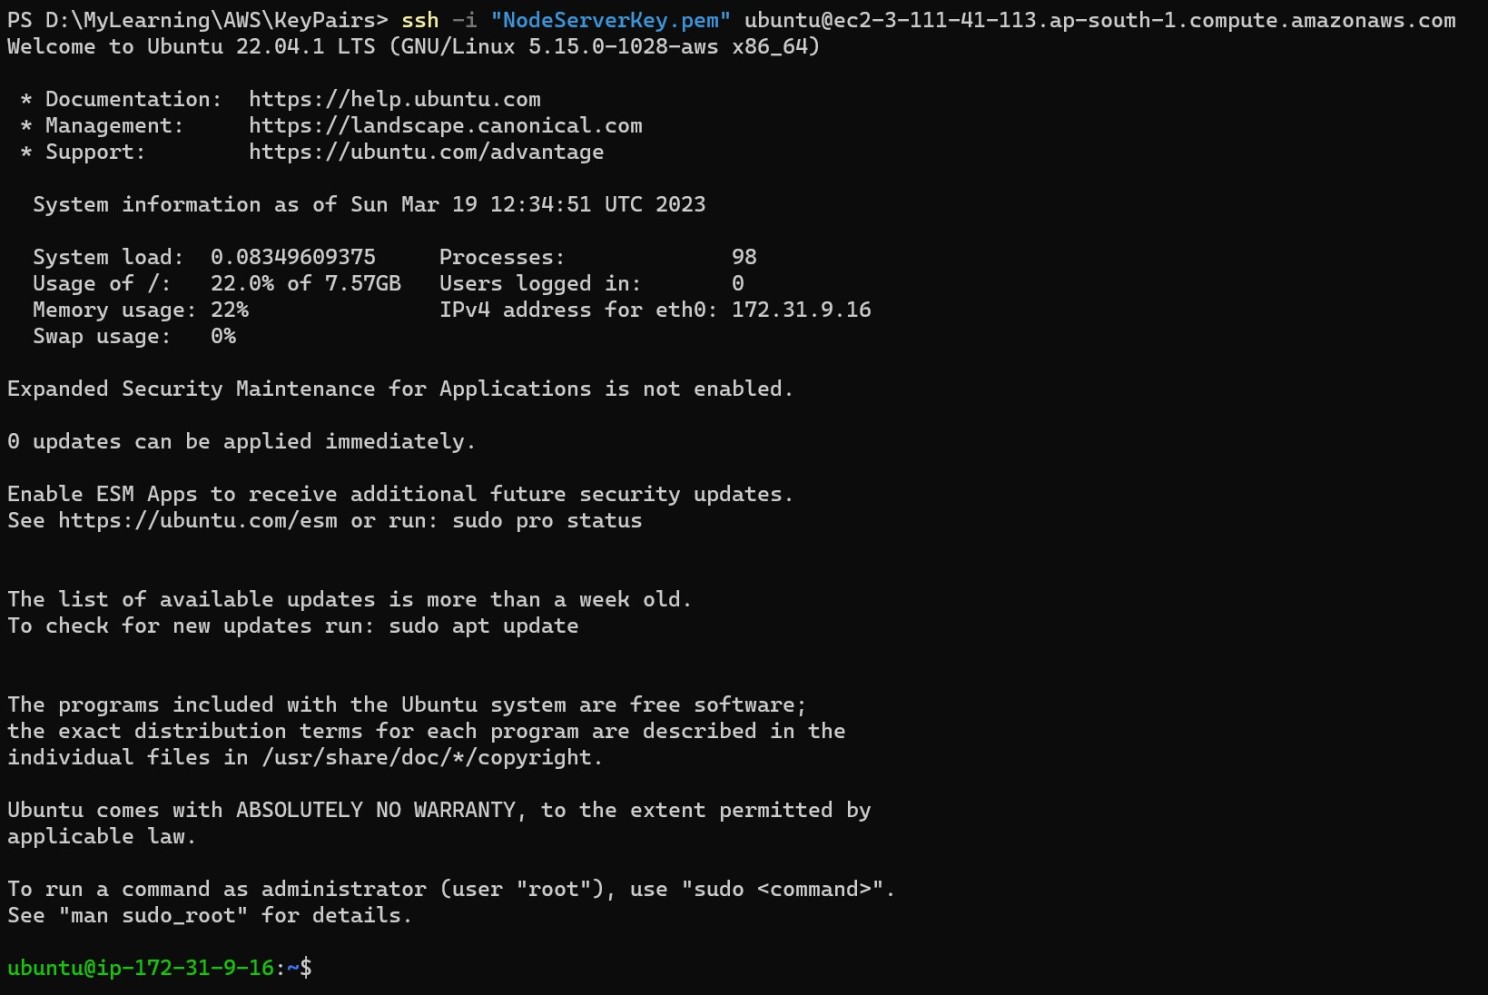 EC2: Connect to Console
You can get the above command specific your EC2 instance by clicking “Connect” option of your EC2 instance.
 EC2: Connect
Note: You might get authorization error for the keypair file for the first time. Please ensure that you have full permission of access to that file.
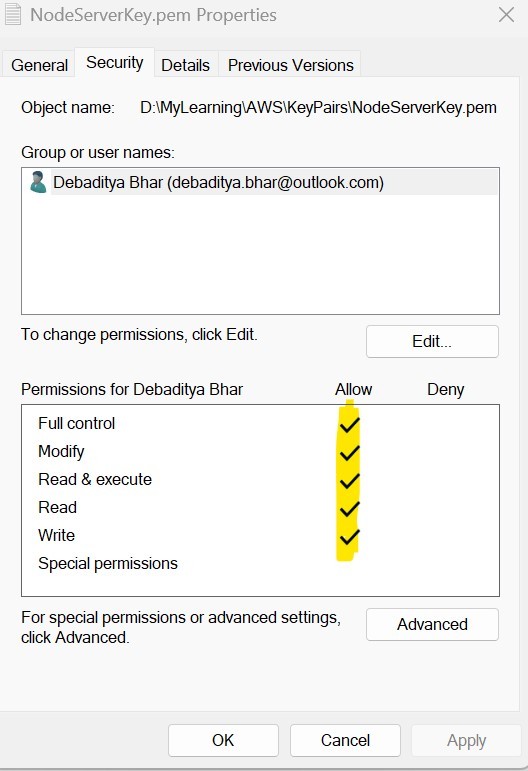 EC2: Keypair permissions
Install the required software into AWS EC2
After we connect to the EC2 instance, we need to install following software to make our Node JS application to be hosted on it.
- Node JS Engine.
- Git
- Process Manager (PM2) for demonizing the Node JS App.
We need to run following series of commands to install the above packages.
- Install the system updates.
sudo apt update
- Install the 'curl' command.
sudo apt install curl -y
- Get the latest version of node repository.
curl -fsSL https://deb.nodesource.com/setup_lts.x | sudo -E bash
- Install the node on the Amazon EC2.
sudo apt-get install nodejs
- Check the version of node and npm package.
node -v
npm -v
- Install the git.
sudo apt-get install git -y
- Check the version of the git installed.
git --version
- Install the Process Manager (PM2) to demonize the Node application so that it can run on background.
sudo npm install pm2@latest -g
- Check the version of the PM2 installed.
pm2 -v
Now, our EC2 instance is ready to host the Node JS application.
Cloning the GitHub repository and install the dependencies
Now, we need to clone the source code of the Node JS application from the GitHub Repository and install the dependencies.
$ git clone https://github.com/debapps/Sample-Node-App.git

Cloning into 'Sample-Node-App'...
remote: Enumerating objects: 22, done.
remote: Counting objects: 100% (22/22), done.
remote: Compressing objects: 100% (15/15), done.
remote: Total 22 (delta 9), reused 19 (delta 6), pack-reused 0
Receiving objects: 100% (22/22), 4.36 KiB | 1.45 MiB/s, done.
Resolving deltas: 100% (9/9), done.

$ ls -l

total 4
drwxrwxr-x 4 ubuntu ubuntu 4096 Mar 19 13:10 Sample-Node-App
The Sample-Node-App folder is created containing all the source codes. We enter the folder and install the dependencies using npm install command.
$ cd Sample-Node-App

$ ls -l

total 16
-rw-rw-r-- 1 ubuntu ubuntu 111 Mar 19 13:10 README.md
-rw-rw-r-- 1 ubuntu ubuntu 1301 Mar 19 13:10 app.js
-rw-rw-r-- 1 ubuntu ubuntu 273 Mar 19 13:10 package.json
drwxrwxr-x 2 ubuntu ubuntu 4096 Mar 19 13:10 pages

$ npm install

up to date, audited 1 package in 147m
found 0 vulnerabilities

$ ls -l

total 20
-rw-rw-r-- 1 ubuntu ubuntu 111 Mar 19 13:10 README.md
-rw-rw-r-- 1 ubuntu ubuntu 1301 Mar 19 13:10 app.js
-rw-rw-r-- 1 ubuntu ubuntu 217 Mar 19 13:13 package-lock.json
-rw-rw-r-- 1 ubuntu ubuntu 273 Mar 19 13:10 package.json
drwxrwxr-x 2 ubuntu ubuntu 4096 Mar 19 13:10 pages/
Start the application
Now, we can start our Node JS application on AWS EC2 using following command.
$ node app.js
The server is started on port - 3000
The application is started on port 3000. Open the web browser and type the following URL – http://< Public IPv4 address of the EC2>:3000 and hit enter.
Ta-Da !! you see the application is running and displaying the hostname or private IP address.
 Node JS Application running on AWS EC2
When we press Ctrl + C, the application stops. We can run the application as daemon process on background with the following command and exit from the EC2 instance. It will run the application until the EC2 is in running state.
$ pm2 start app.js
Installing all software using EC2 User data
EC2 user data is the boot-up scripts that runs one time during the launch of a EC2 instance. This is used to install necessary software packages and upgrades to the EC2 instance for the first time. We can launch EC2 instance using user data to install following upgrades and packages:
- Install system updates and 'curl' command.
- Download the latest Node repository.
- Install Node.
- Install Git.
- Install PM2.
The EC2 user data script is as follows:
#!/bin/bash
sudo apt update
sudo apt install curl -y
curl -fsSL https://deb.nodesource.com/setup_lts.x | sudo -E bash
sudo apt-get install nodejs
sudo apt-get install git -y
sudo npm install pm2@latest -g
Conclusion
In this article, I try to summarize the process of creating the AWS EC2 instance from AWS console, connect to the EC2 instance using keypair and installing the software packages and deploying a simple Node JS application. You can automate the EC2 creation process using AWS CloudFormation YAML template or using AWS CDK. The Node JS application deployment process can be automated using AWS CI/CD pipelines. The deployment on EC2 instances can be used in DEV or QA environments. The production environment of Node JS application is generally deployed using Application Load Balancer (ALB) for load sharing and fault-tolerance.
For more information, please refer to the AWS Documentations.
Please share your feedback, suggestion and correction to me at – bhar.debaditya@gmail.com