

Introduction
NextJS is the most popular React framework for the web application with powerful built-in optimization, file system based routing, client and server side rendering, easy data fetching and static site generation. React JS is the popular JavaScript library for building frontend web applications. On top of ReactJS, NextJS provides powerful optimization and integrated with the backend data fetching through API routes and file system based routing features. Currently, React developer team recommends to use NextJS framework to build react application among the other recommended frameworks. The Vercel team launched NextJS version 13 on 2022 with brand new features.
Next JS is the framework you should adopt for your React JS applications to make them SEO friedly. Next JS have its built-in features to make SEO friendly static sites. The webpages fetching data from the backend server are hydrated or populated with data at server side. So, It improves Search Engine Optimization (SEO) by default. Deployment of your Next JS application is little more tricky. It can be deployed in Vercel App, GitHub Pages and other deployment and hosting services.
In this article, we will discuss on how a NextJS 13 application can be deployed to the GitHub Pages in step-by-step manner.
Create a NextJS application
We can create a NextJS application using create-next-app. The Node.js 14.6.0 or newer version needs to be installed before creating a Next Application.
npx create-next-app@latest <app-name>
Example:
% npx create-next-app@latest demo-next-app
This will take some time and create a Next JS application in the folder demo-next-app.
Start Next JS App in development server
Now, we will enter into the NextJS application directory and start the development server.
$ cd <app-name>
and
$ npm run dev
The application is started on http://localhost:3000. Open the browser on theat URL and see the application.
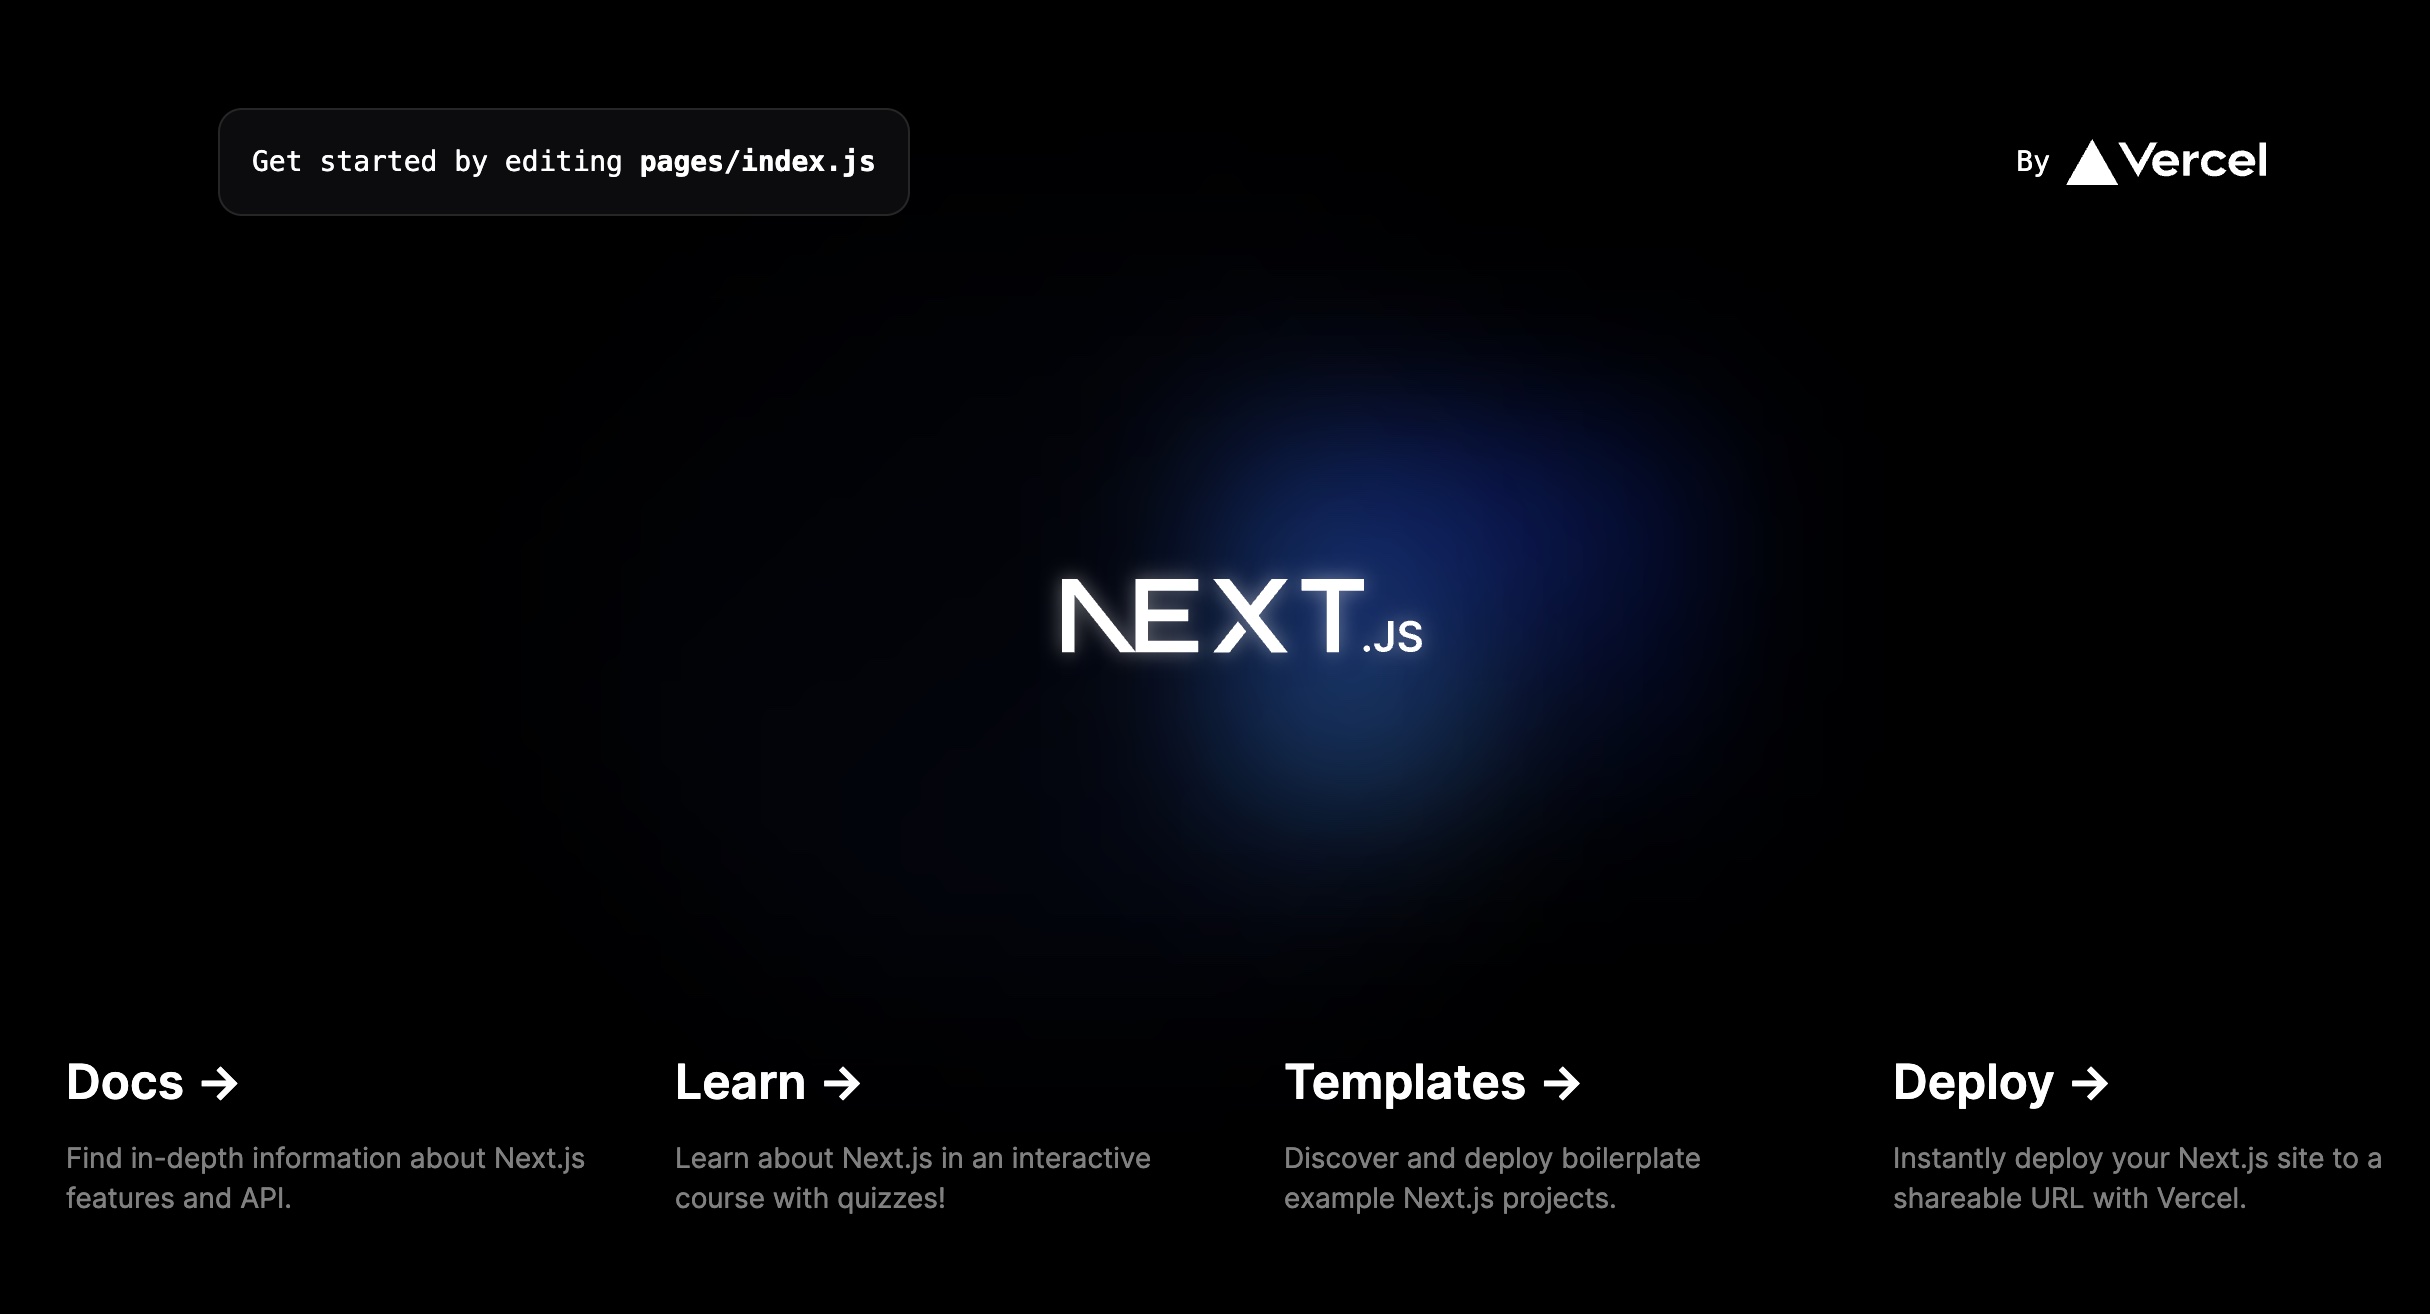 NextJS application on dev
Make changes to App as per your requirement.
This step is optional but necessary. As per your application functionality and requirement, you need to change your application. Here, I make some basic changes to the application to have a Navigation bar, Footer section, about and contact pages and make some modification in the index (home) page. This will provide you the basic building blocks of any web application you need to develop.
At first, I chenge the styles/globals.css file to have default content.
@tailwind base;
@tailwind components;
@tailwind utilities;
After that, I add a folder called components under the pages directory. Then, in the components folder, I add files called NavBar.jsx and Footer.jsx. The codes of those components are as follows:
NavBar.jsx
import Link from "next/link";

export default function NavBar() {
 return (
 <nav
 className="flex flex-row items-center justify-center
 space-x-2 lg:space-x-5 bg-blue-950 text-yellow-500
 text-lg lg:text-xl font-bold p-5">
 <Link href={`/`}>Home</Link>
 <Link href={`/about`}>About</Link>
 <Link href={`/contact`}>Contact</Link>
 </nav>
 );
}
Footer.jsx
export default function Footer() {
return (
<footer
className="bg-blue-950 flex flex-row
items-center justify-center py-10">
<p
className="text-yellow-500 text-lg
font-mono font-medium">
Made with 💖 - Debaditya Bhar
</p>
</footer>
);
}
Then, I change the index.js and added two new pages: abount.jsx, contact.jsx. Please find the source code in the my GitHub repository.
I commit the application into git and push it into the GitHub repository. I run following commands to perform this.
% git add .
% git commit -a

% git remote add origin https://github.com/debapps/demo-next-app.git
% git branch -M main
% git push -u origin main
Now, let's start the dev server of the Next JS app using following command:
npm run dev
The application is up at http://localhost:3000/ as follows:
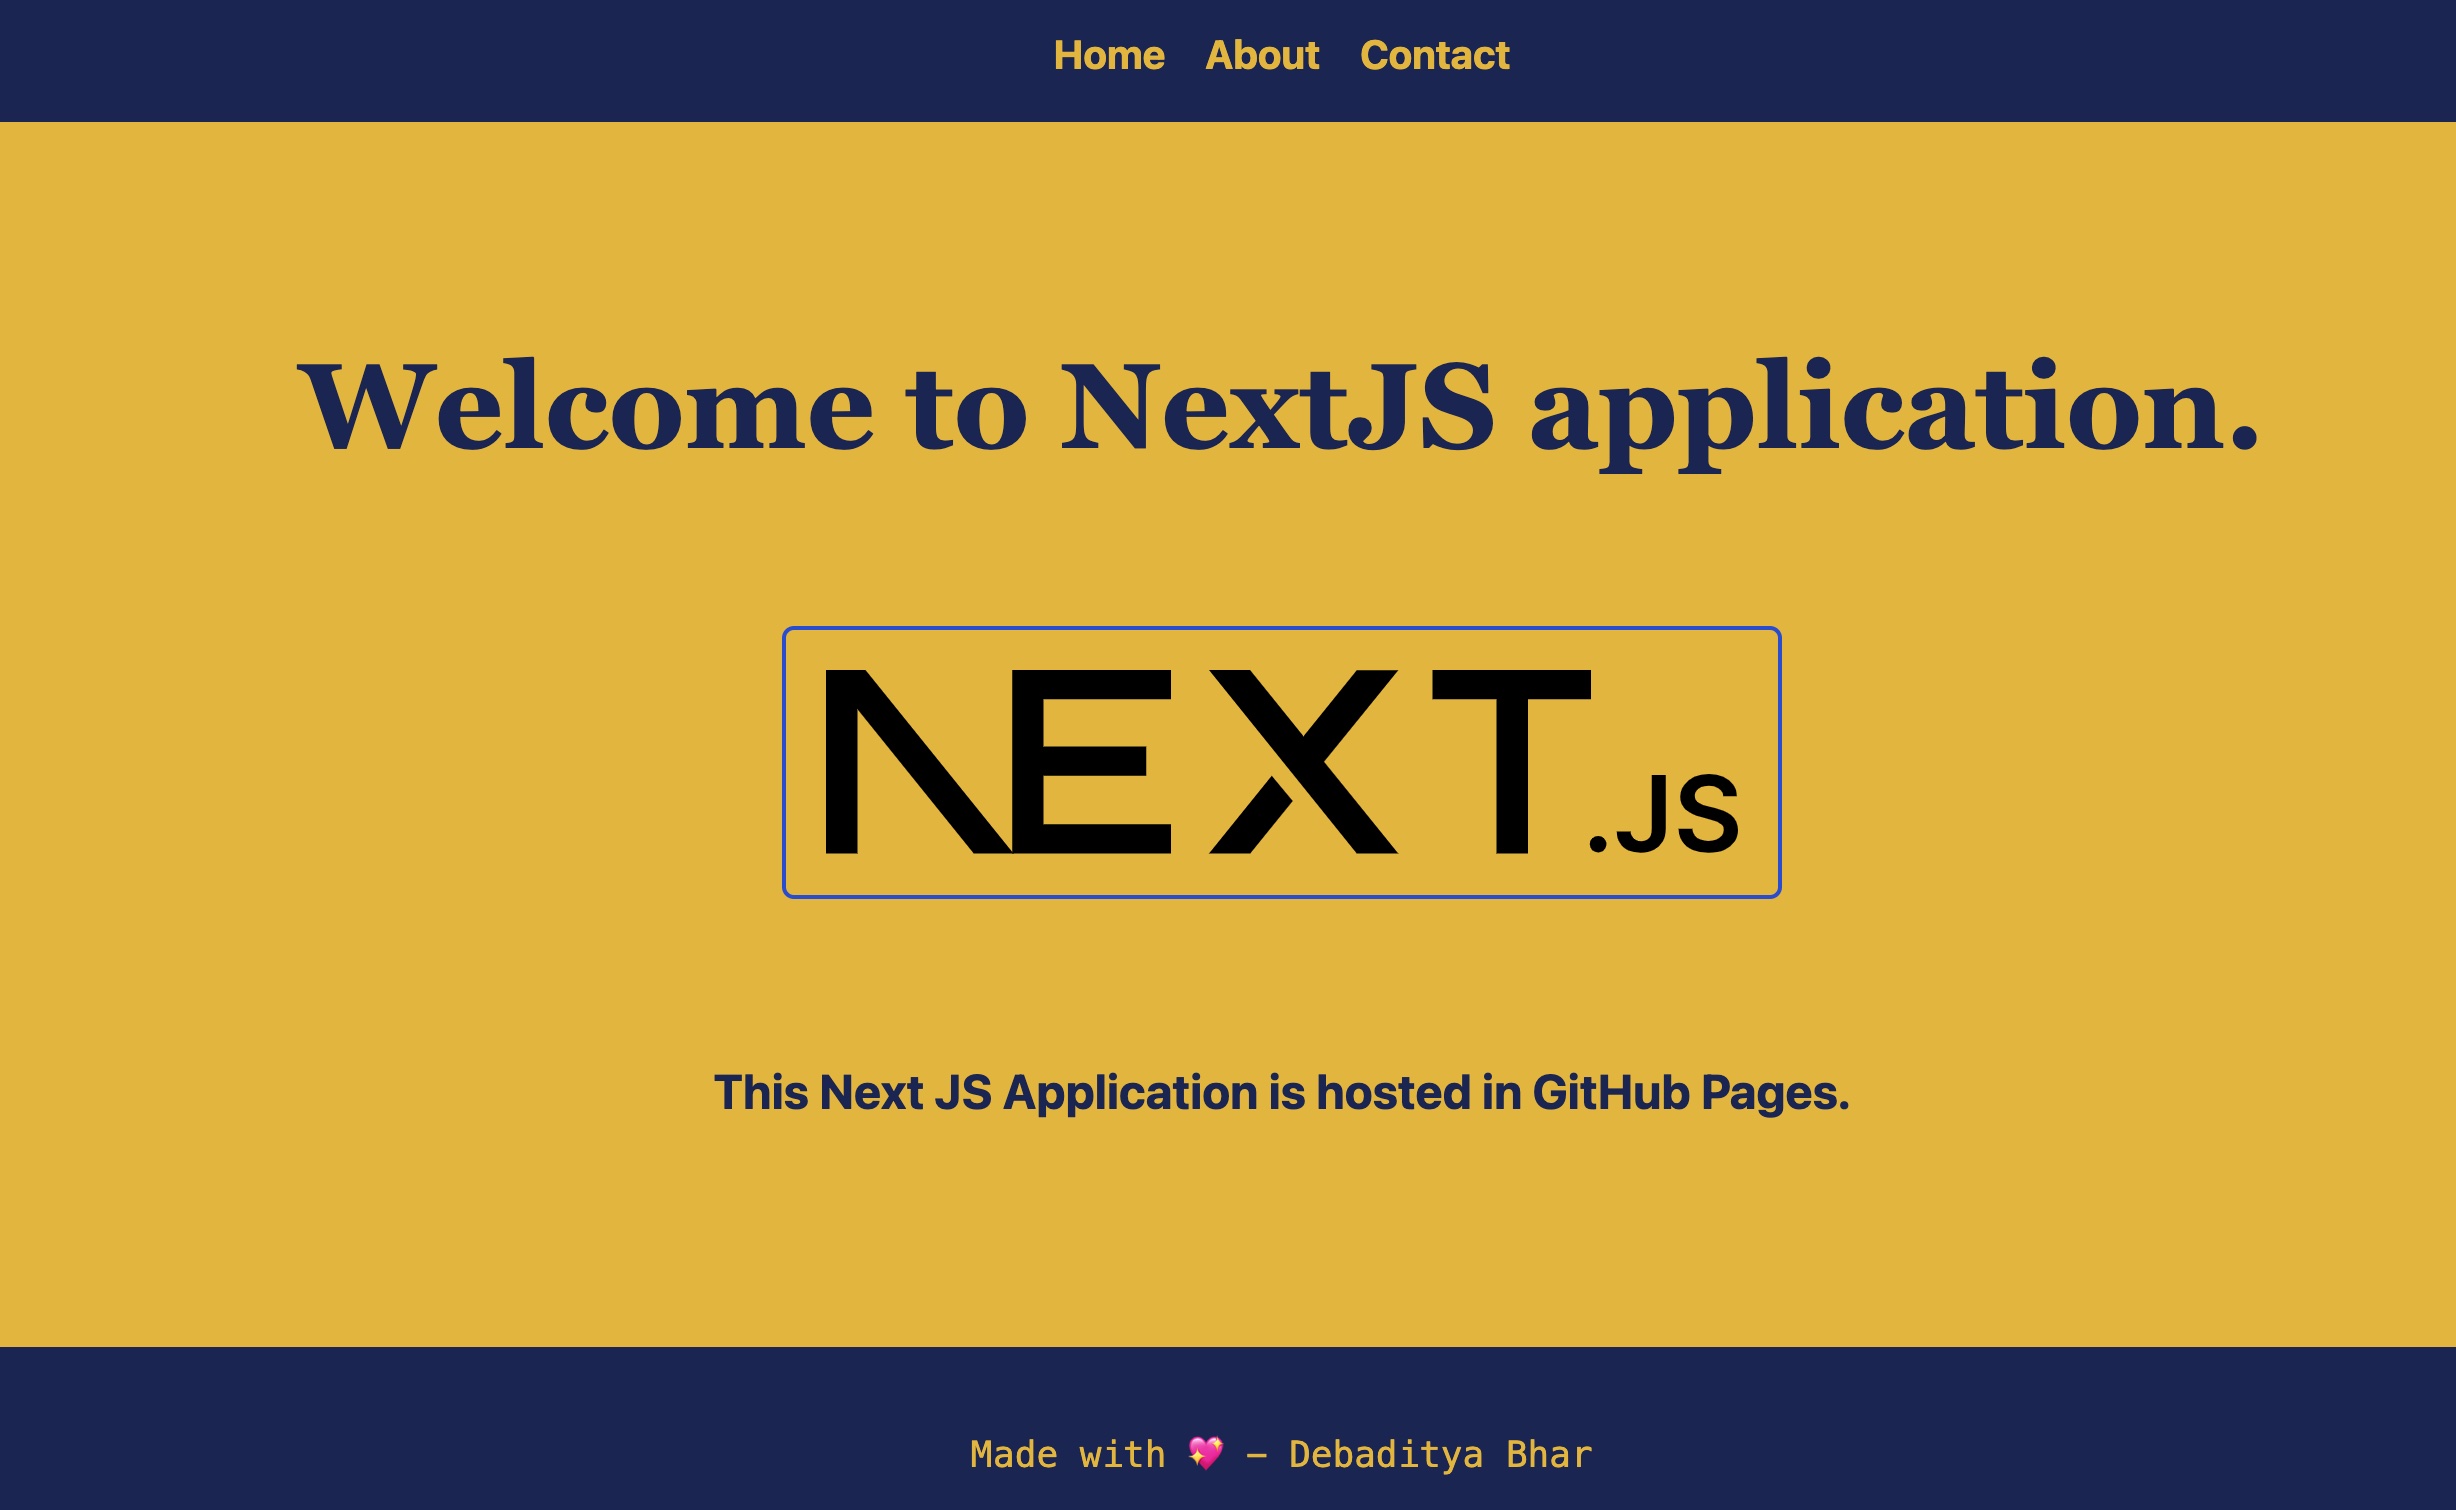 NextJS application on dev - After Change
Change in next.config.js file
Now we need to change next.config.js file to have following content.
/** @type {import('next').NextConfig} */
const nextConfig = {
 reactStrictMode: true,
 output: "export",
};

module.exports = nextConfig;
The above changes have following meanings:
reactStrictMode: true - Means it enforce JavaScript restrict mode.
output: "export" - Means when we run the 'npm run build' command the built output will be exported to the /out folder by default.
Add GitHub Action Workflows
Now we need to add GitHub Actions. GitHub Actions is the CI/CD (Code Integration/Code Deployment) pipelines provided by GitHub. It is now in beta version.
In order to set GitHub Actions, we need to follow following steps:
- Go to GitHub repository Settings > Pages (in the left sidebar).
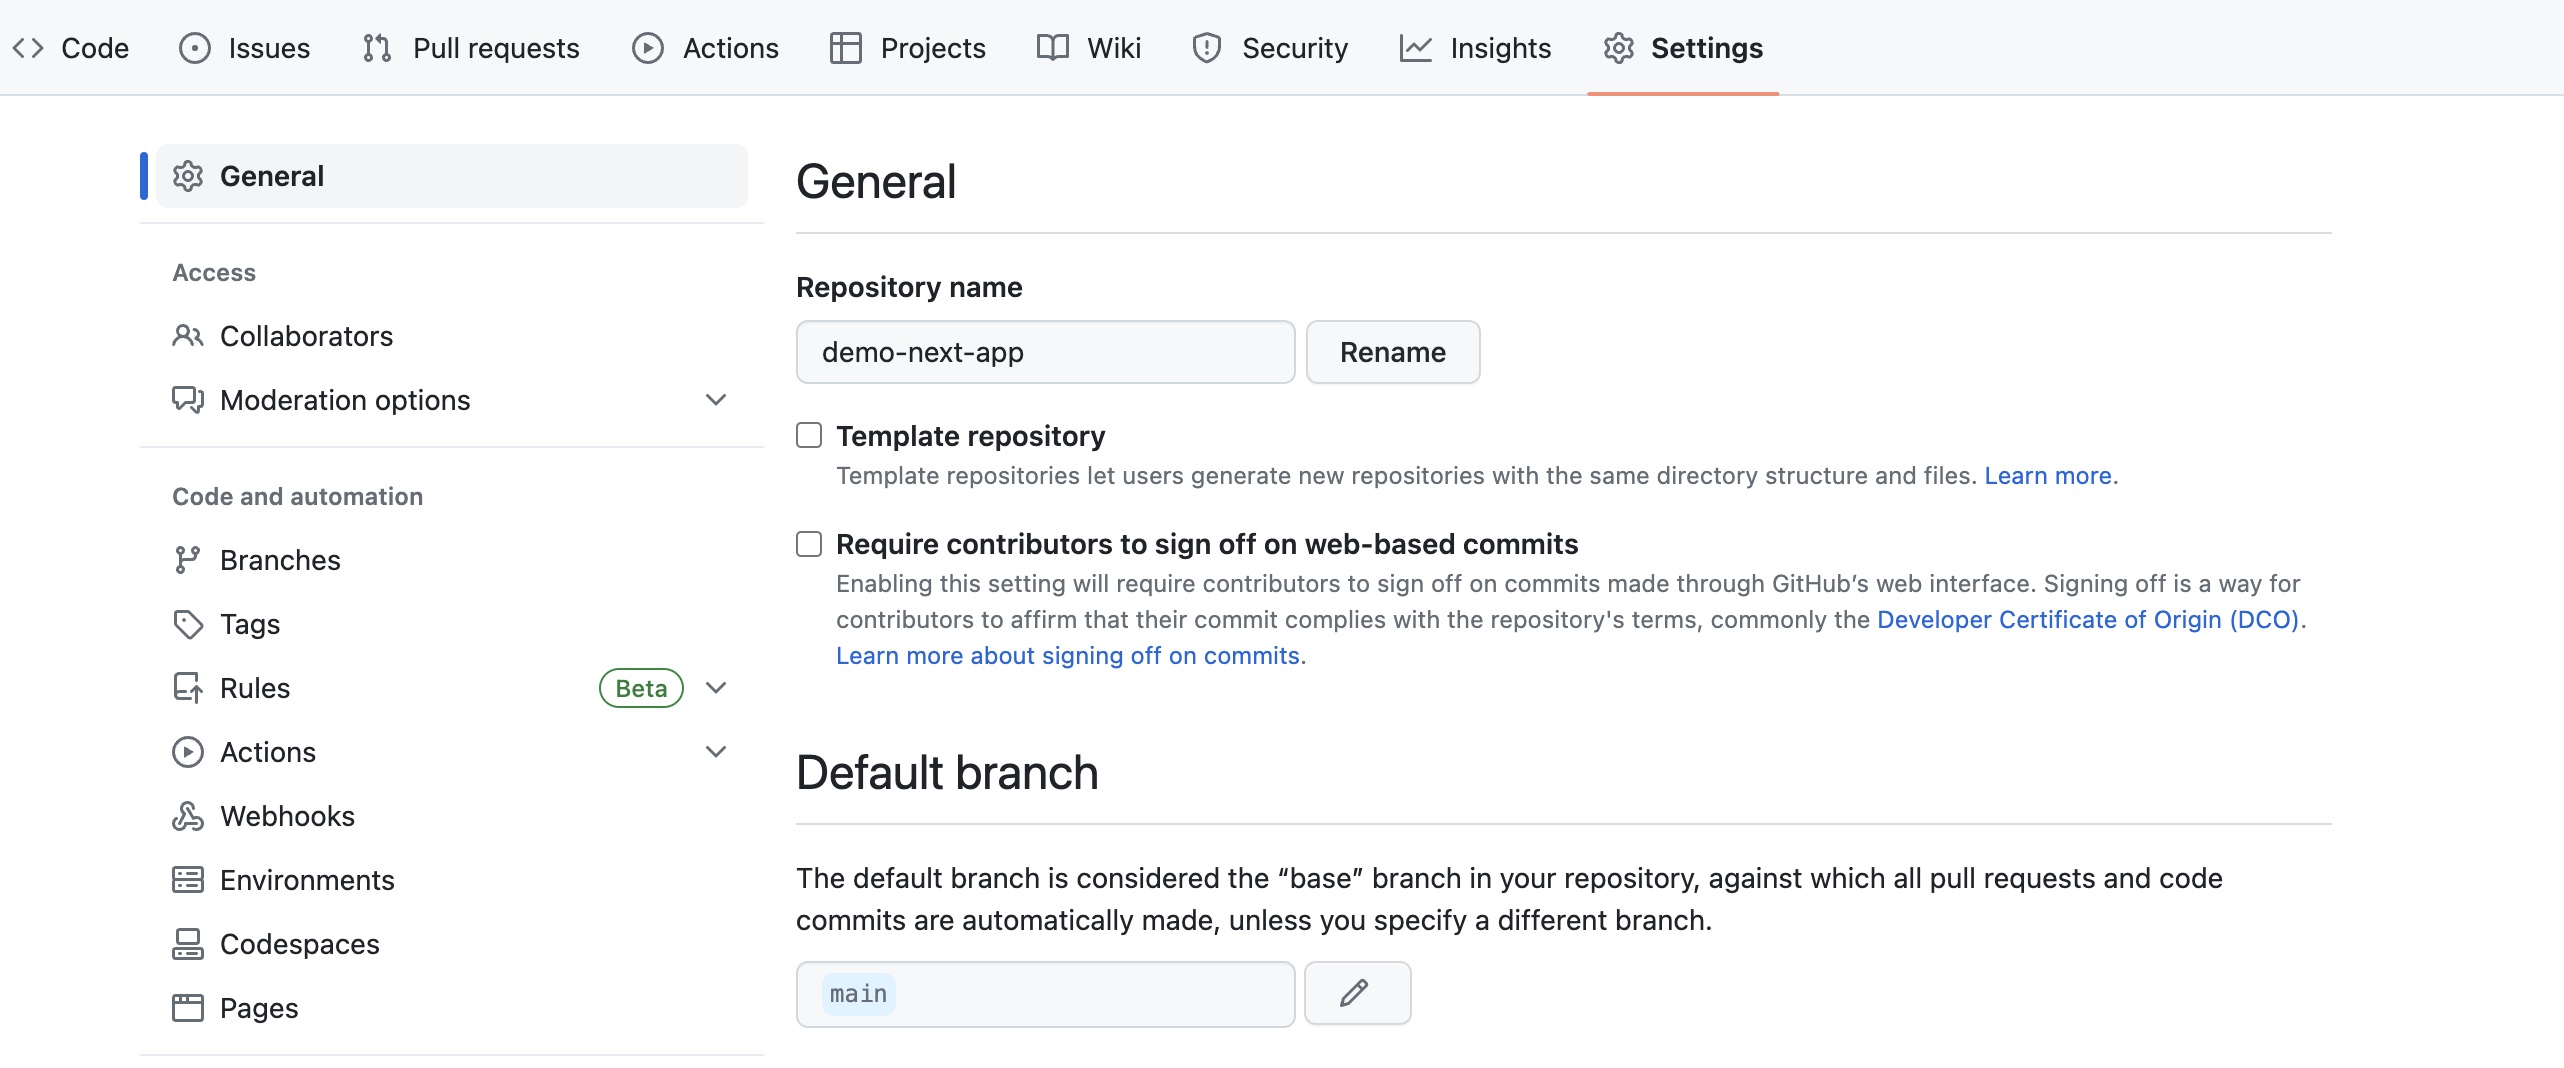 GitHub Actions - set up
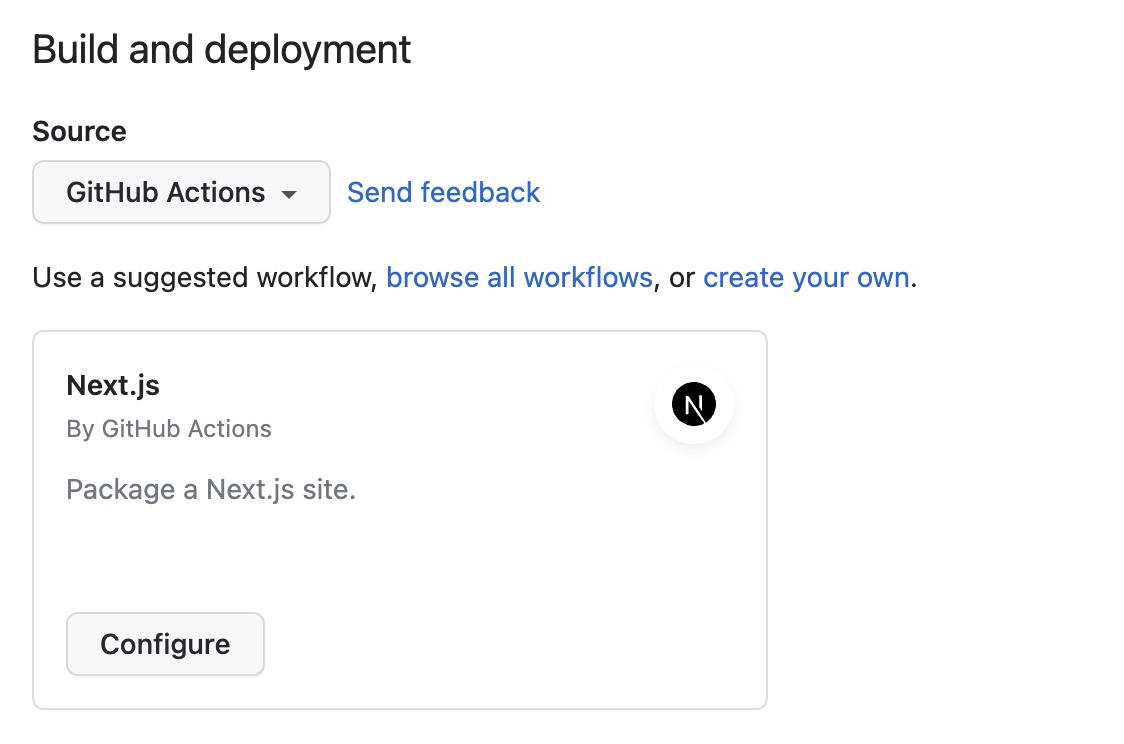
- Select the Source as GitHub Actions (beta).
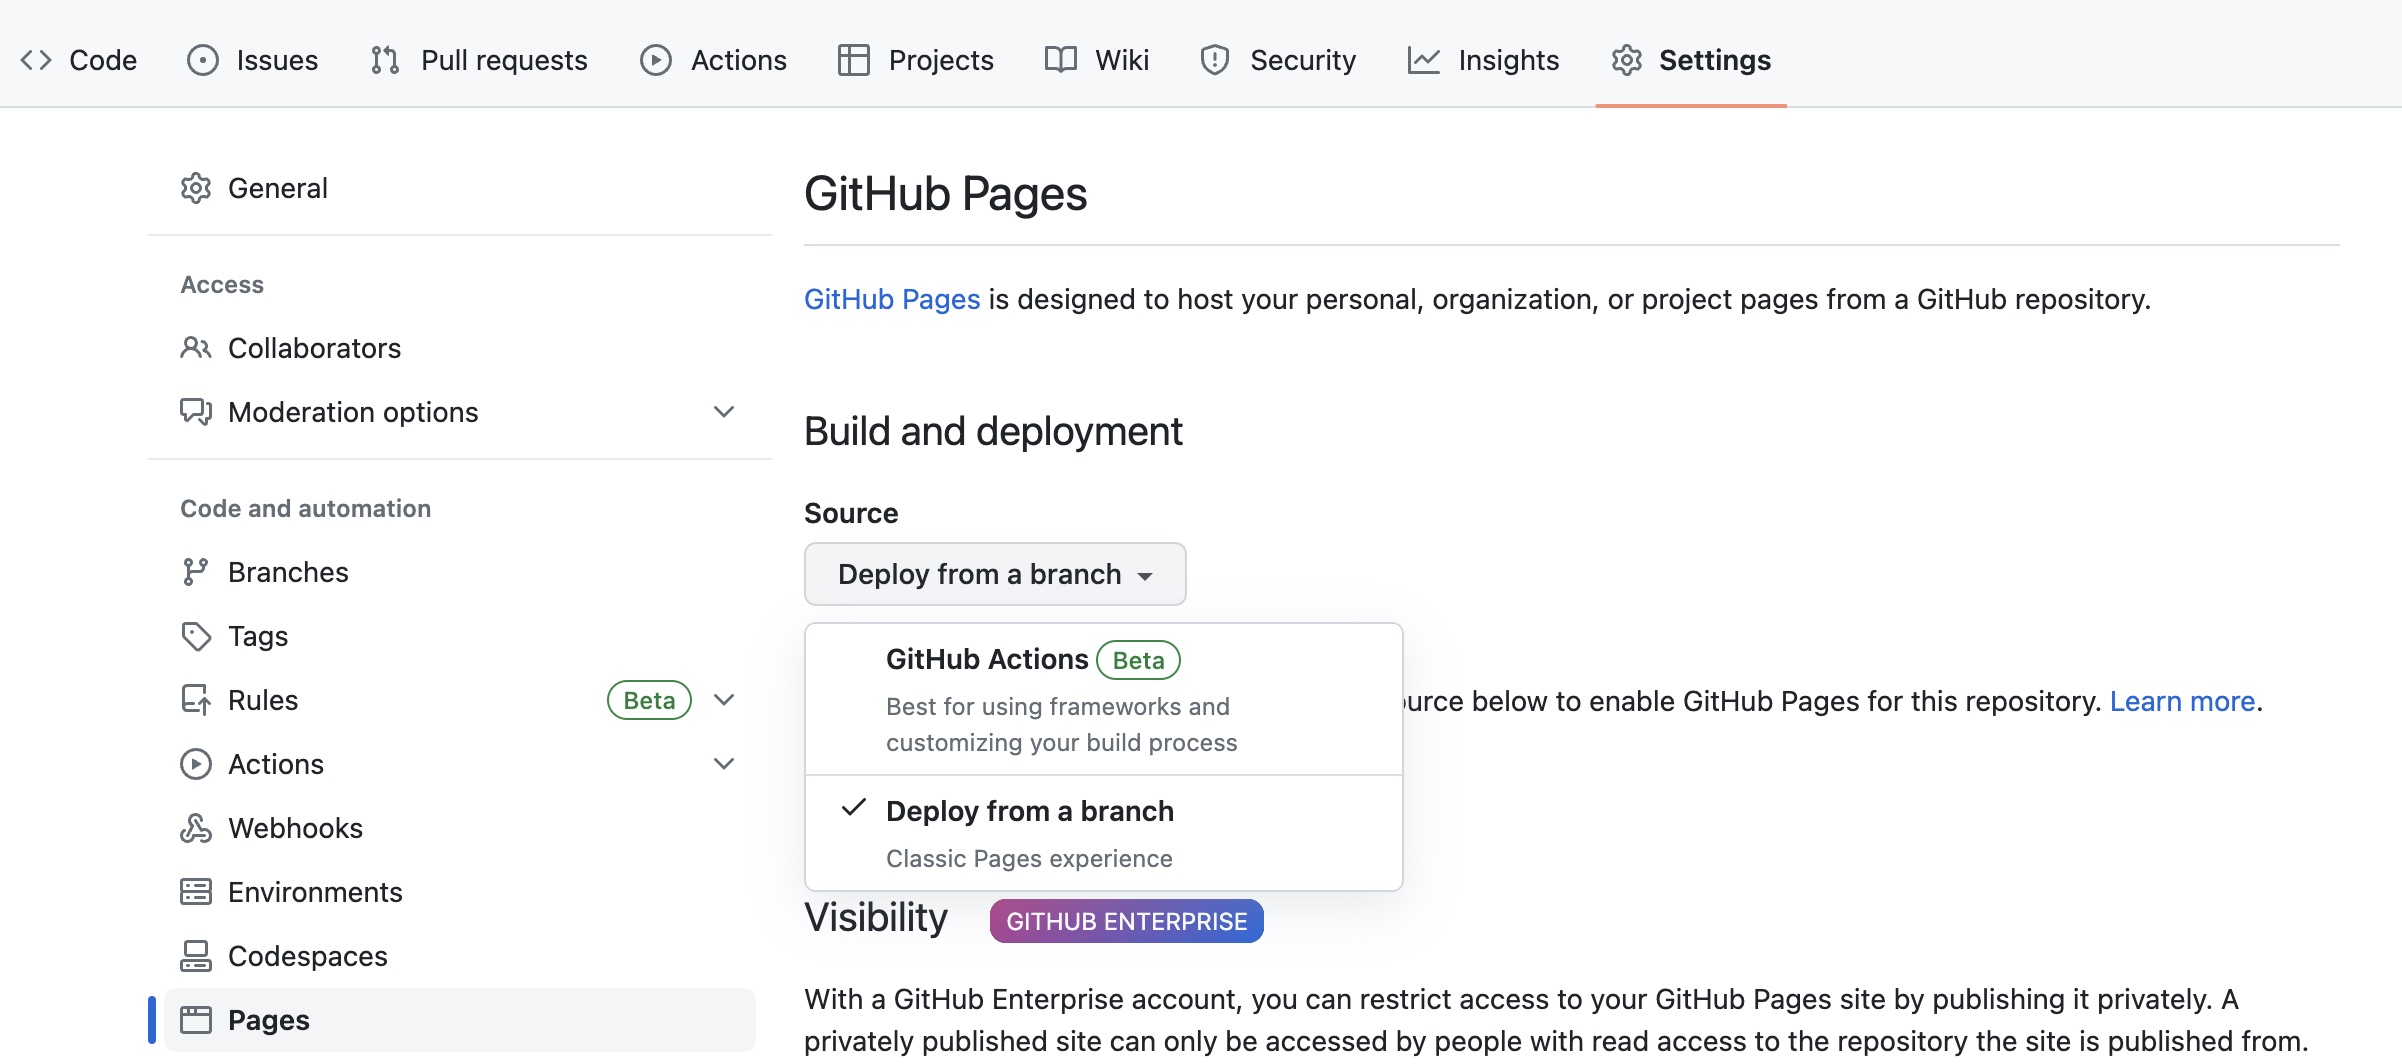 GitHub Actions - source
- Click on the Configure for Next.js GitHub Actions.
 GitHub Actions - Configure
- The GitHub action script for Next.js will be generated. Copy the whole script. Then, click on "Cancel changes".
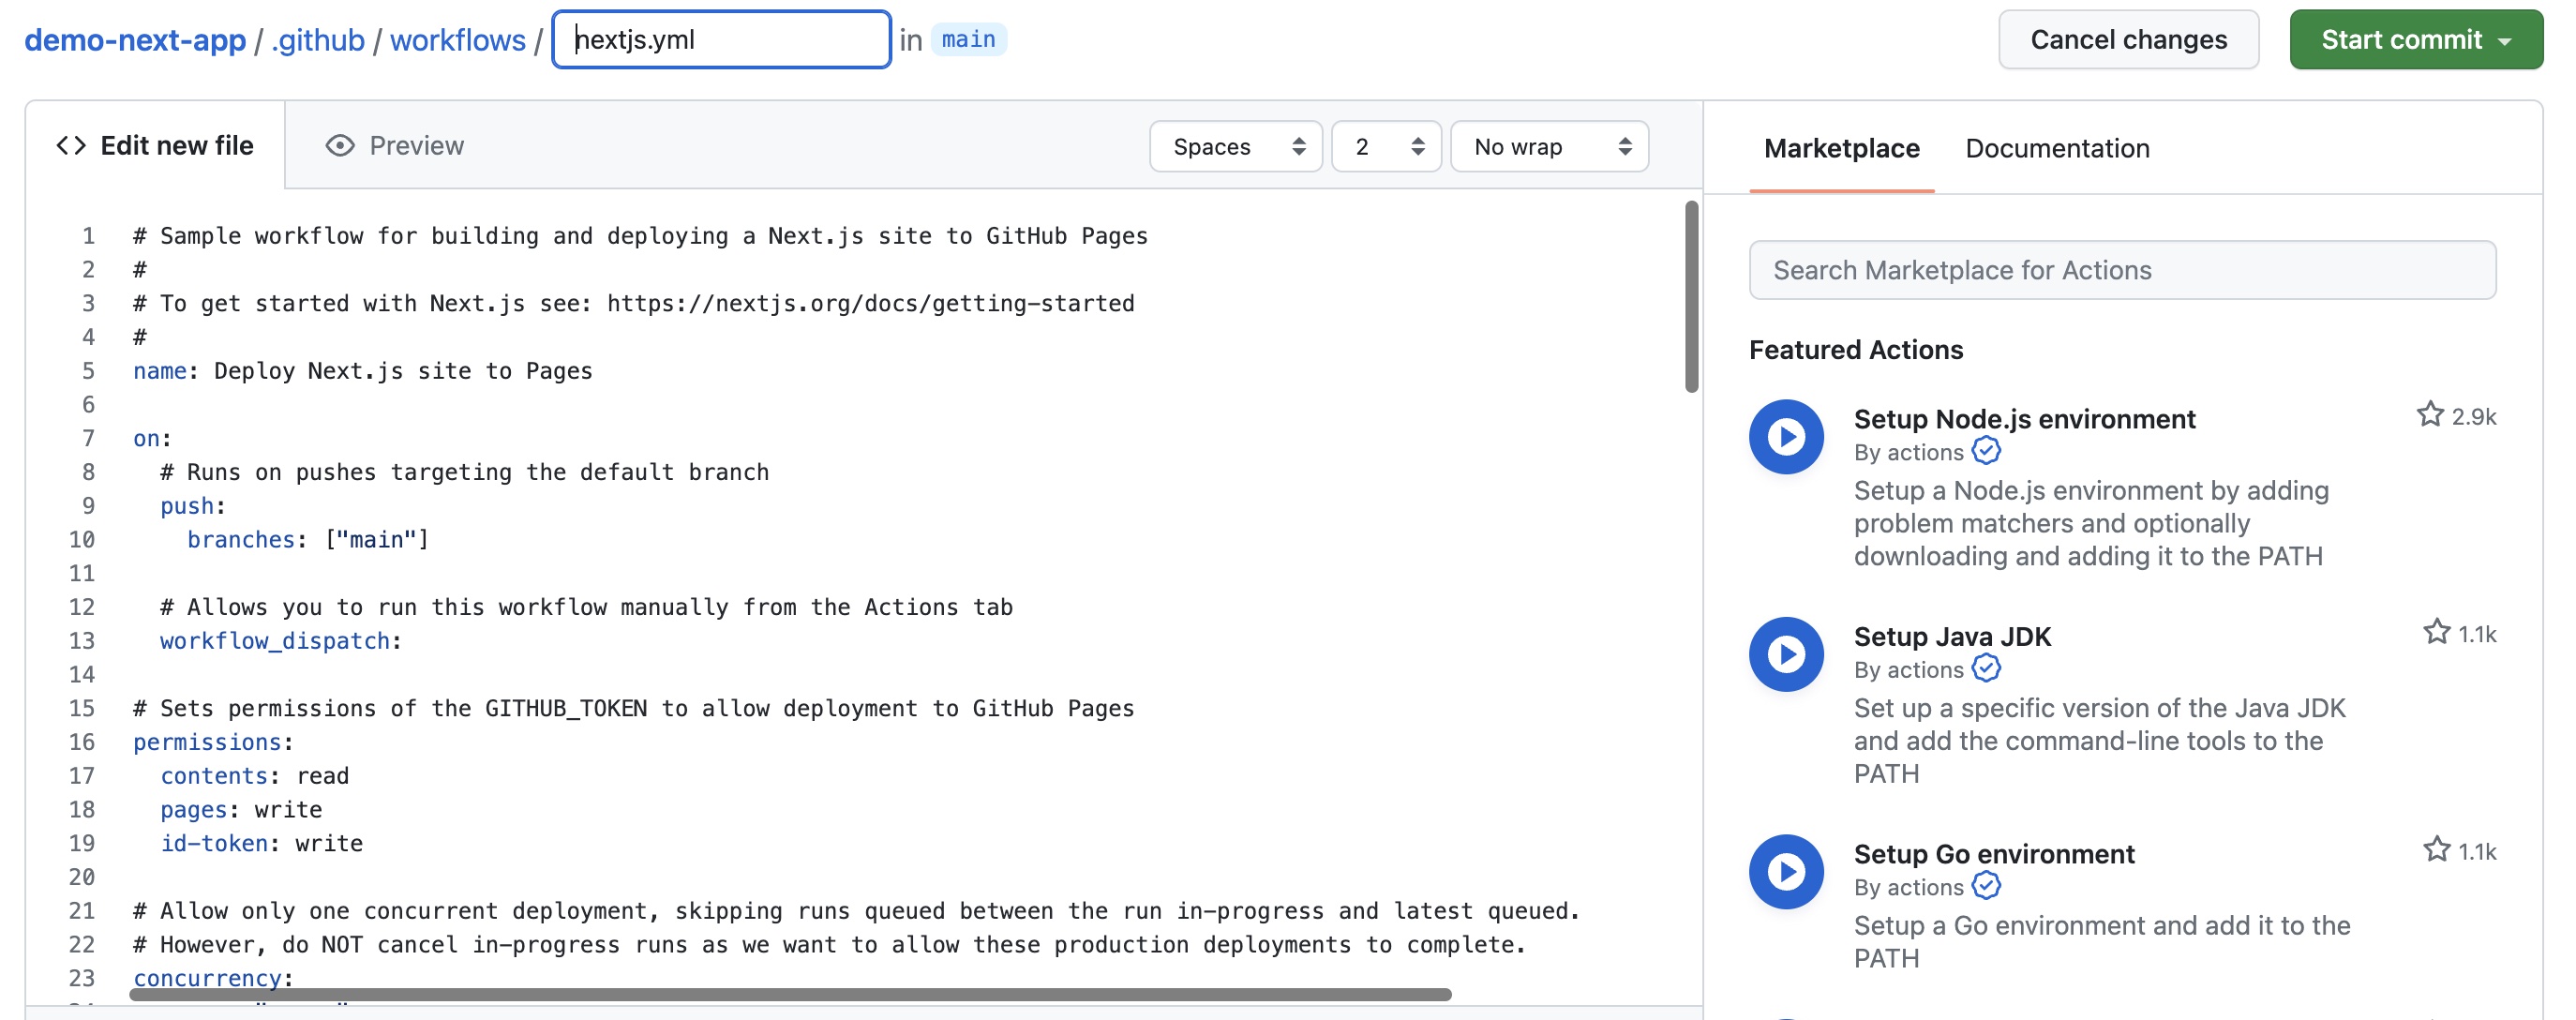 GitHub Actions Next.js script
Under the app directory in the code editor (VSCode), create the following sequence of folders .github/workflows and under the workflows folder create a file called next-build-deploy.yml (you can use other names with .yml extension) and paste the copied script in the file.
From the copied script delete the following 2 lines highlighted:
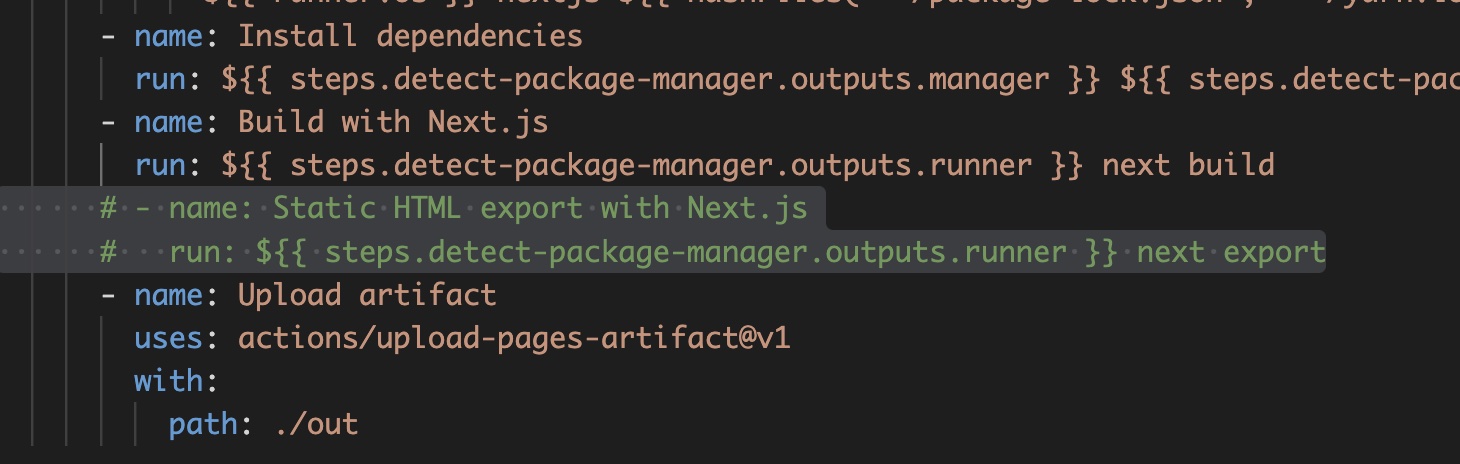 next-build-deploy
Push the code into GitHub Repository
Now we will push the code into GitHub repository using following command:
git add . && git commit -m "Version 1.0.1 - Deployment Ready" && git push
Then Go to the GitHub Repository Actions to see the CI/CD pipeline is running.
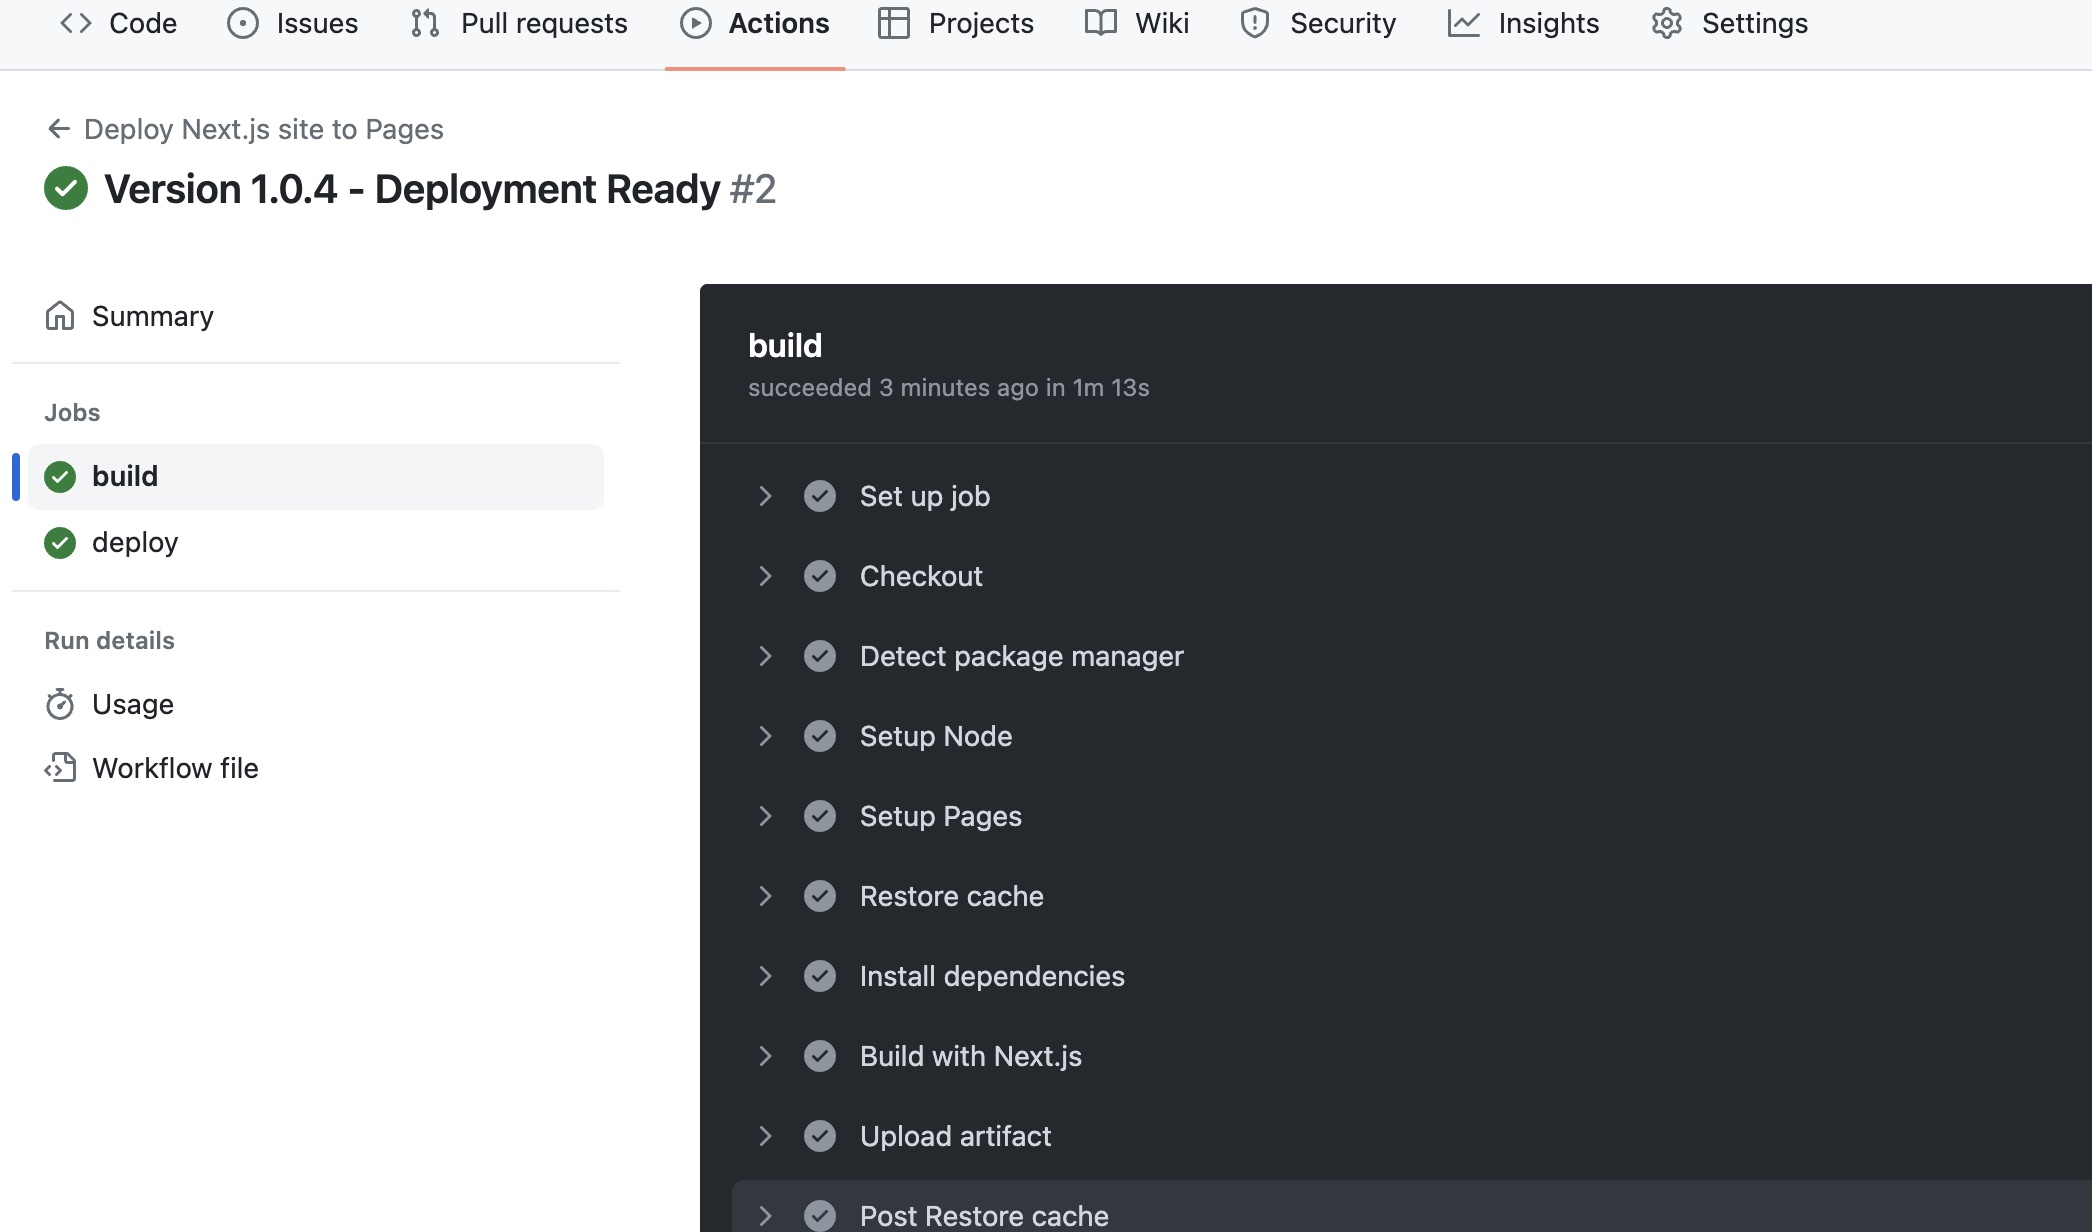 GitHub Actions running
If there is any errors or warning in the build and deploy steps, the error is shown on the screen. Please fix the error and push the updated code in the GitHub repository again. The CI/CD pipeline will run again automatically.
After the build and deploy steps run successfully, open the Settings > Page to get the production URL of the Next JS application.
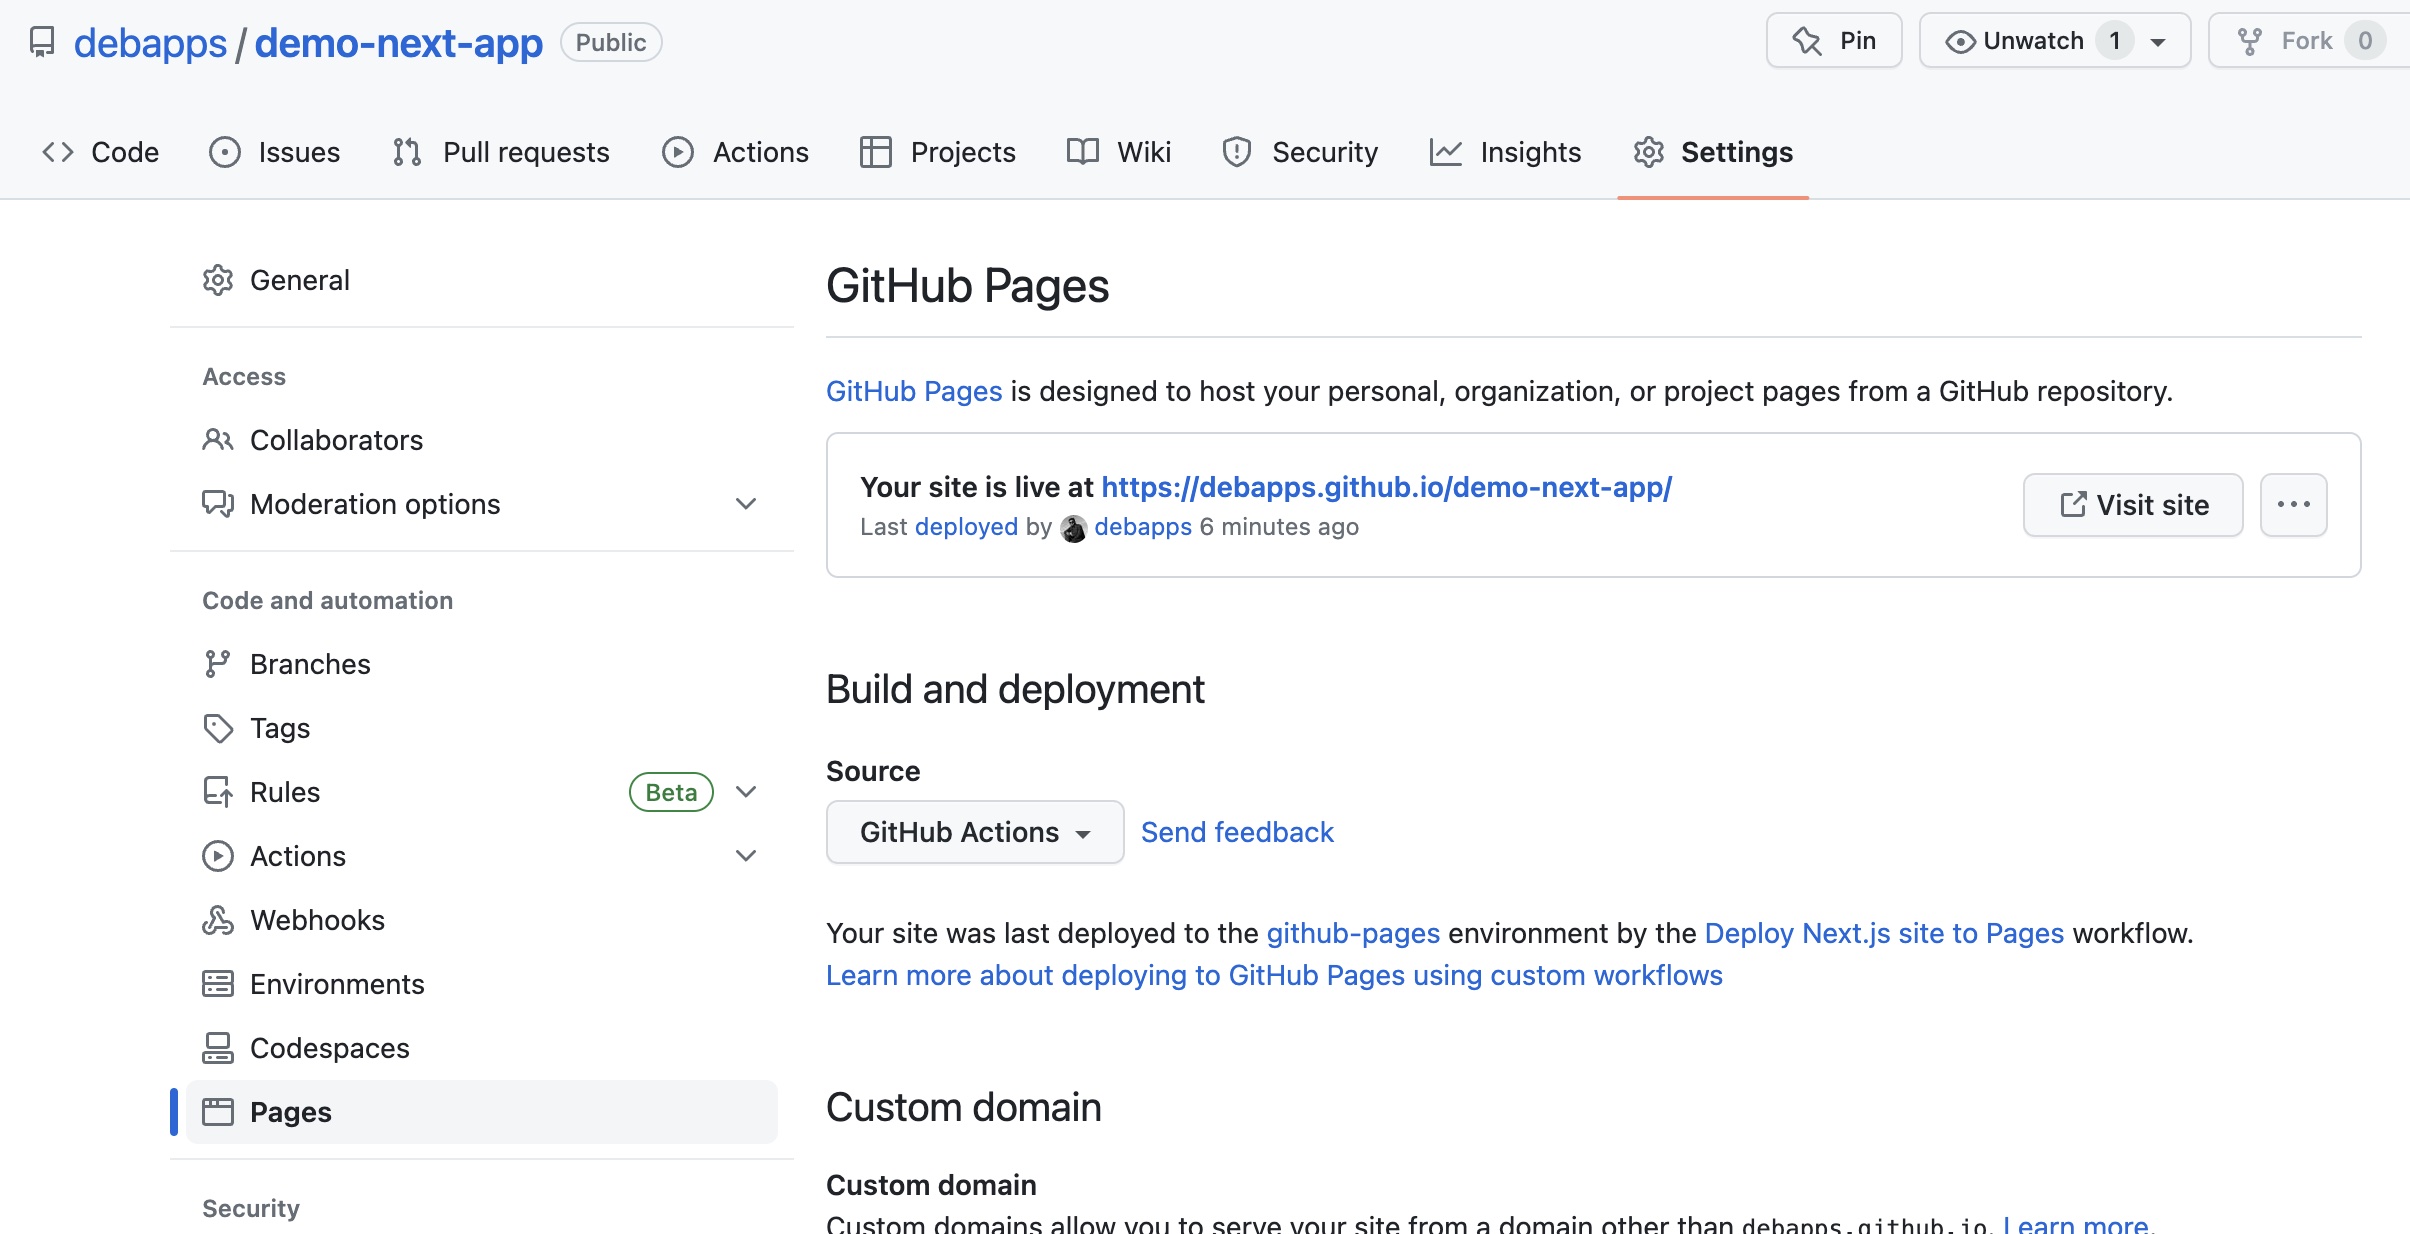 GitHub page URL
Click on the Visit site button to open the production URL in new tab.
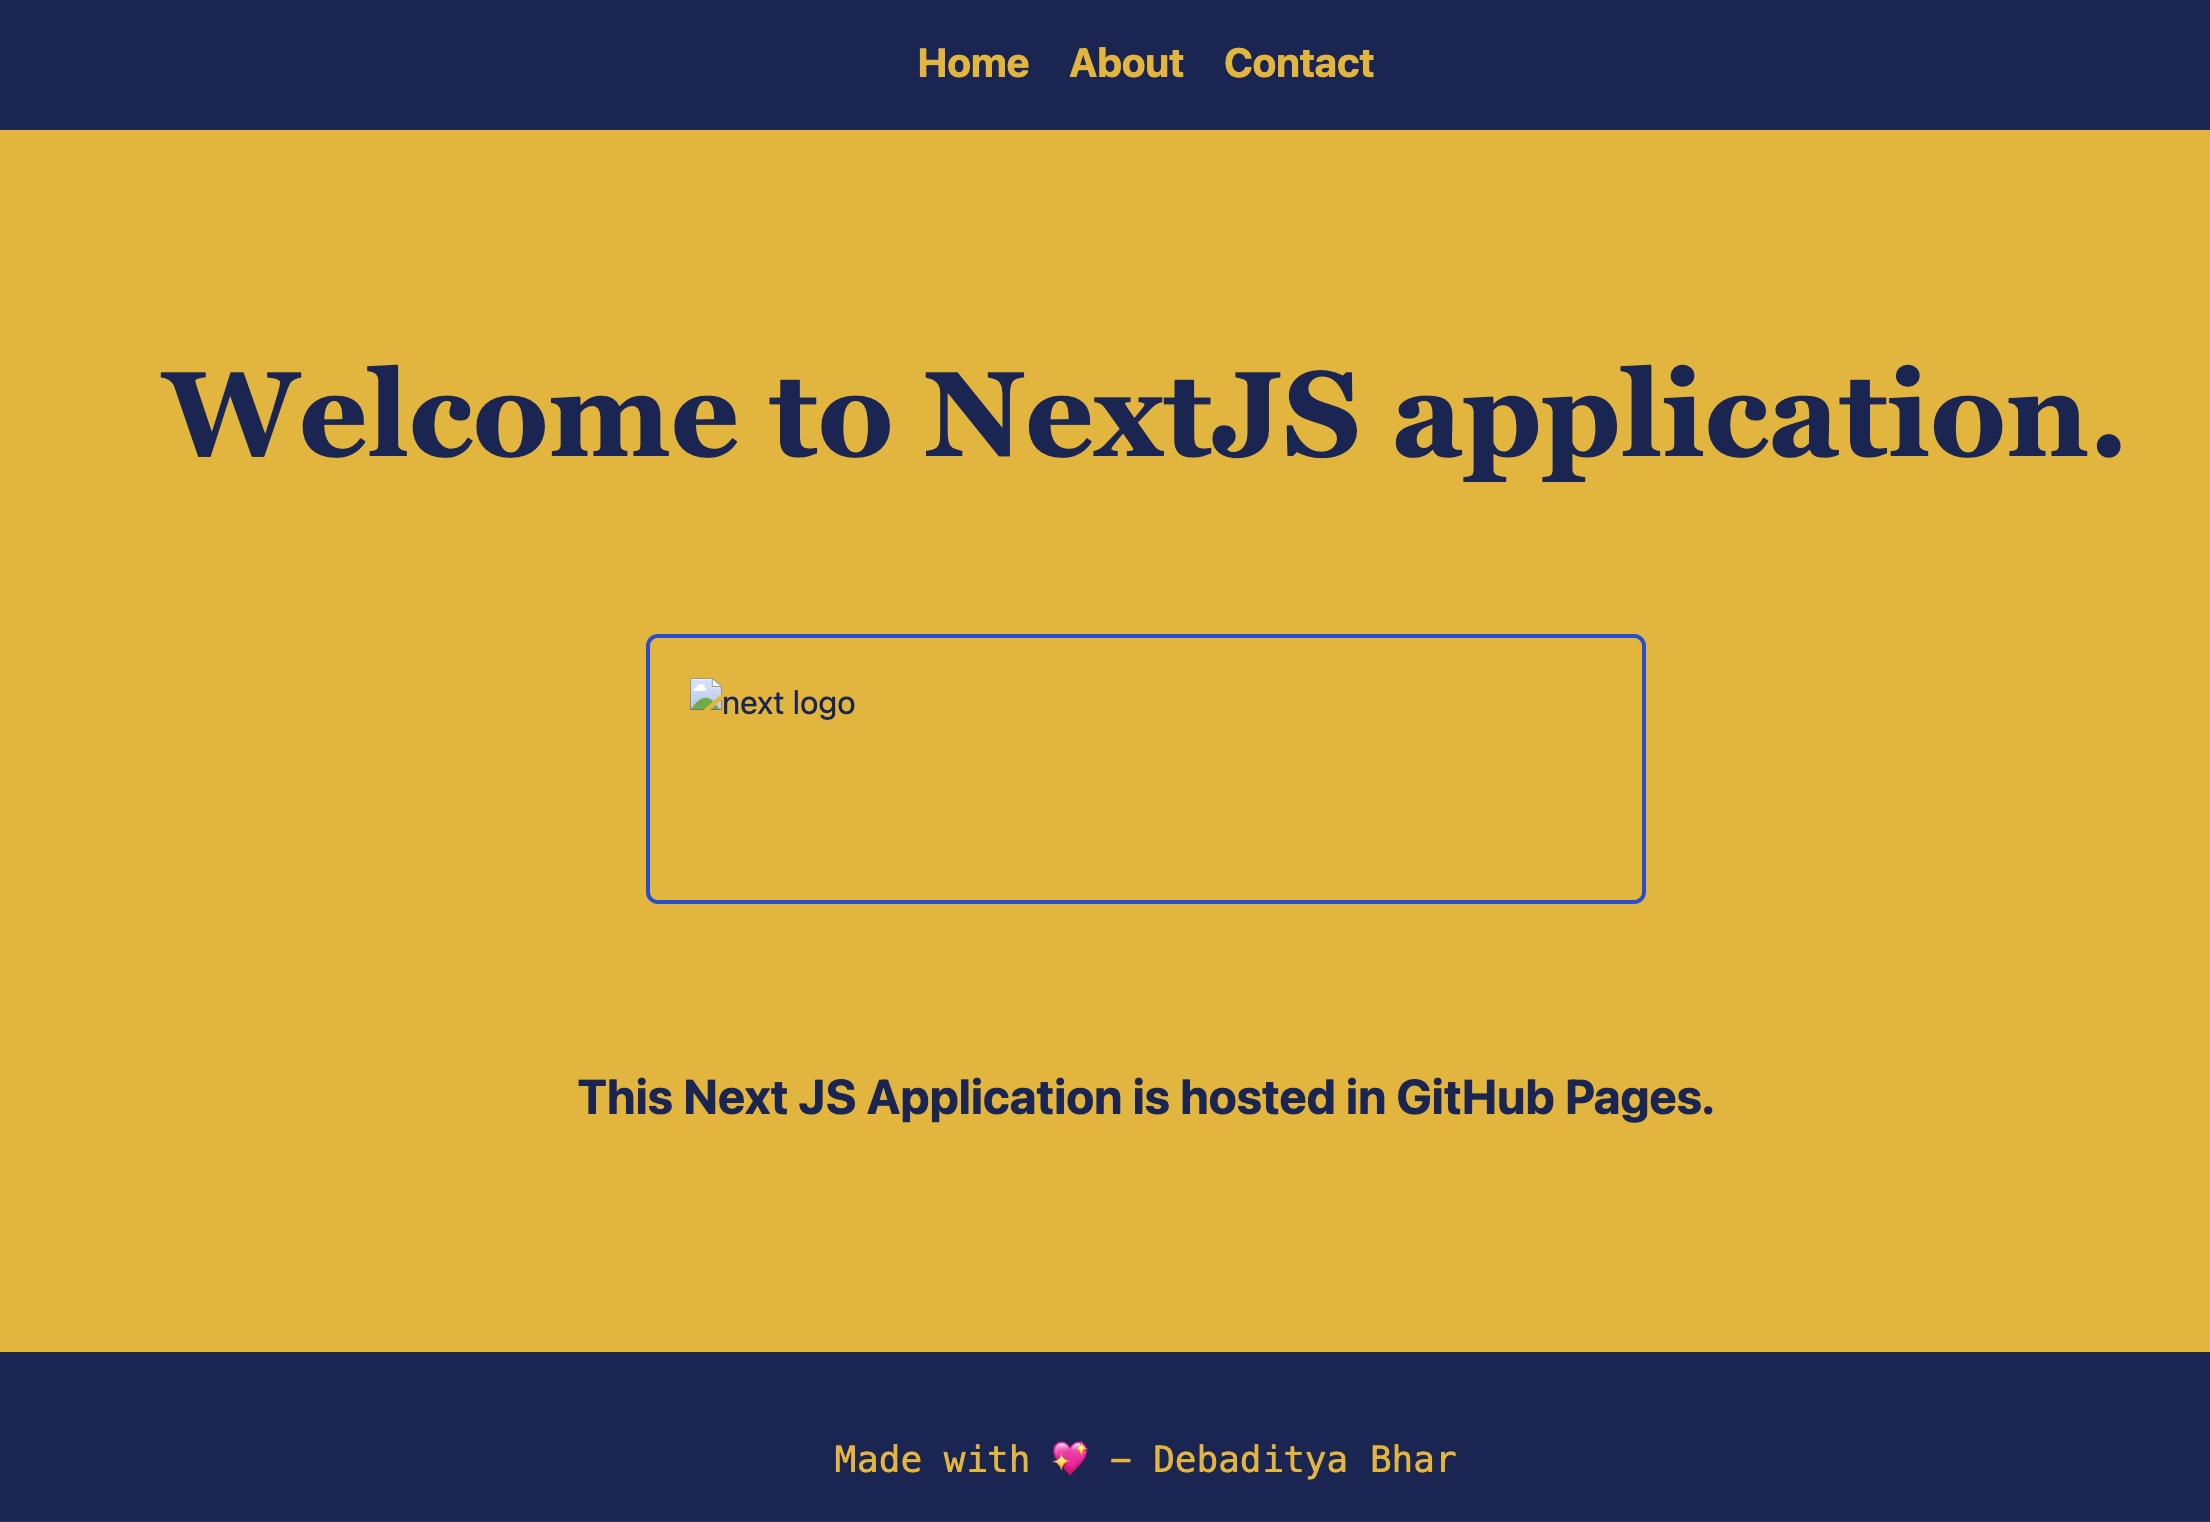 NextJS application deployed on GihHub Pages
Now, we see, here is an issue. The home page images are NOT showing. Also, we do not see the favicon at the page title. If we open browser console, we will see some errors.
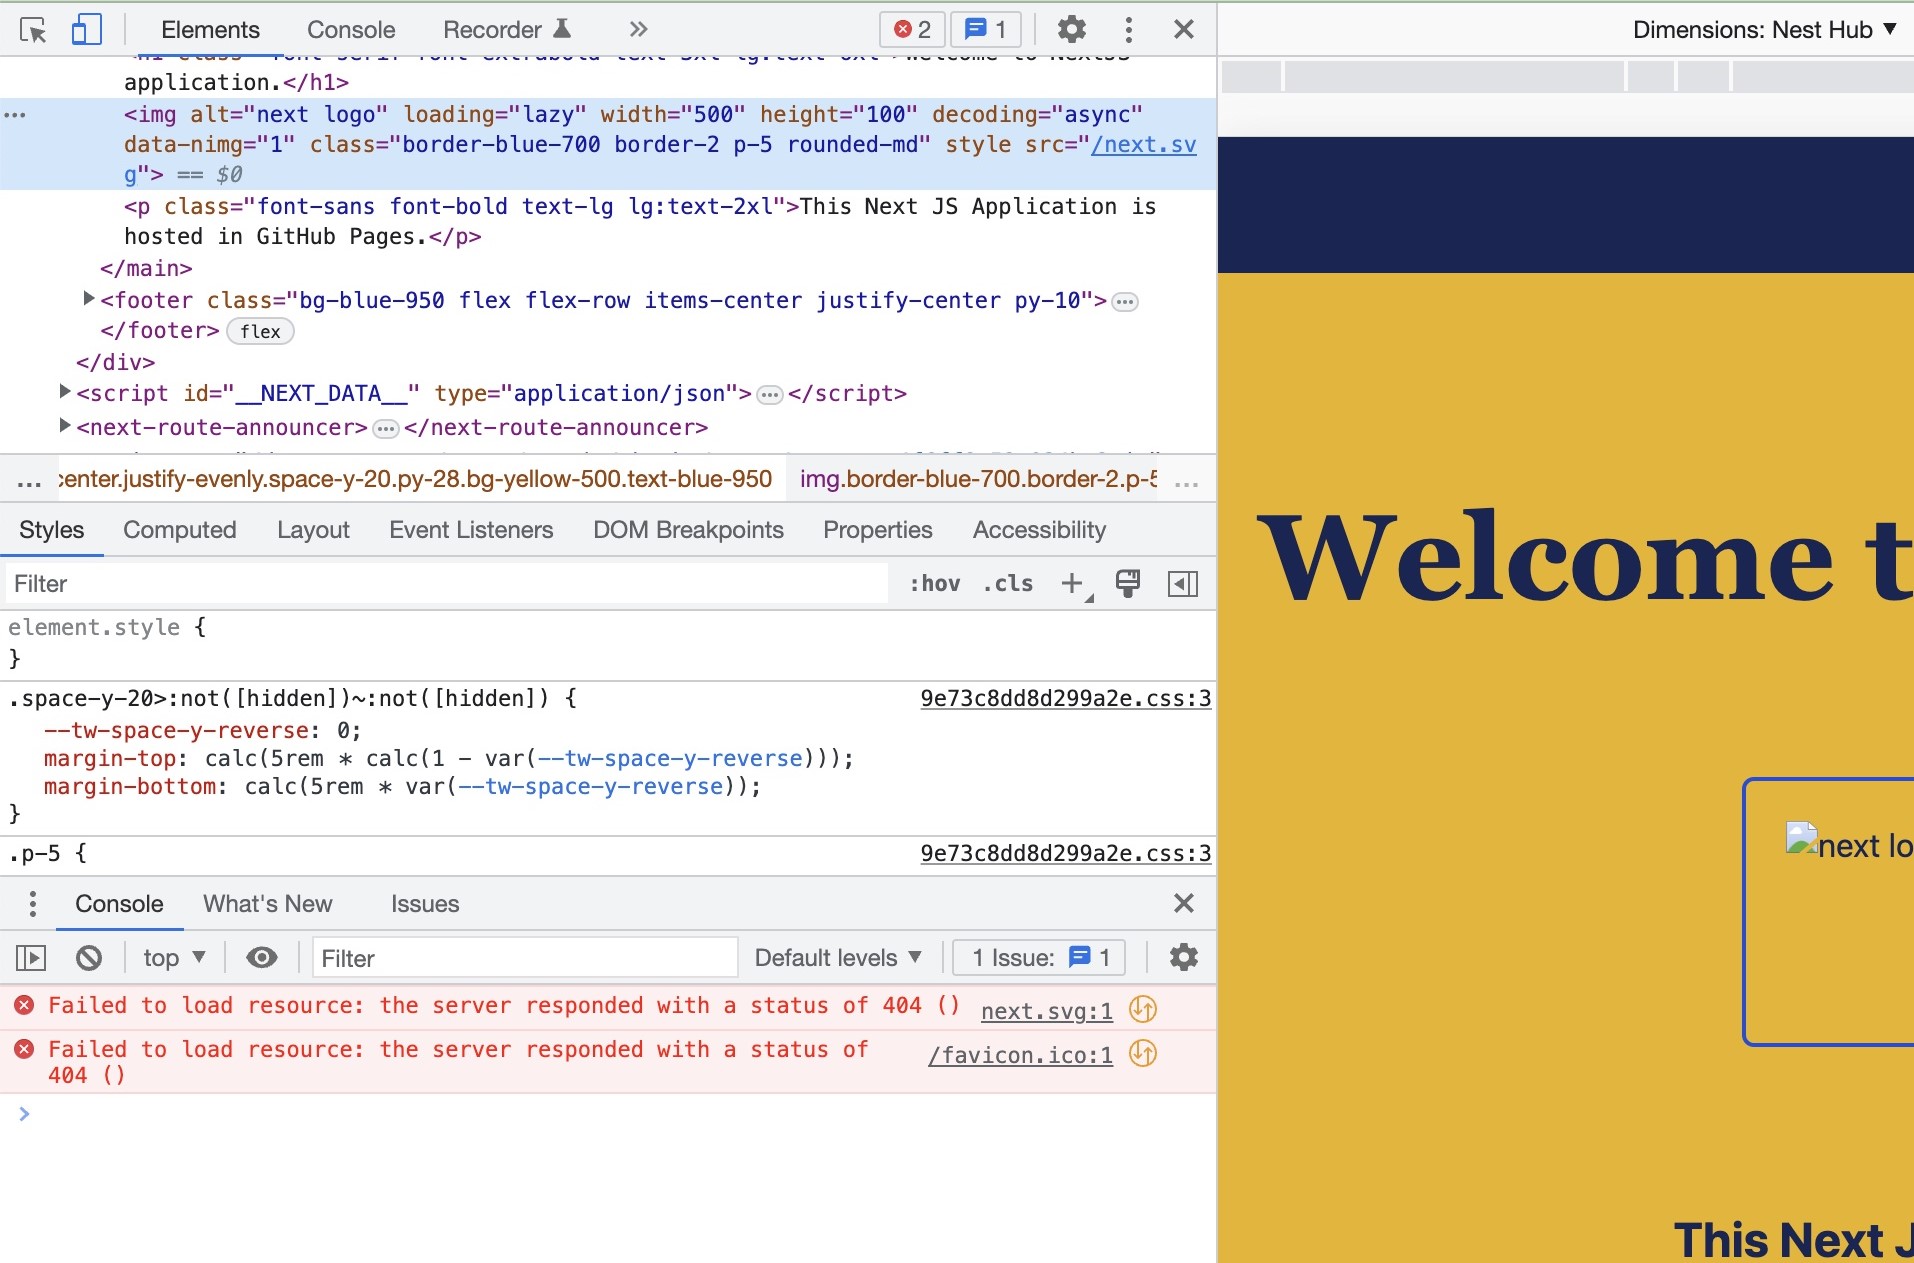 Browser Console
We can notice the image source (src) is set to /next.svg. The main site URL is https://debapps.github.io/demo-next-app/. In order to fix the image load issue we need to add a prefix - /demo-next-app (or whatever /
Add environment variable in the GitHub Actions script
In order to add prefix to the image URL and favicon image, we will use environment variable in the next-build-deploy.yml script. We add following lines at the top of the script.
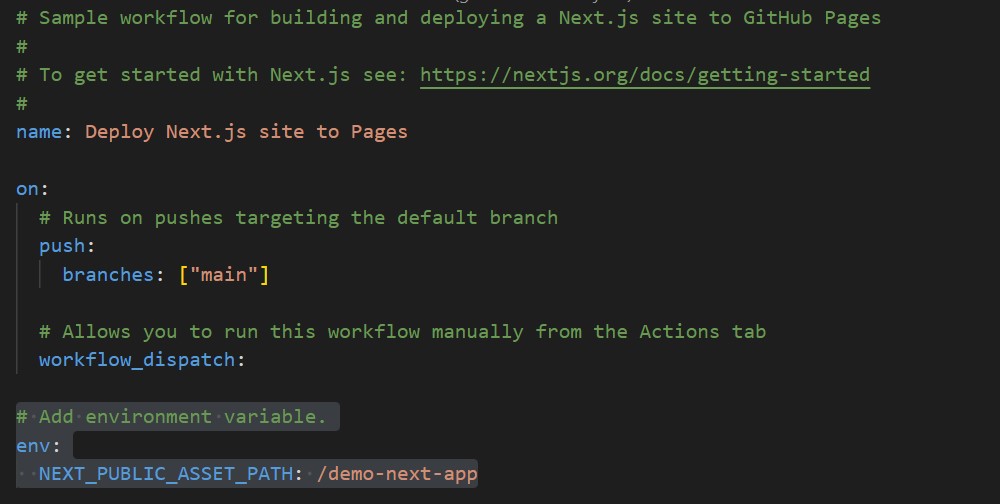 Adding env variable
The naming convention of environment variables in Next JS is the environment variable name start with
NEXT_PUBLIC_prefix. The variable names those does not have that prefix are not accessible from the browser.
To fetch the environment variable in the code, I use following 2 lines.
const assetPrefix = process.env.NEXT_PUBLIC_ASSET_PATH || "";
I use the environment variable as follows:
<Image
 className="border-blue-700 border-2 p-5 rounded-md"
 src={`${assetPrefix}/next.svg`}
 alt="next logo"
 width={500}
 height={100}
/>
Then, we add a favicon folder inside the public folder containing our site favicons generated from the site - favicon.io and added following code in the index.js under < Head > tag.
<Head>
 <title>Demo App - Home</title>
 <link rel="apple-touch-icon"
 sizes="180x180"
 href={`${assetPrefix}/favicon/apple-touch-icon.png`}
 />
 <link rel="icon"
 type="image/png"
 sizes="32x32"
 href={`${assetPrefix}/favicon/favicon-32x32.png`}
 />
 <link rel="icon"
 type="image/png"
 sizes="16x16"
 href={`${assetPrefix}/favicon/favicon-16x16.png`}
 />
 <link rel="manifest"
 href={`${assetPrefix}/favicon/site.webmanifest`}
 />
</Head>
Then, we commit the changes and push it to GitHub Repository.
git add . && git commit -m "Version 1.0.5 - Fixed Image & Favicon URL" && git push
And wait for the GitHub Actions pipeline to complete.
Now, when we click on the GitHub Page URL finally, the deployed Application is there:
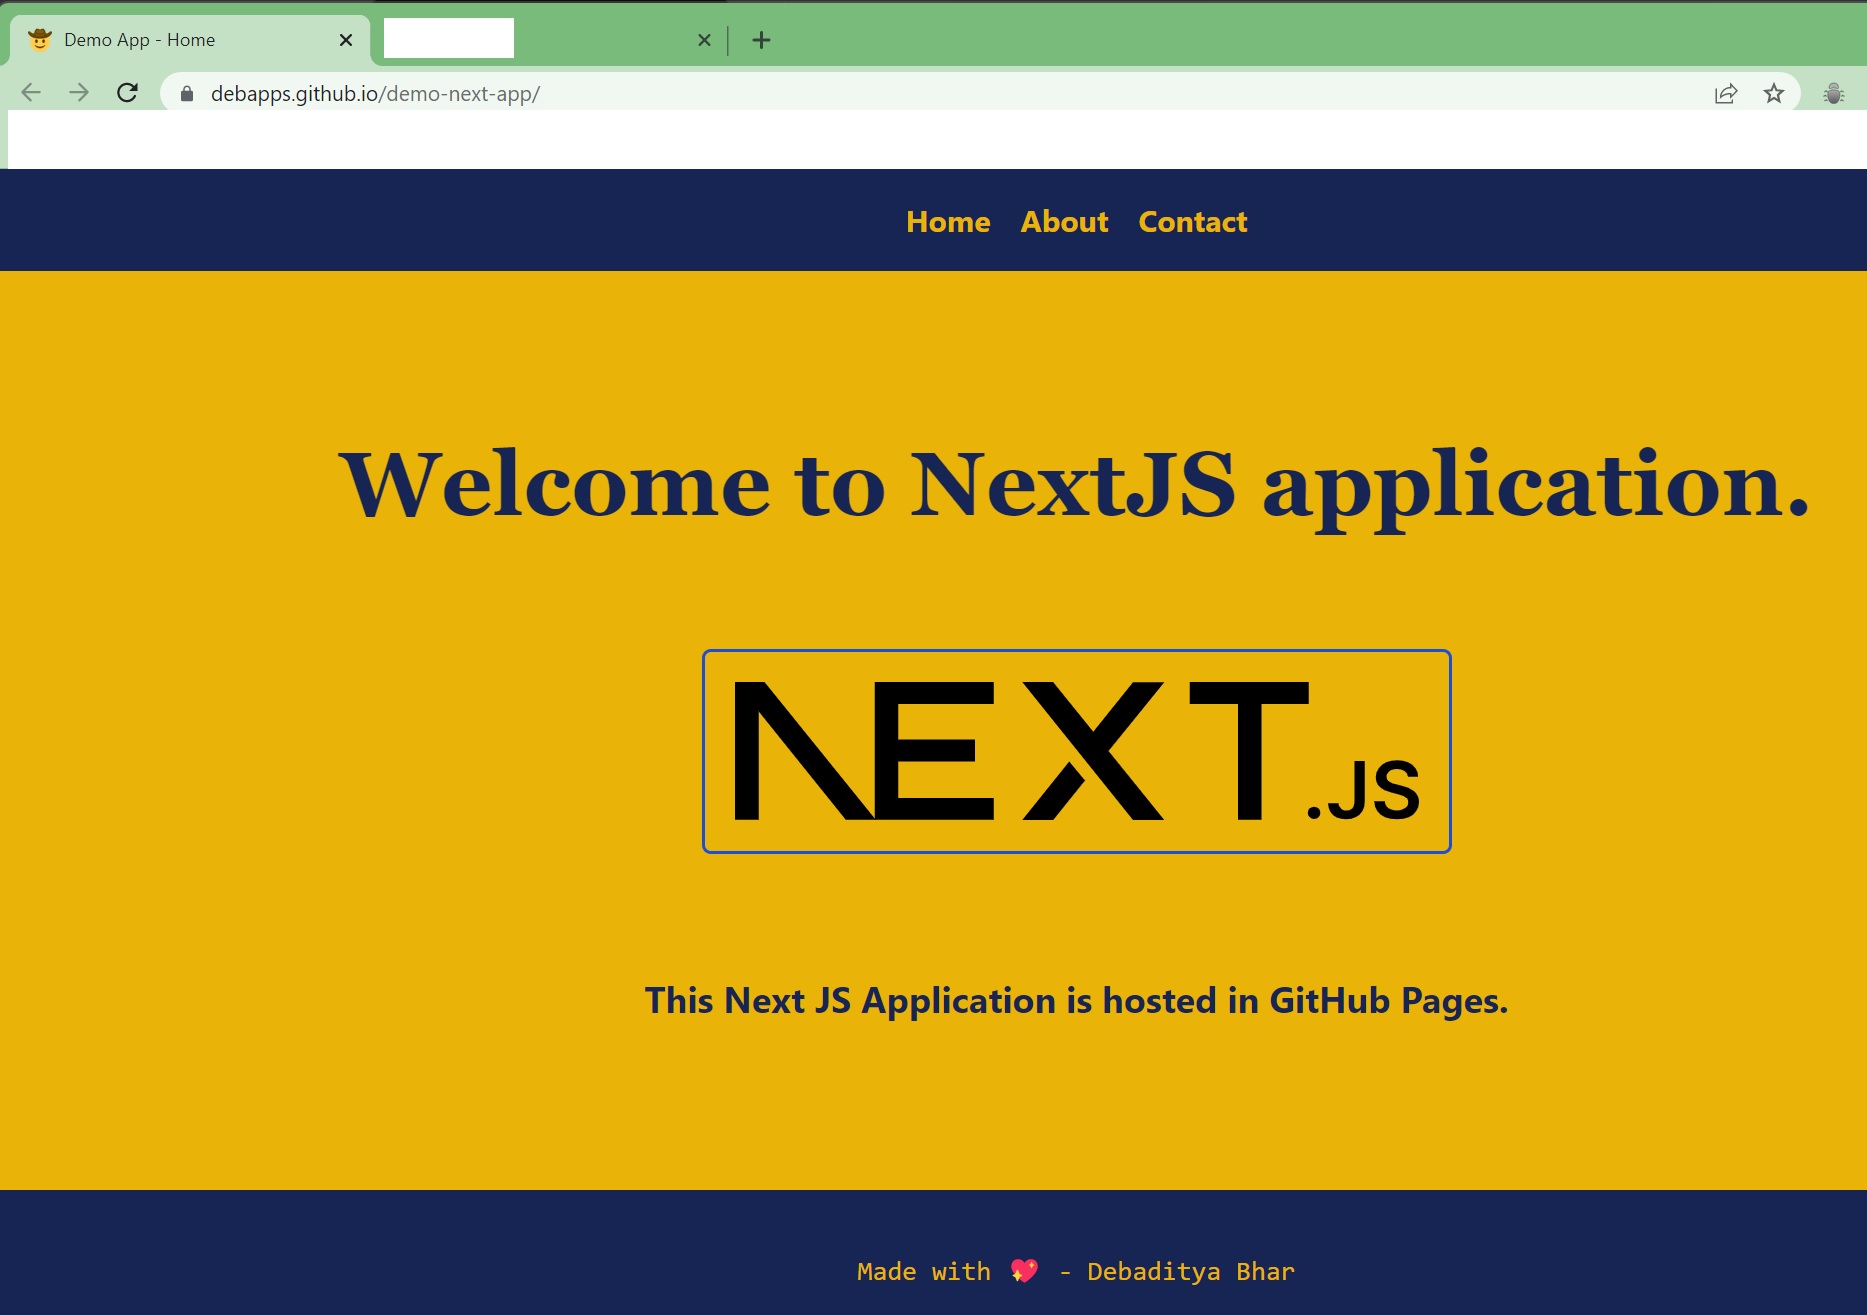 Final Deployed Version
URL: https://debapps.github.io/demo-next-app/
GitHub Repo: https://github.com/debapps/demo-next-app
Conclusion
We can deploy Next JS application in GitHub Pages very easily by following above steps for FREE. It is very helpful for your production ready hobby projects to showcase the world about your works. In case, you want to deploy your application with full scale, there are several different options, some of them are in cloud: AWS, Azure, DigitalOcean etc. But, GitHub Pages are very handy tool for deployment for your development work to public.
I hope you like it. Please feel free to provide your valuable feedback on the topic - bhar.debaditya@gmail.com.