

Introduction
The website or the webpage is called static when the content of the page is not resolved from any backend server. When user requests the webpage using HTTP protocol, the HTML content, the CSS style, and vanilla JavaScript files are sent to the client browser one time. The web browser interprets the web content, style, and web functionalities to the user. The content of the page does not change by the backend server. Generally, from the developer point of view, a webpage designed and developed by HTML, CSS, and vanilla JavaScript is called as static webpage.
HTML (Hyper-Text Markup Language) builds the structure of the webpage. This is the minimum component of a webpage/website. CSS (Cascaded Style Sheet) comprises the looks, layouts, color, styles and feel of the website. Vanilla JavaScript provides some functionalities and user interaction of the website.
We can host a static website on AWS easily using Amazon S3 (Simple Storage Service). Amazon S3 is the object (any kind of file) storage service that provides industry level scalability, availability, security, and performance. It also provides versioning feature where data object can be stored in different versions. It is the backbone of many static websites.
Amazon S3 stores objects into containers called buckets. Bucket stores objects those are identified by key. Key is the full path of the object. It consists of prefix and object name. Suppose a S3 URL is as follows:
s3://my-bucket/myfolder1/anotherfolder/myfile.txt_
Here, Bucket name = my-bucket
Object Key = /myfolder1/anotherfolder/my_file.txt
Prefix = /myfolder1/anotherfolder/
Object name = my_file.txt
There is no concept of directory in S3. But the AWS UI tricks users to show the objects are in directory structure using object key and prefix.
There is concept of bucket policy those controls the access and permission of the bucket. Bucket policy are JSON documents that control who can access the bucket, what is the access permissions (read/write) and what is the condition of the access. We will see the bucket policies in more detailed in this article in later point of time.
Now, we need to host a static web content into AWS S3 bucket and publish it as static website that can be browsed using web browsers. We will perform this activity using following steps:
- Create S3 bucket and enable the feature static website hosting.
- Upload the static web content to the bucket.
- Assign proper bucket policy to the bucket.
Now, let us get started for hands-on!
Hands On
Create S3 bucket and enable the feature static website hosting
AWS provides free-tier access for 1 year for learning and practice. I advise you to make full use of it and create a free-tier account. Please follow the link and create your first free-tier account in AWS: AWS Free Tier Account Generation.
Now, log in with your AWS free-tier account using username, and password. The AWS console dashboard appears after successful login. On the top of the page, there is a search bar. Search the word: S3 and click on the service.
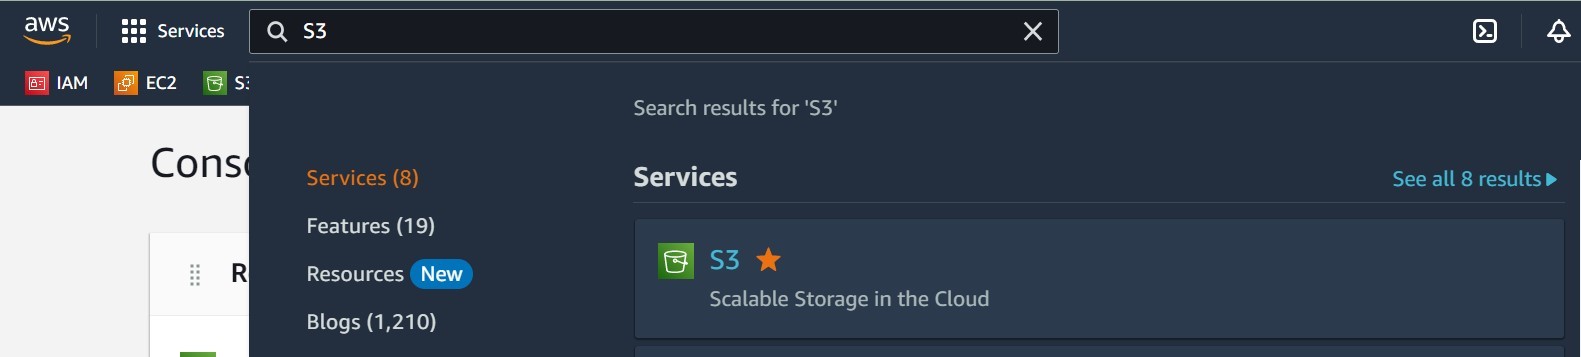 Search S3 in AWS Console
The Amazon S3 dashboard appears. I have several buckets those are already created listed on the S3 dashboard. You might have empty list. Now, let us create a new bucket clicking on “Create bucket” button on the right.
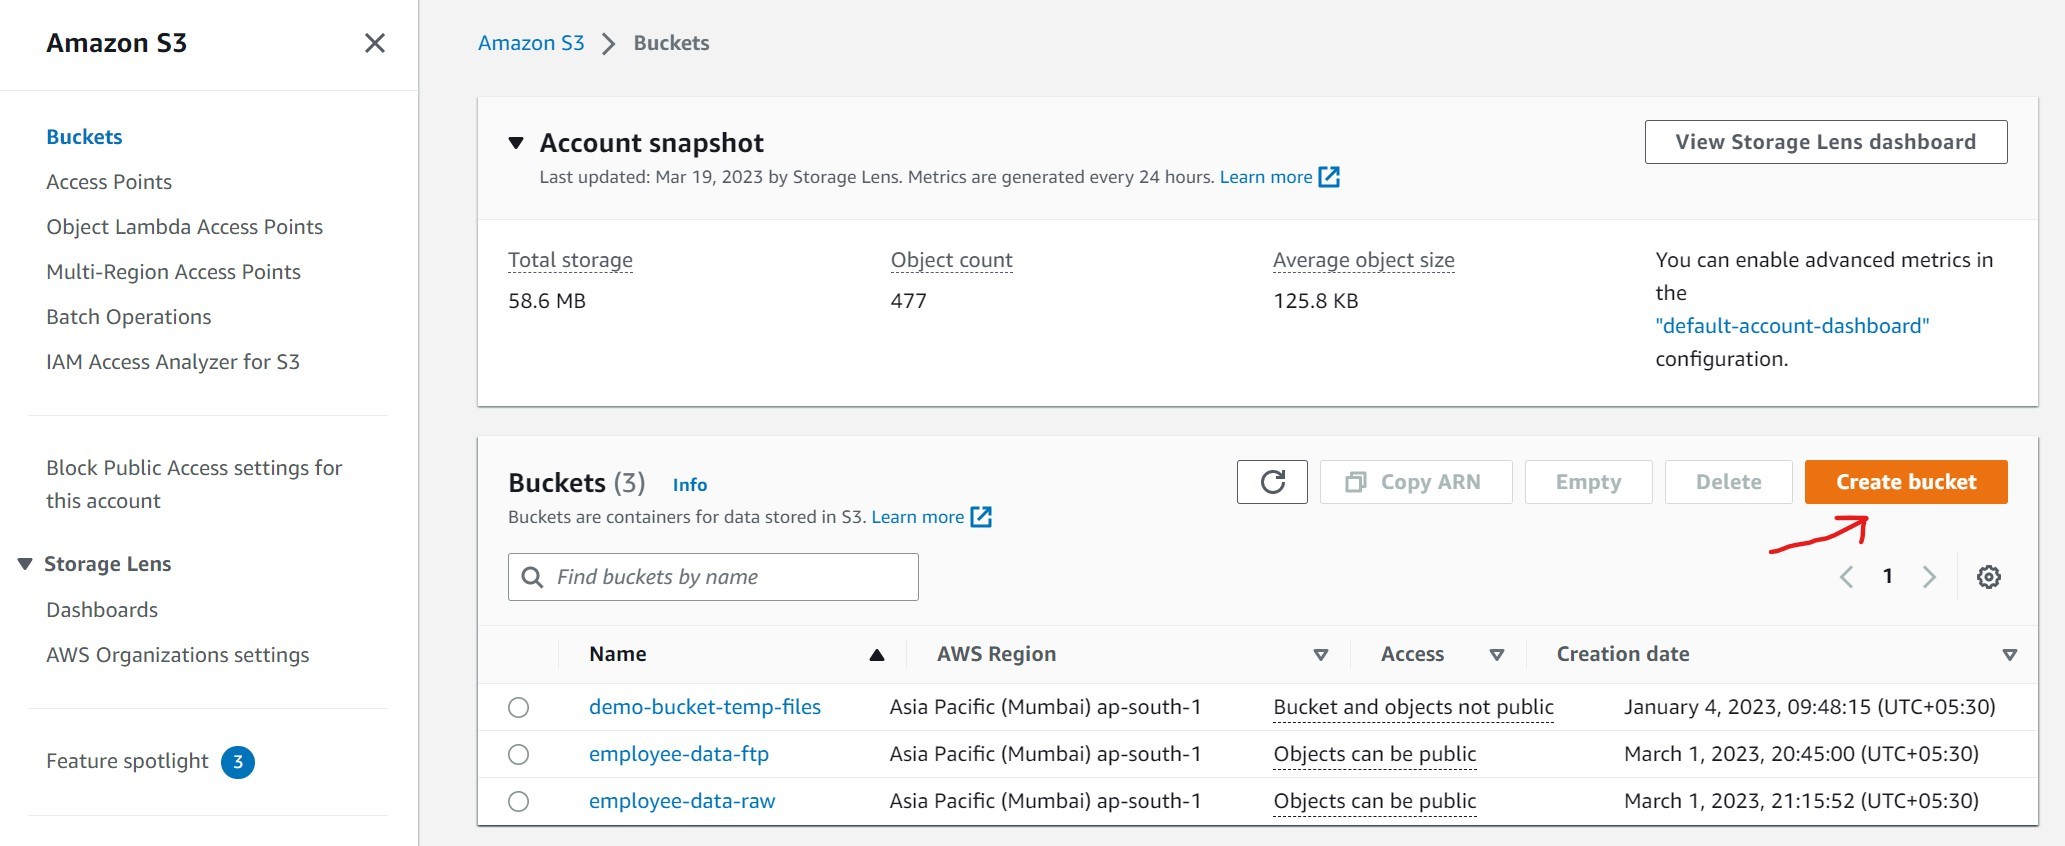 Create S3 Bucket
The next screen has several bucket specific attributes. Let us go through one by one.
Bucket name: Bucket name must be unique across all AWS accounts in all the AWS regions within a partition. There are several bucket naming conventions. You can get detailed information in Bucket Name Rule in AWS Documentation.
AWS Region: The nearby geographic location where your bucket located. We put ap-south-1 (Mumbai).
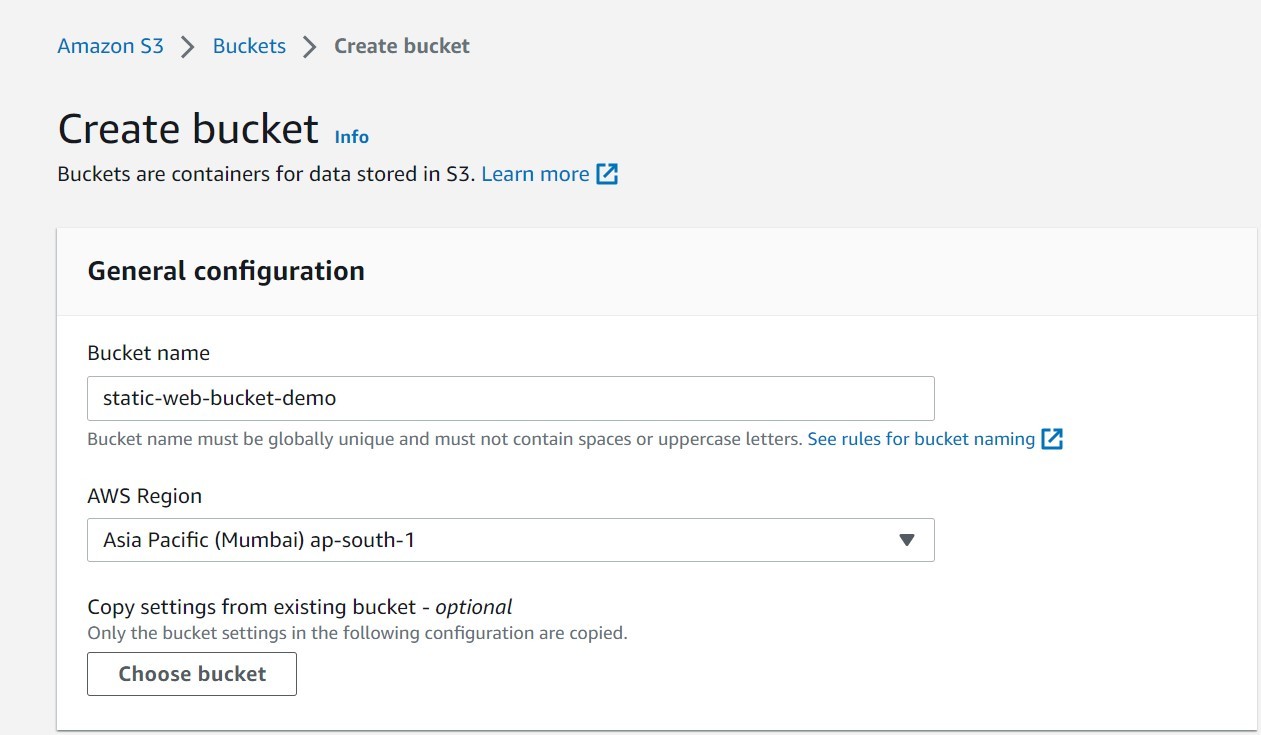 Bucket Name and AWS Region
- Object Ownership: It indicates who is the owner of the objects created in the bucket. The AWS account which created the bucket is called bucket owner. By default, all the objects created in the bucket are owned by the bucket owner. In this case no access control list (ACL) is required. In other cases, the other AWS accounts those are not bucker owner, can have ownership of the objects created in the bucket. In that case the ACL needs to be enable. We will go with the default settings for simplicity as shown in the picture.
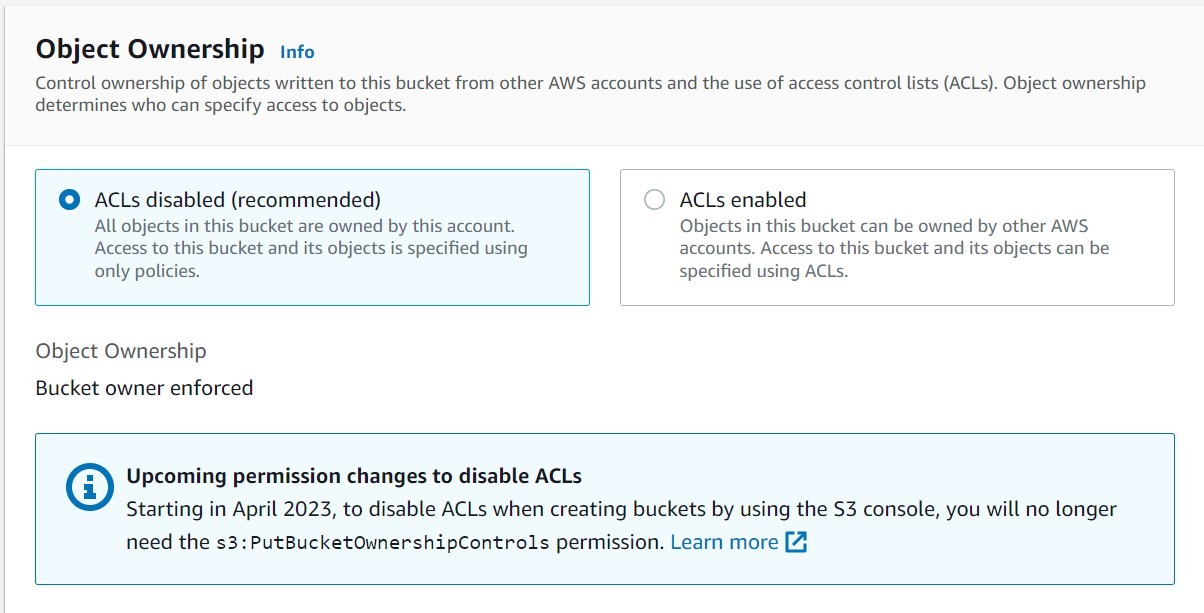 Bucket Object Ownership
- Block Public Access: The bucket is blocked for public access from the outside world by default. As we are hosting a static website for public access, we need to uncheck the option to make the contents of the bucket available from outside world. When we uncheck all the checkboxes, a warning appears on the screen. We need to acknowledge that.
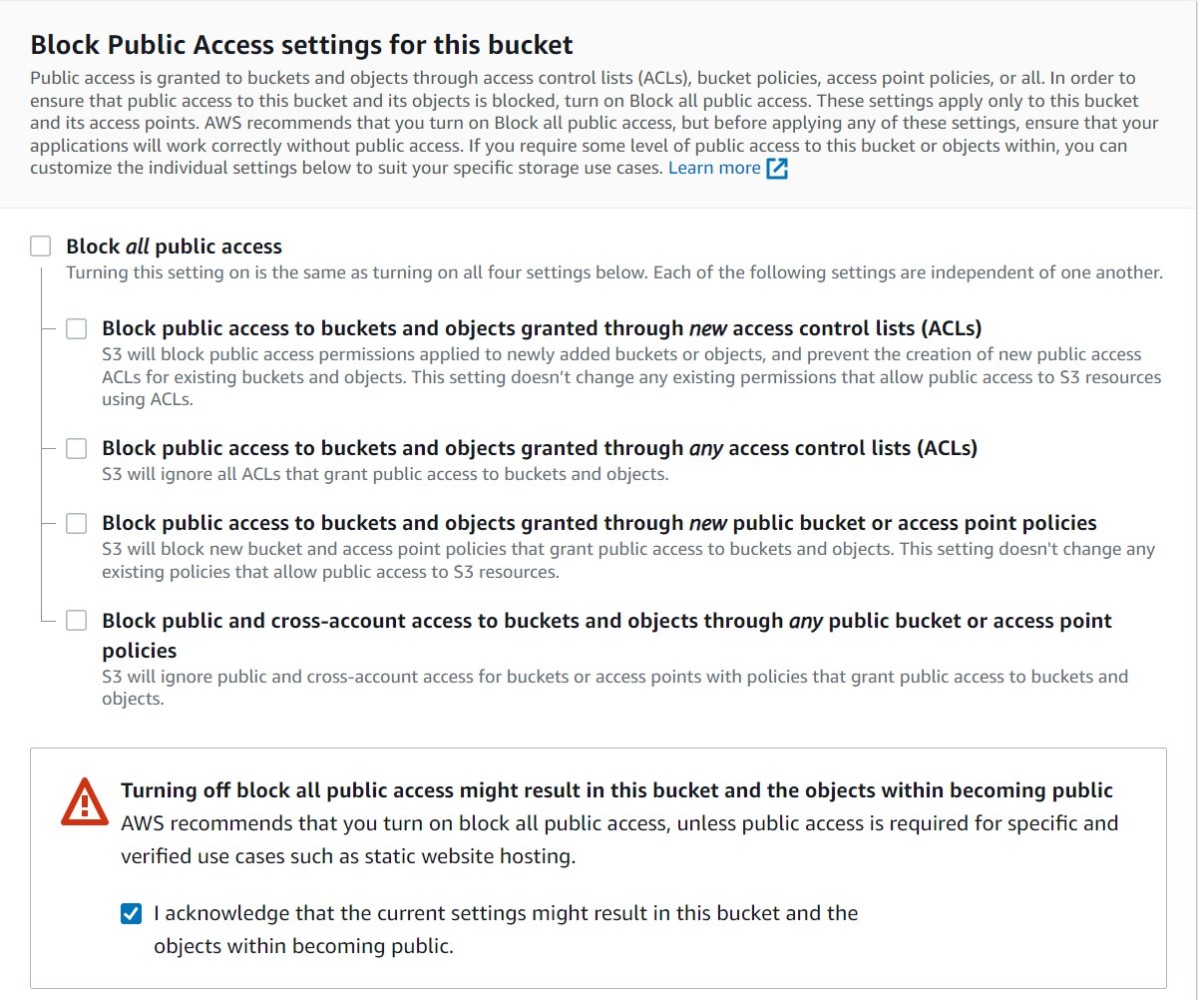 Block Public Access Option
- Bucket Versioning: It enables bucket to create versions of the objects in that bucket. Versions of the objects are used for data retention purpose. But for this article, we will go with the default i.e., Disable.
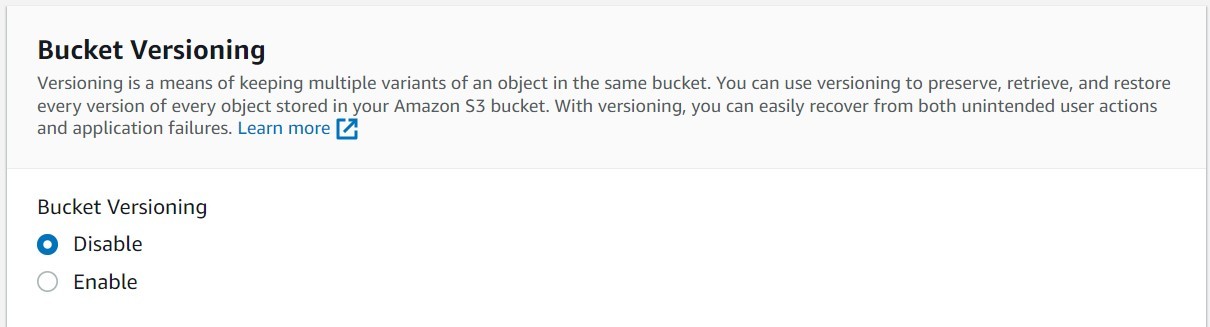 Bucket Versioning
- Default Encryption: It enables server-side encryption technique for the objects created in the bucket. We will go with the default choice: Amazon S3 managed keys (SSE-S3).
We do not set any advance settings as of now. Then click on the button “Create bucket” to create the bucket.
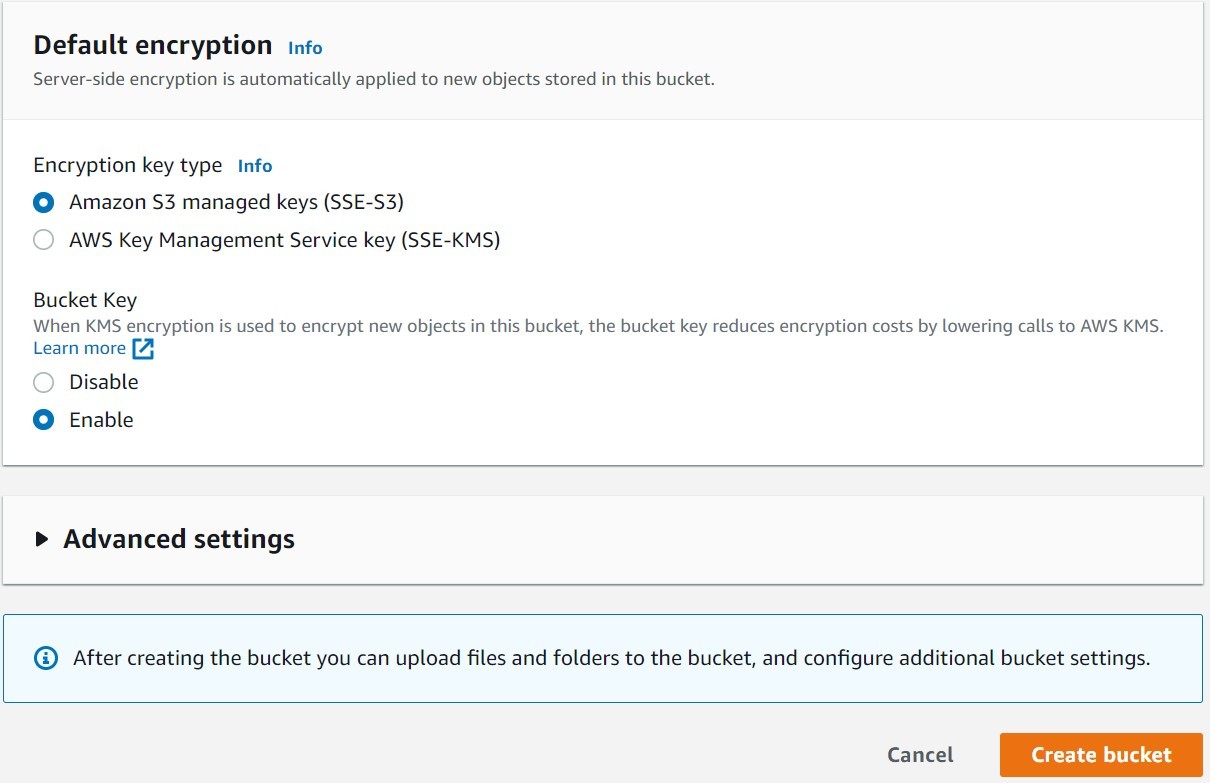 Bucket Encryption
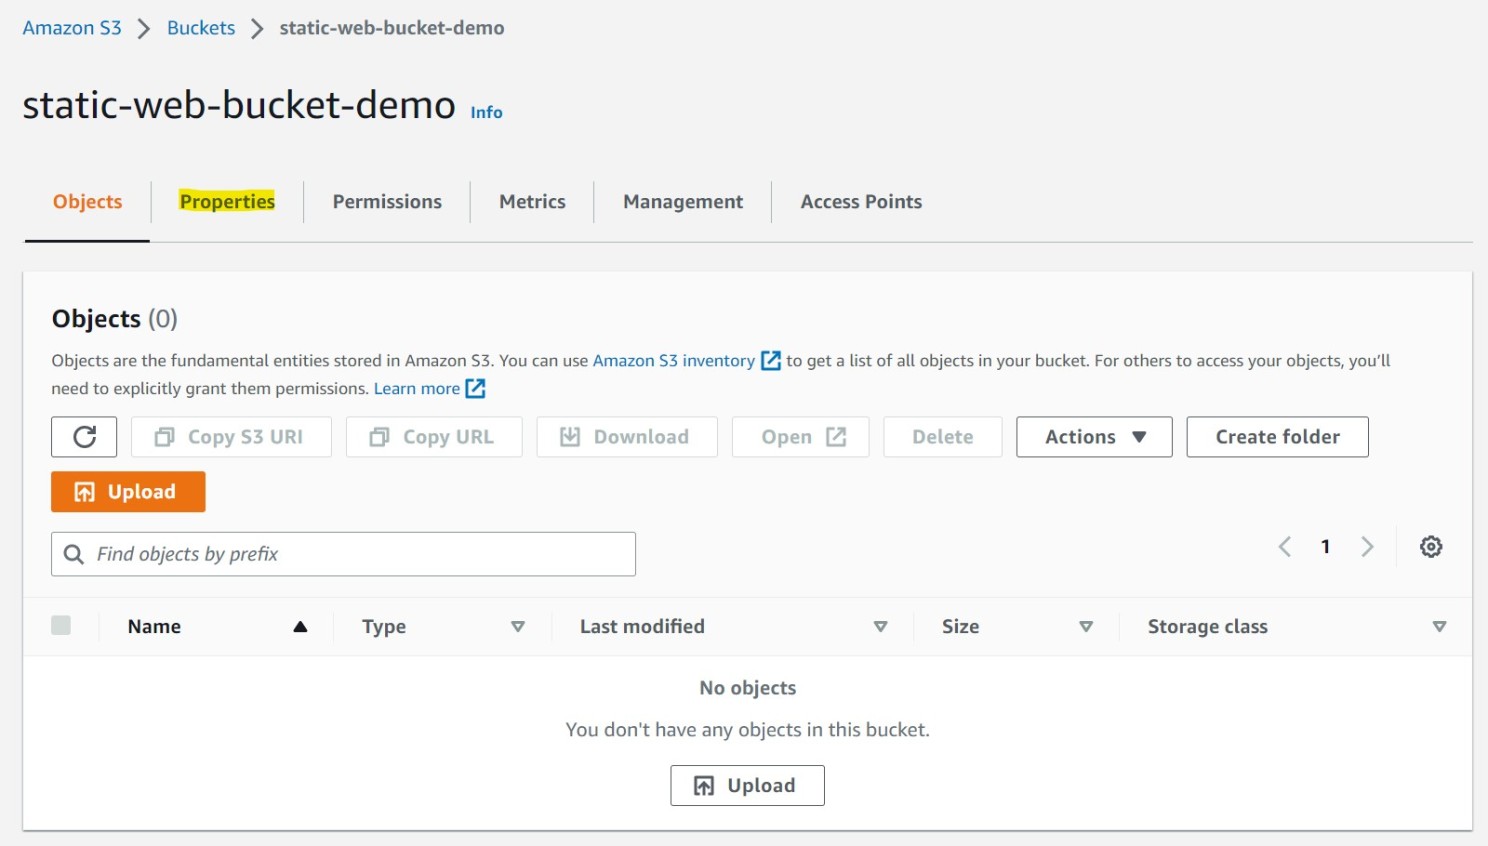
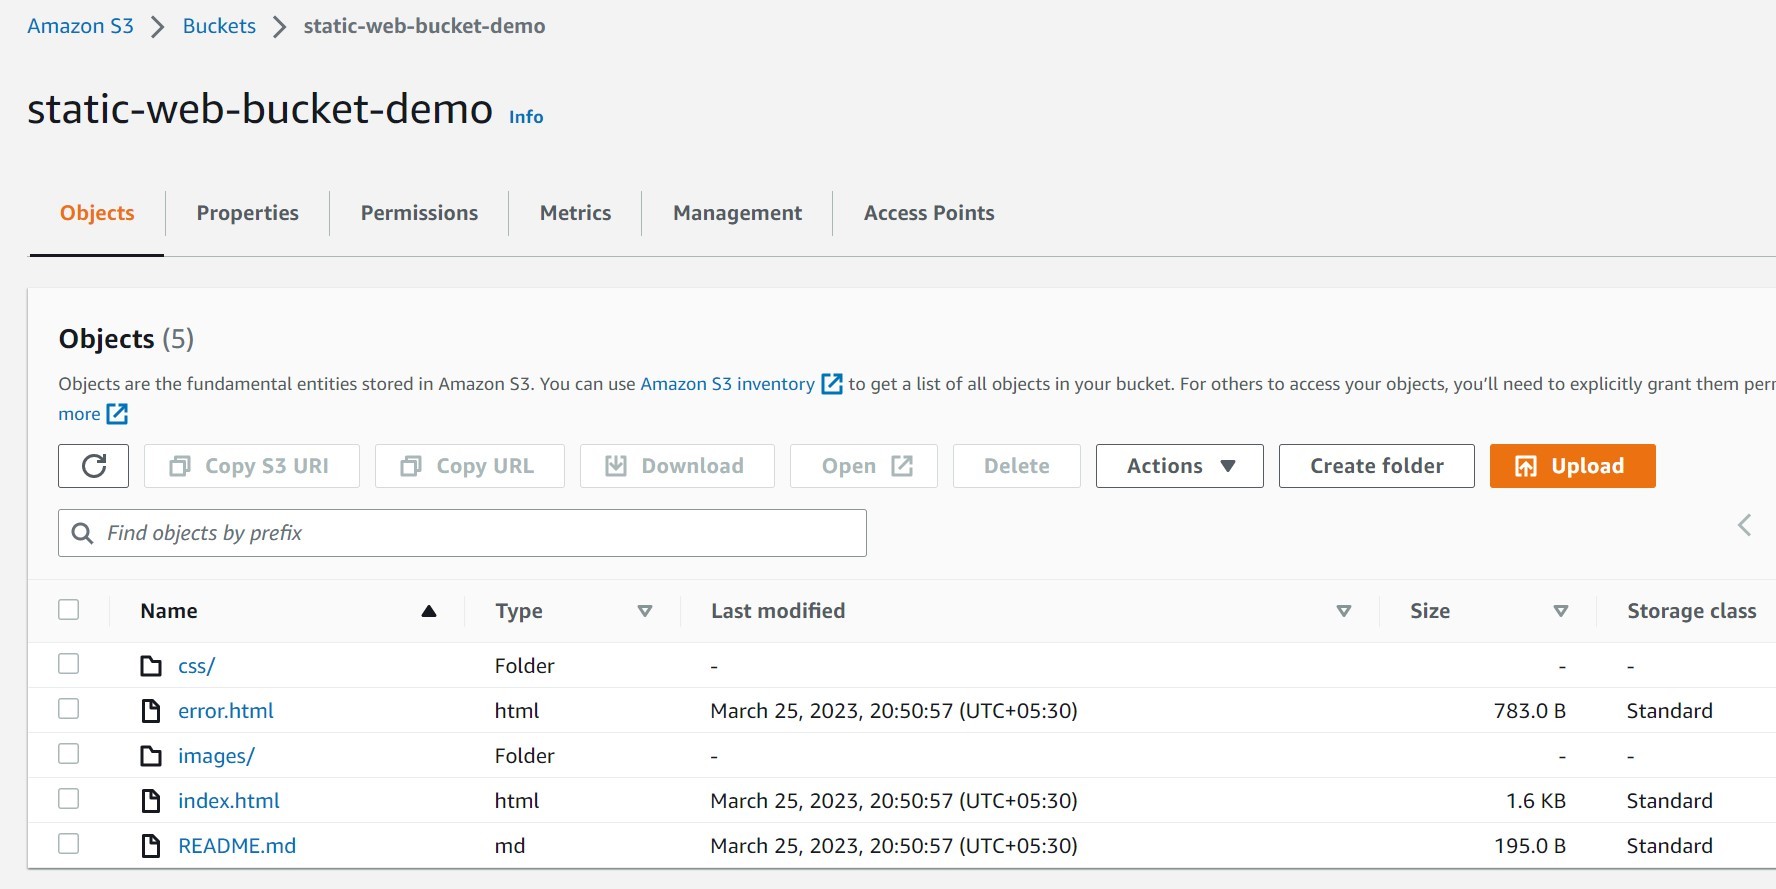
We have created the bucket with the name: static-web-bucket-demo. Now, we will configure the bucket to host a static website.
- We enter the bucket and go to its “Properties” tab.
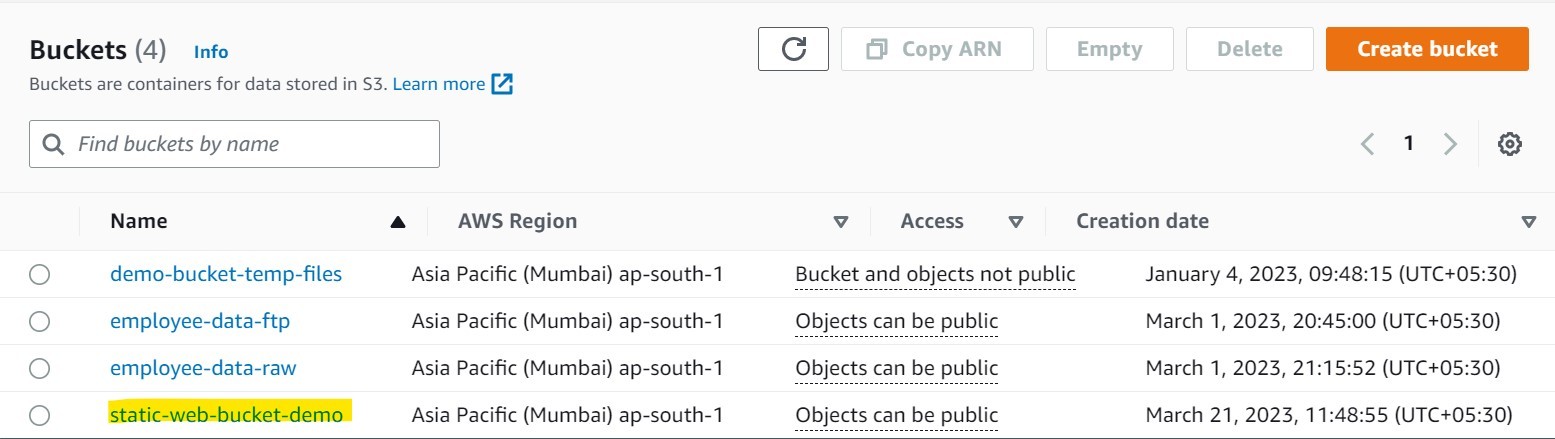 Bucket List
 Bucket Properties
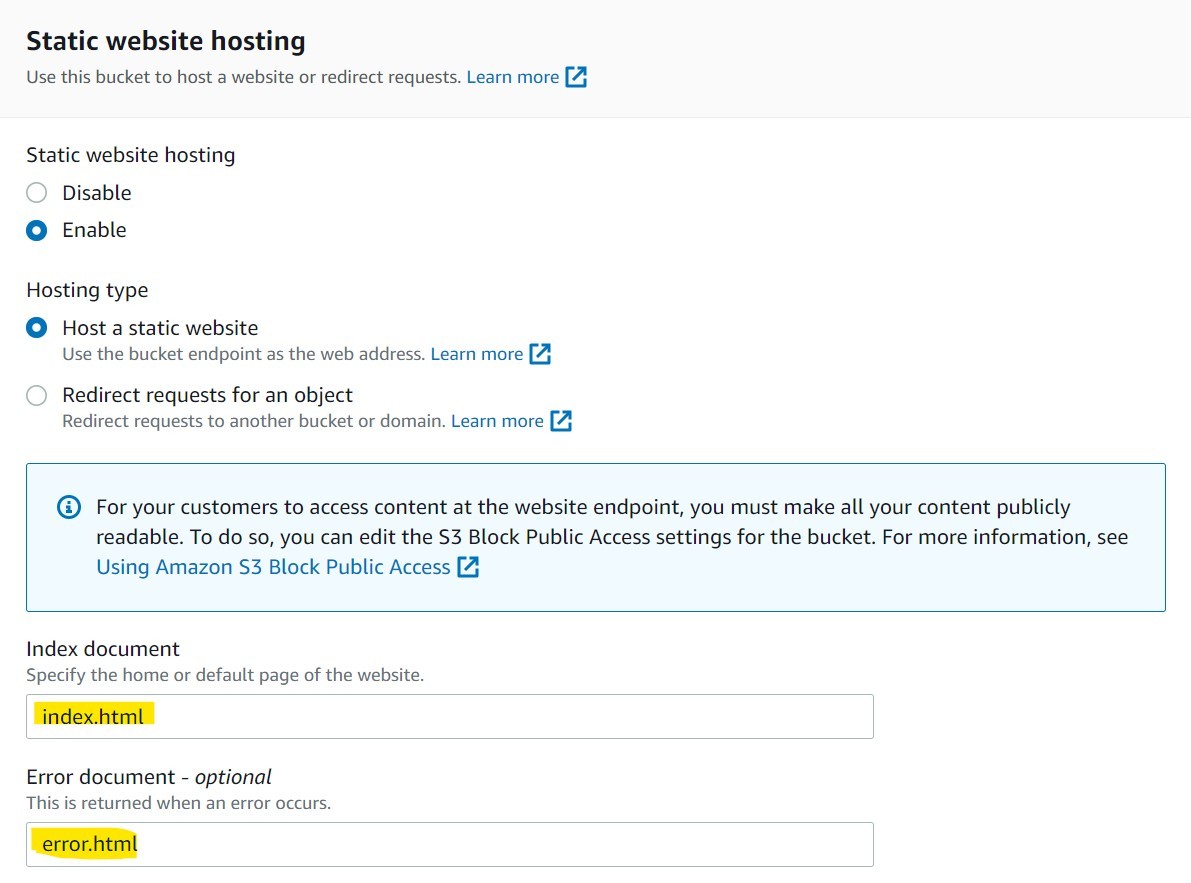
- Scroll down to the properties and find the property “Static website hosting” and click on “Edit” button.
 Static Website Hosting Edit
- Enable the feature “Static website hosting” with following hosting type.
- Mention the index document as index.html and optional error document as error.html.
 Static Website Hosting Configuration
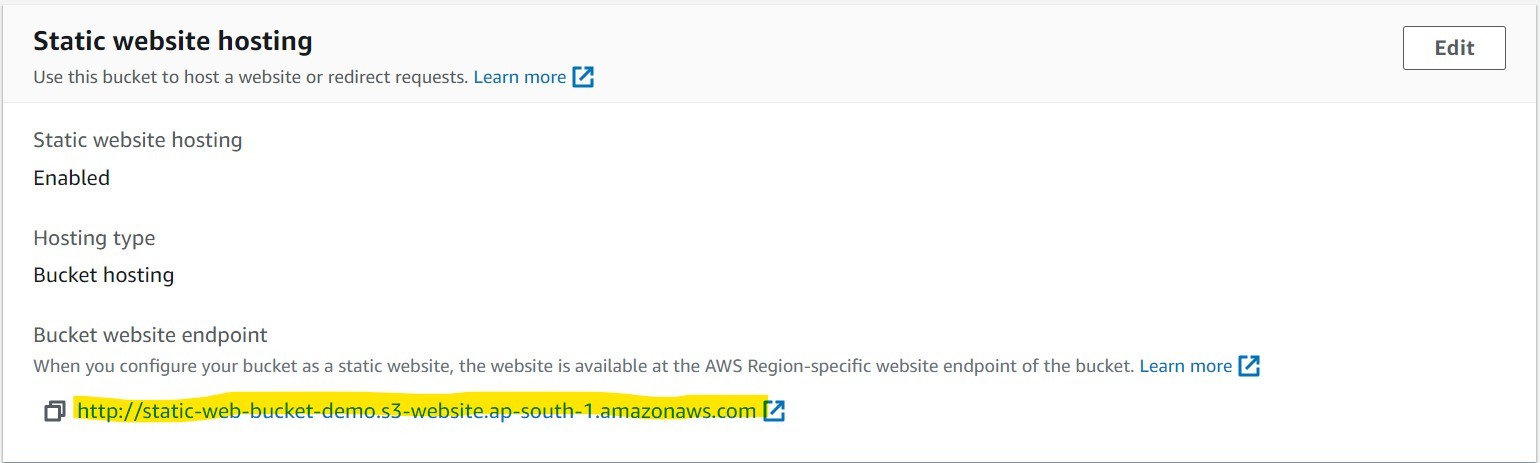
- Click on “Save” button and the bucket website endpoint URL appears on the screen now.
 Static Website URL
If you click on the URL, you will see nothing on web browser now as there is no content uploaded into the bucket.
Upload the static web content to the bucket
You can develop simple webpages – index.html and error.html using HTML, CSS, and Vanilla JavaScript. I have developed static webpages using only HTML and CSS to demonstrate parallax effect. You can get the codes in my GitHub repository. Clone my repository in your local computer.
Now, you need to follow the following steps to upload the content of the static website into the S3 bucket.
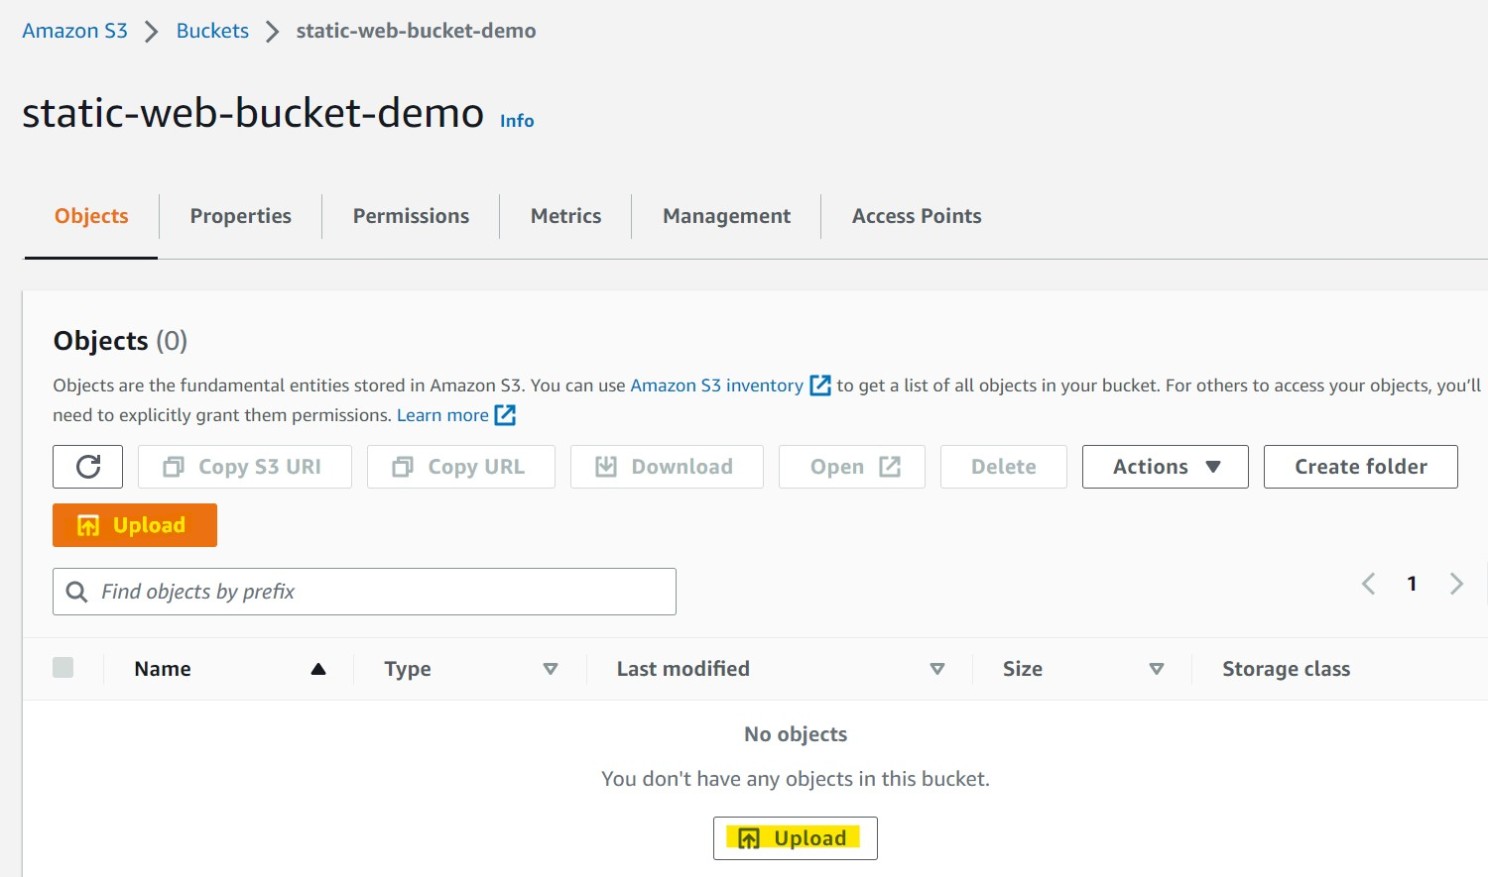
- Open the bucket and click on “Upload” button.
 Upload Object in Bucket
- Click on “Add Files” button to upload the local files (here, HTML files and markup file) from the local computer.
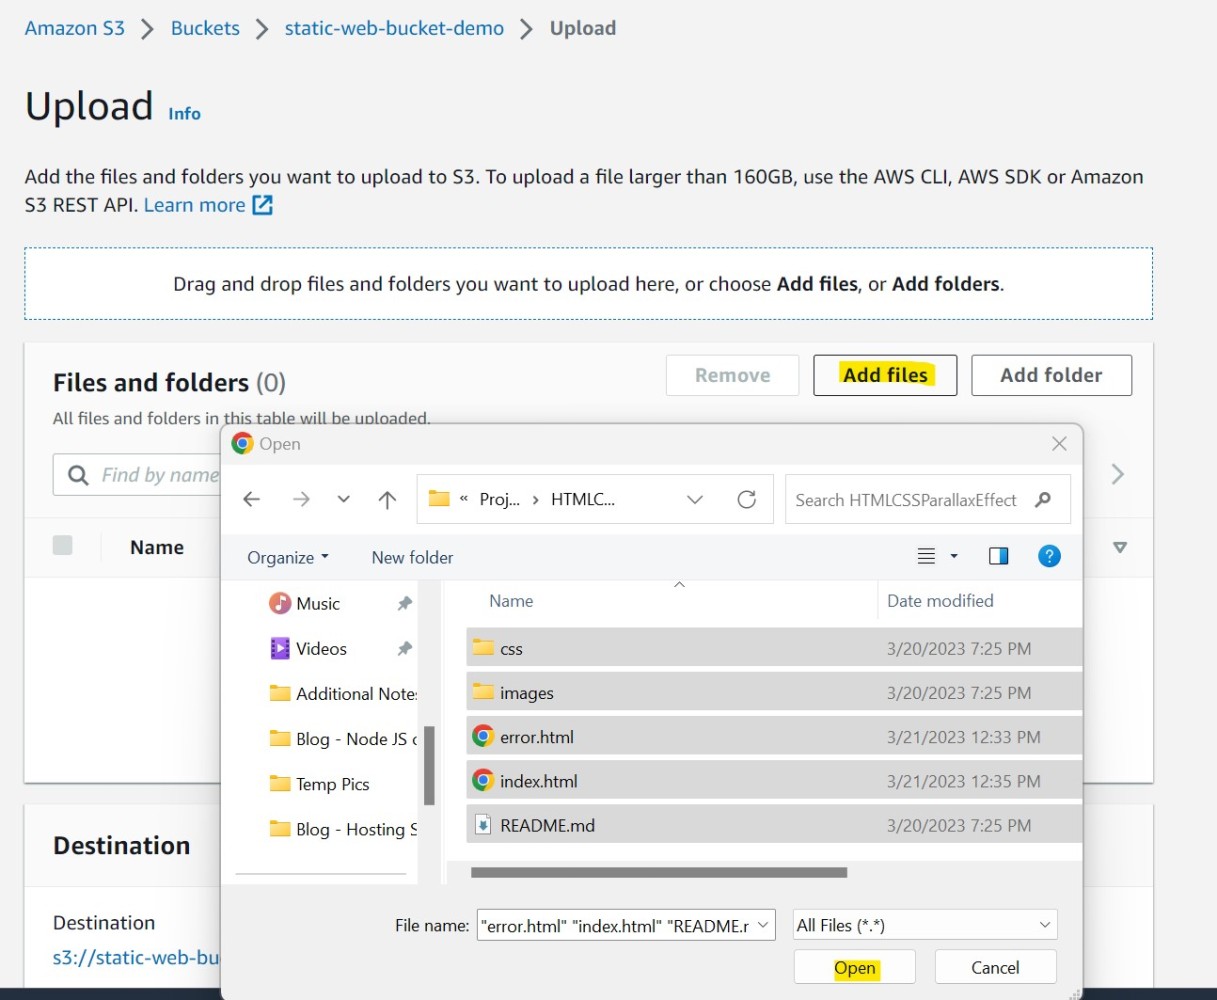 Add files
- Click “Add folder” button to add the folders from the local computer one by one with all the files inside the folder.
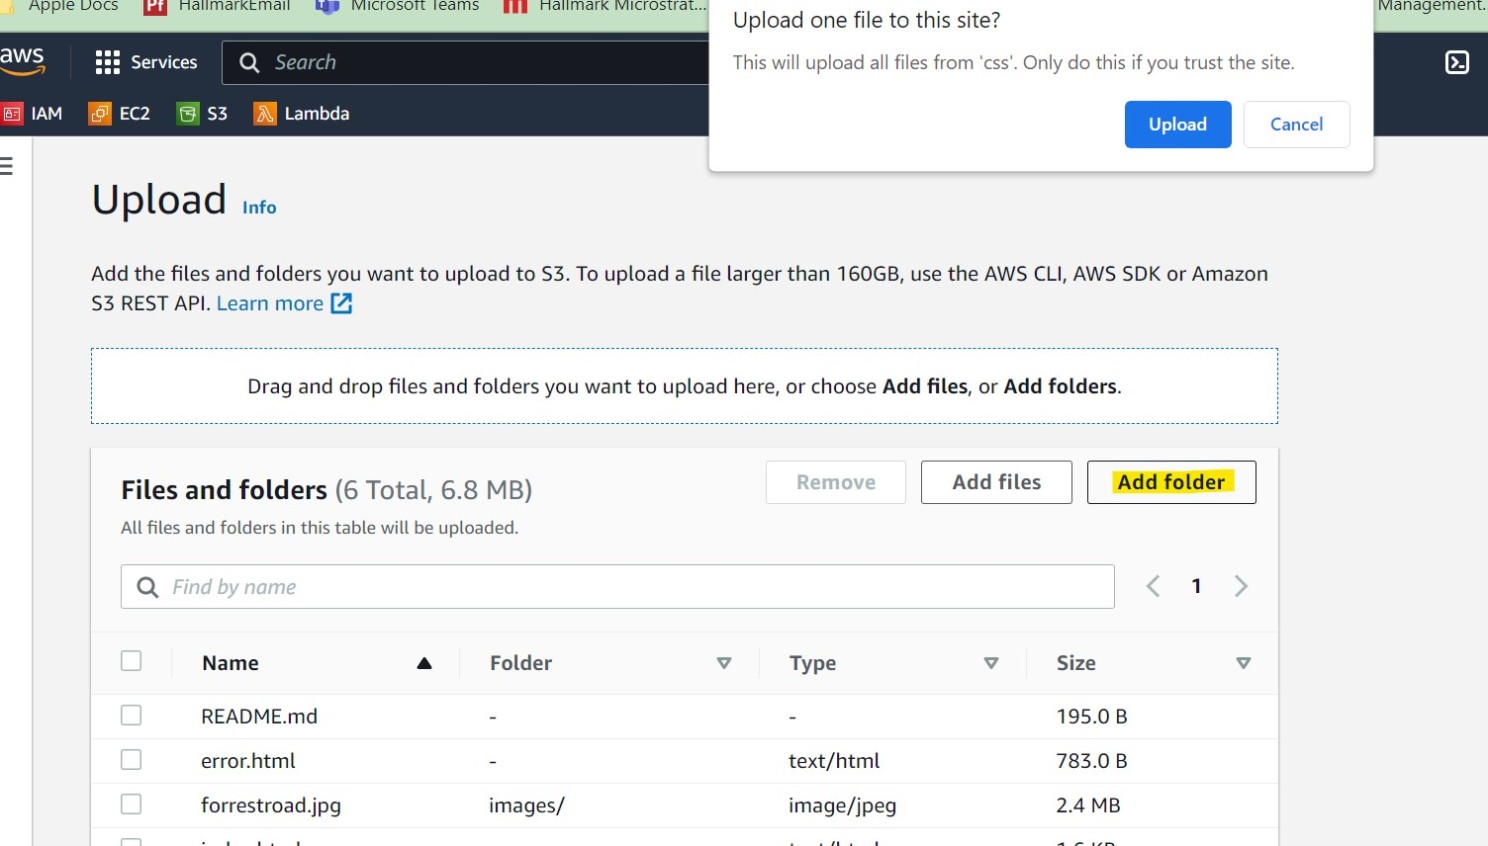 Add folder
- Click on “Upload” to complete the upload into the bucket.
 Upload Complete
- Now open the bucket URL – http://
.s3-website. . But you will get the following message..amazonaws.com/
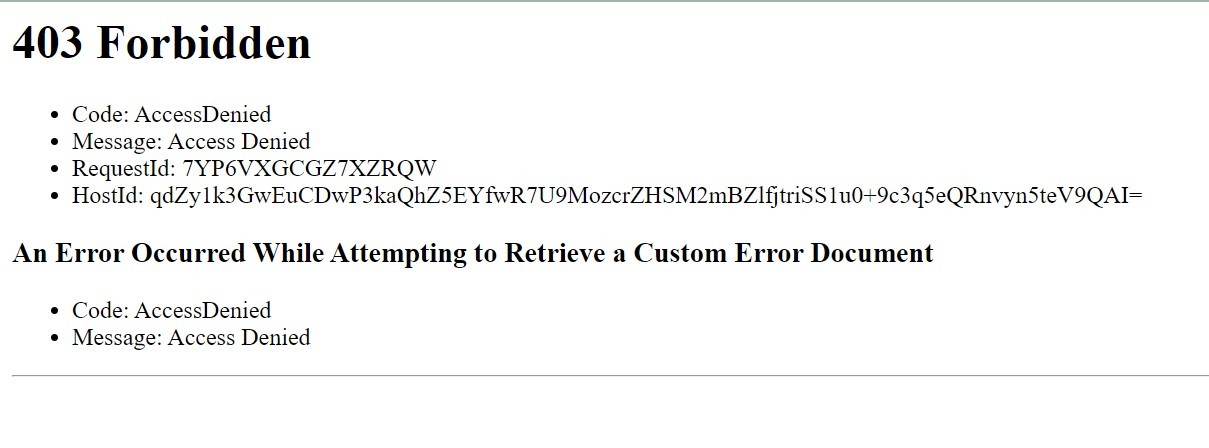 Object Access Denied Error
We need to update bucket policy to fix this issue.
Assign proper bucket policy to the bucket
The objects in the bucket are not yet publicly readable. To make those object publicly readable for any user we need to grant s3:GetObject permission to everyone through bucket policy. Please follow the steps to set up the bucket policy:
- Under the bucket, go to the “Permissions” tab.
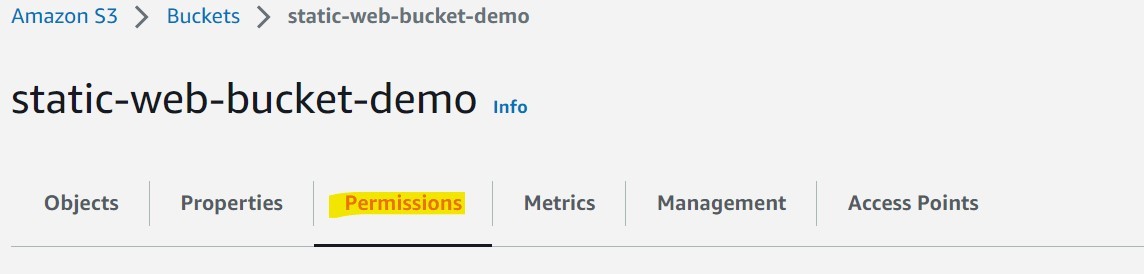 Bucket Permissions
- Edit the “Bucket policy”.
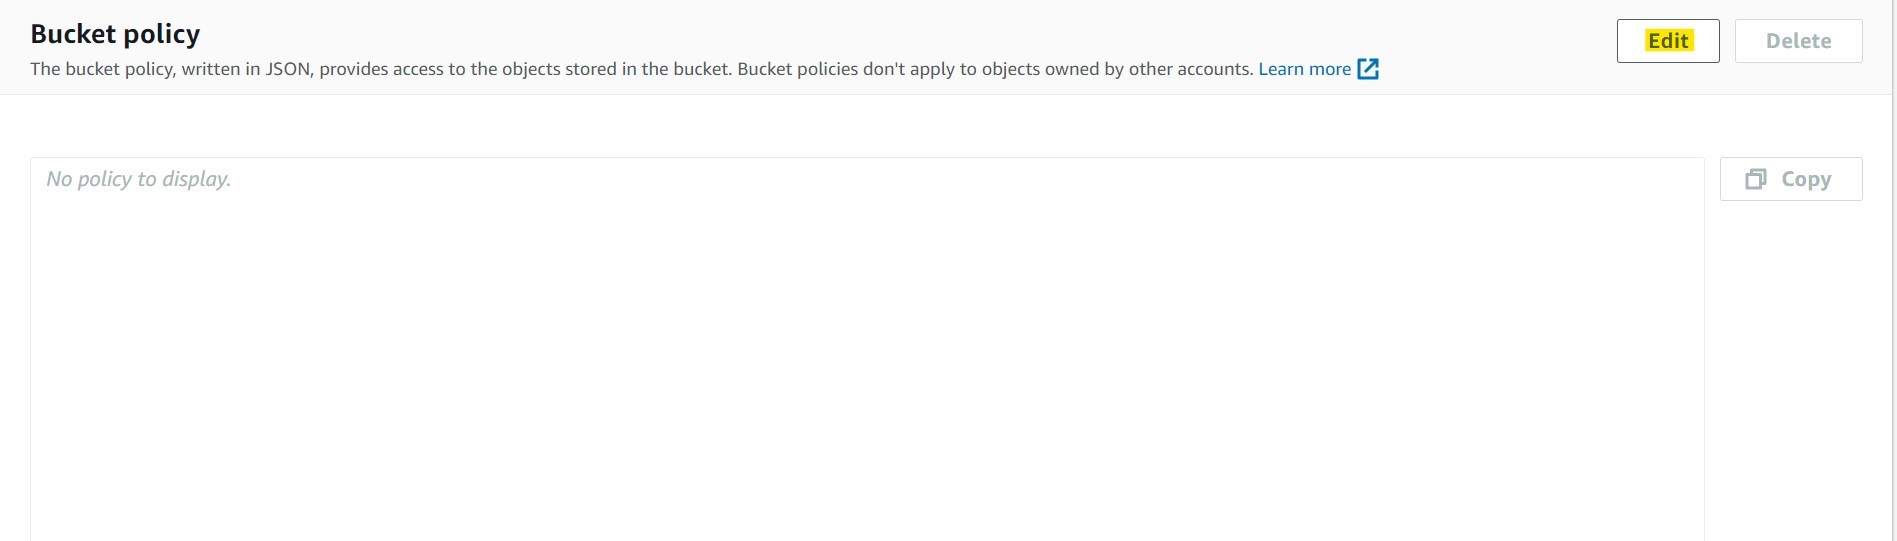 Bucket Policy
- Click the “Policy generator” button. This will open the new browser tab. Please note the ARN of the S3 bucket from the screen here to use later.
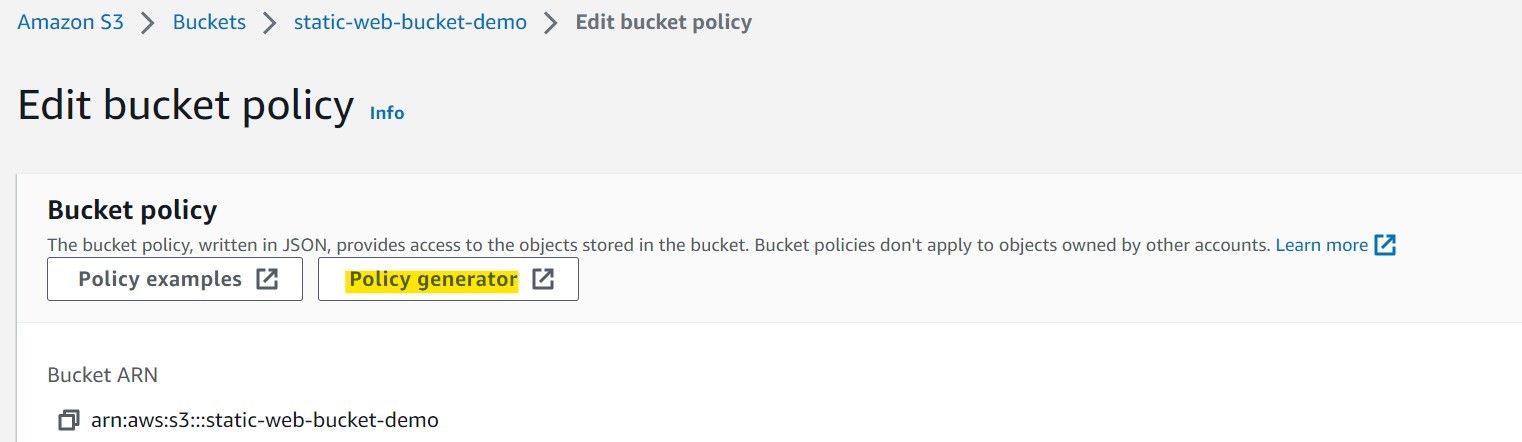 Policy Generator
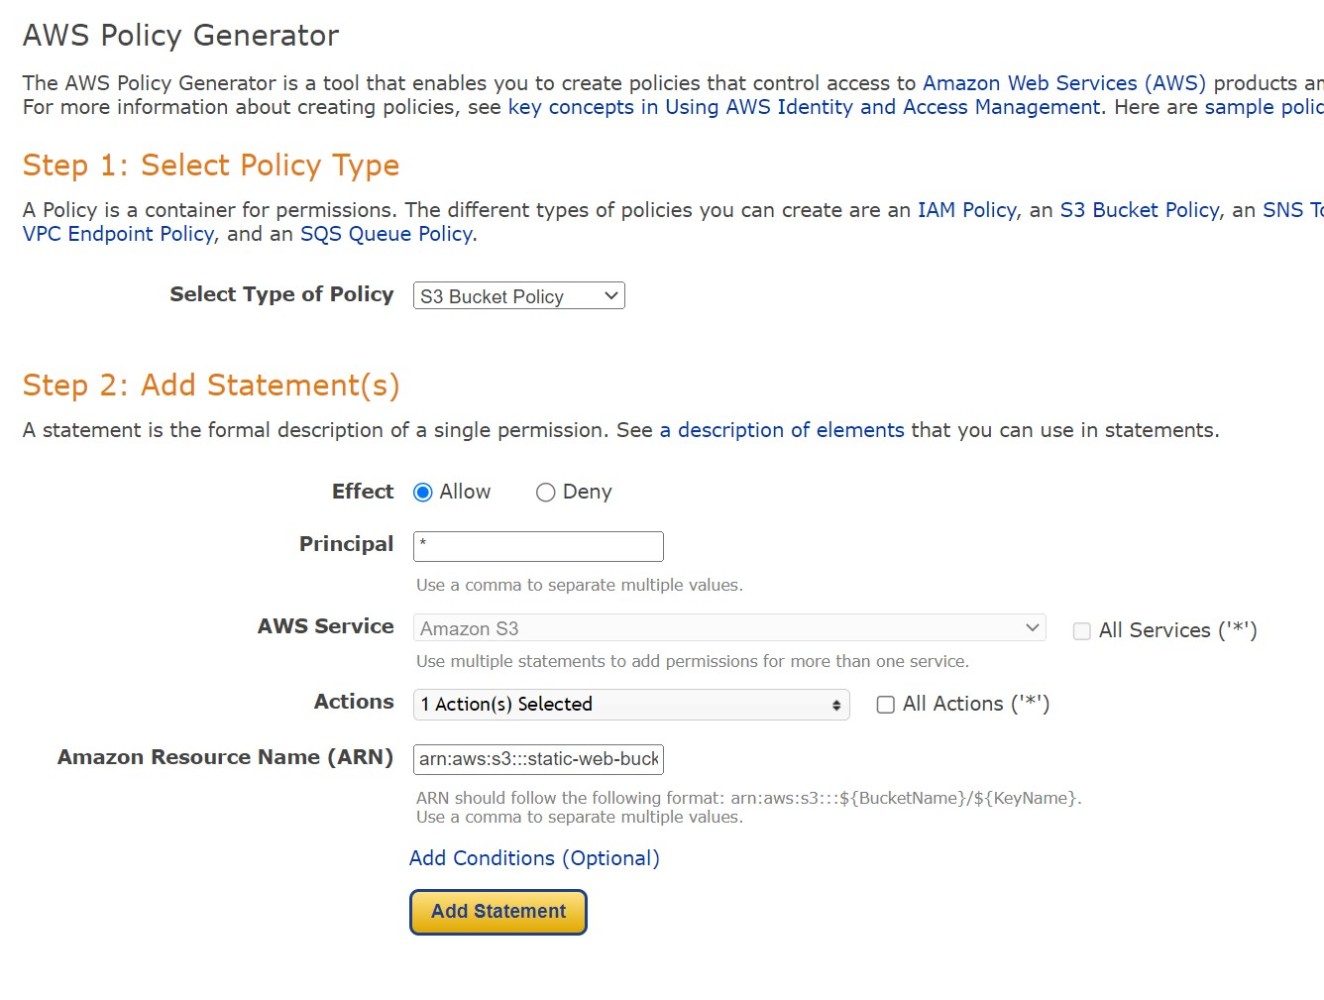
- AWS Policy Generator is the GUI where we can generate bucket policies using nice interface. The bucket policies are JSON documents created directly in text format or in the policy generator UI. The main components of the bucket policies are as follows:
Effect: It has two values: Allow or Deny. It indicates granting or revoking a permission.
Principal: Who can have or does not have the permission. We put * here. It indicates everyone.
Actions: What permission will be granted or revoked. We select GetObject permission only from the dropdown menu. We may select multiple permissions here.
Amazon Resource Name (ARN): It is the unique name of any AWS resource provided by AWS. We put following value – arn:aws:s3:::static-web-bucket-demo/* to denote all the objects under the bucket ARN.
- Then, we click the “Add Statement” button.
 AWS Policy Generator
- Click the “Generate policy” button at the end of the policy generator page to show the policy. Copy the JSON document generated in the modal window.
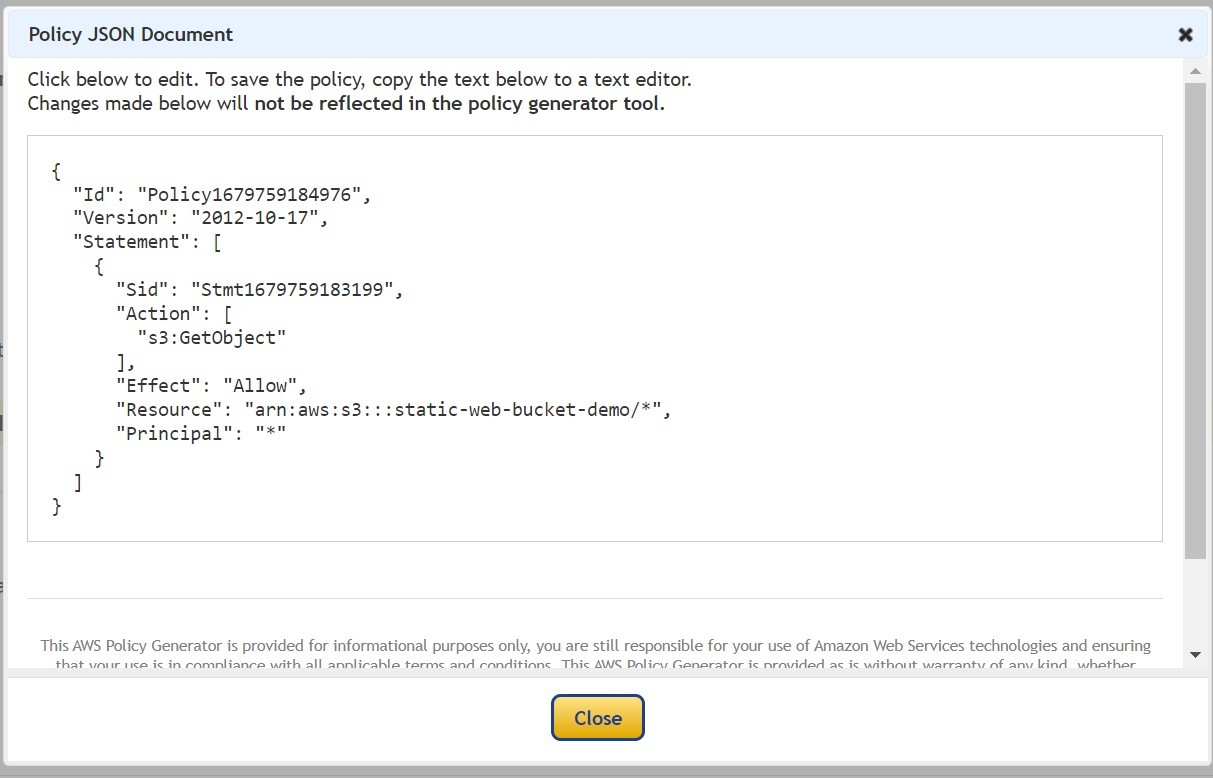 AWS Bucket Policy generated through UI
- Paste the generated JSON policy into the Edit bucket policy section and save the changes.
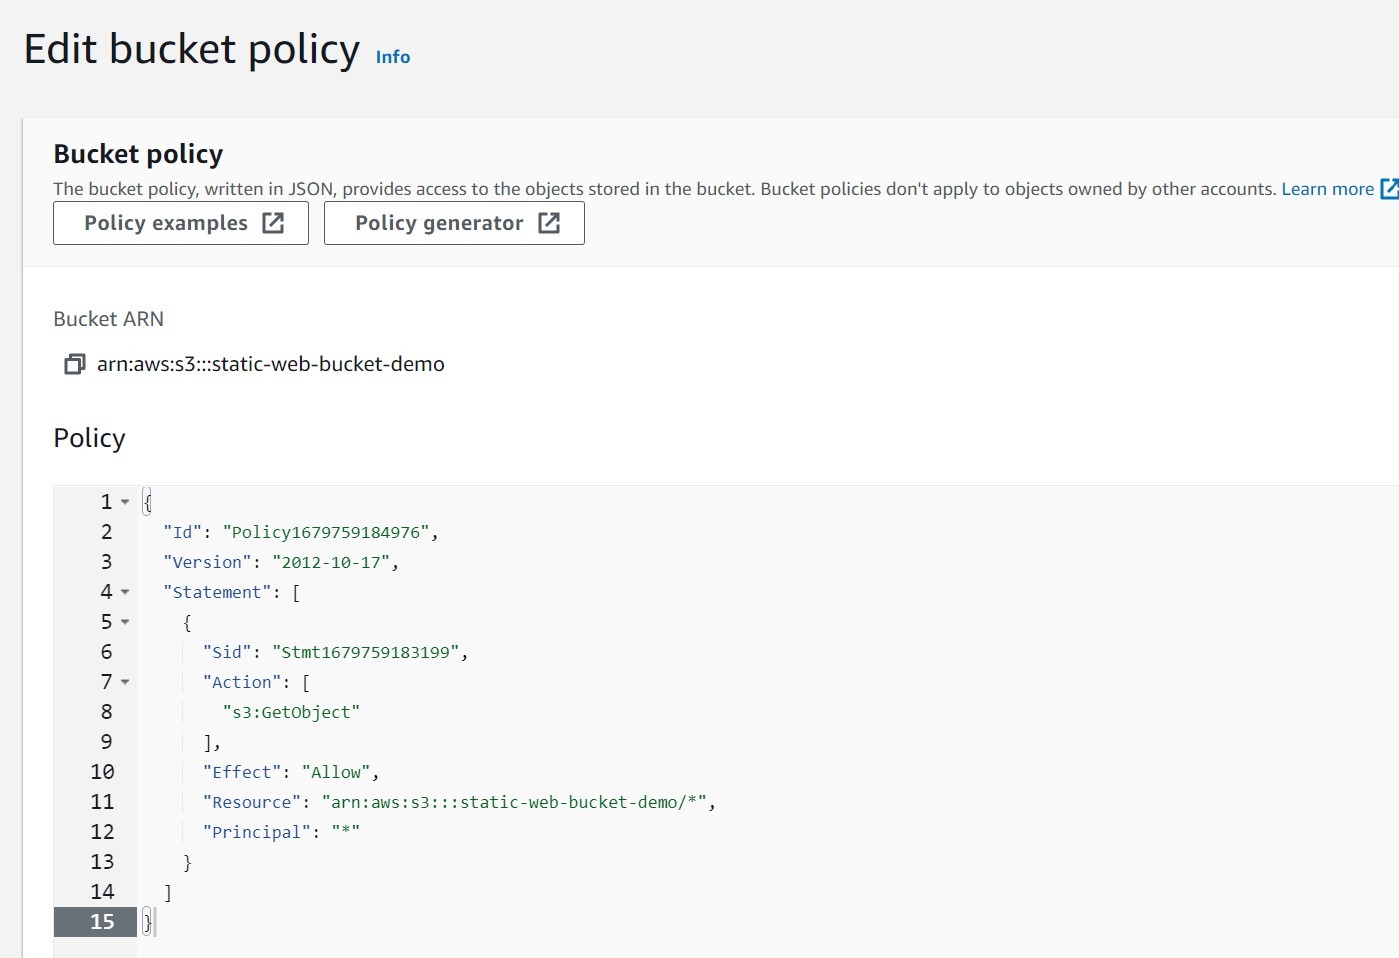 AWS Bucket Policy
The following policy can be pasted directly.
{
 "Version": "2012-10-17",
 "Id": "Policy01",
 "Statement": [
 {
 "Sid": "Stmt01",
 "Effect": "Allow",
 "Principal": "*",
 "Action": "s3:GetObject",
 "Resource": "<buckt-ARN>/*"
 }
 ]
}
Finally, open the bucket URL again - http://
And, we have successfully hosted our static website in the S3 bucket. Now our website is hosted on internet. Nice and Easy!!
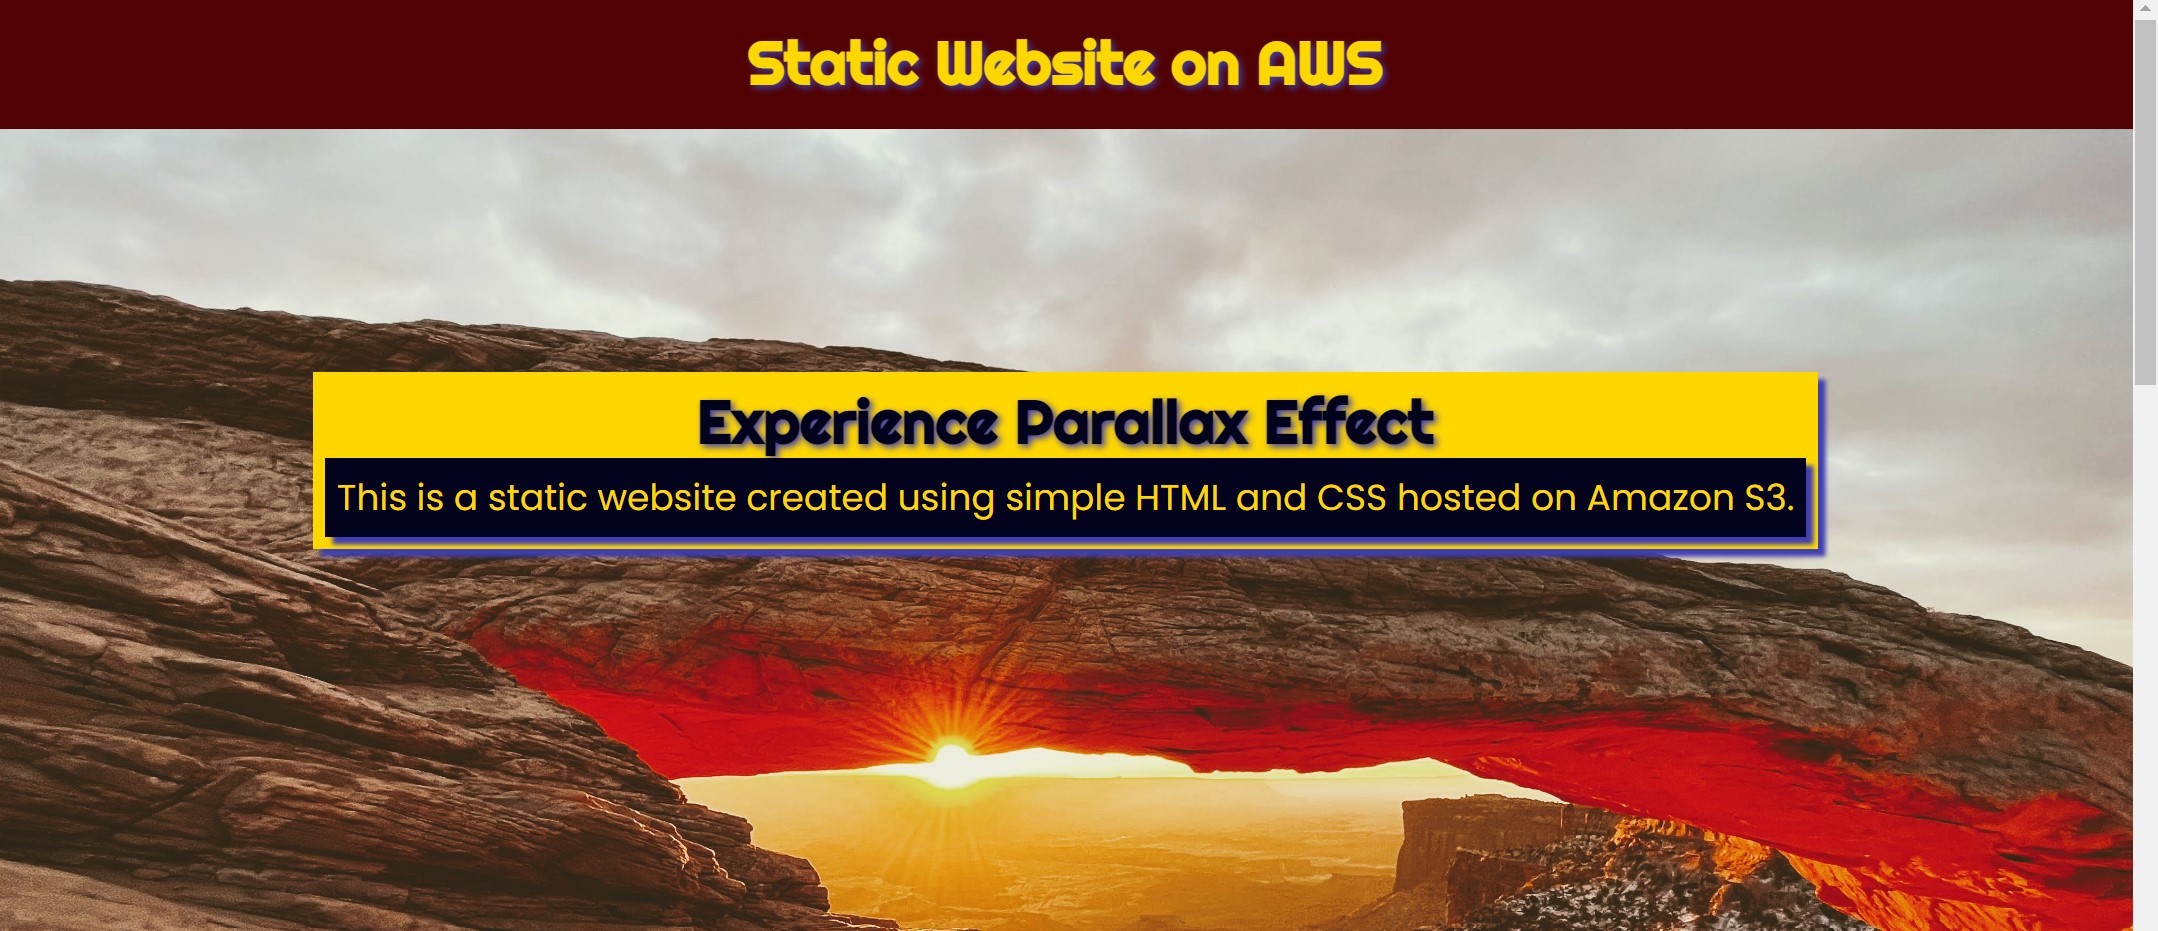 Static website hosted on AWS - Home page
We can view the error page if we type anything after the bucket URL.
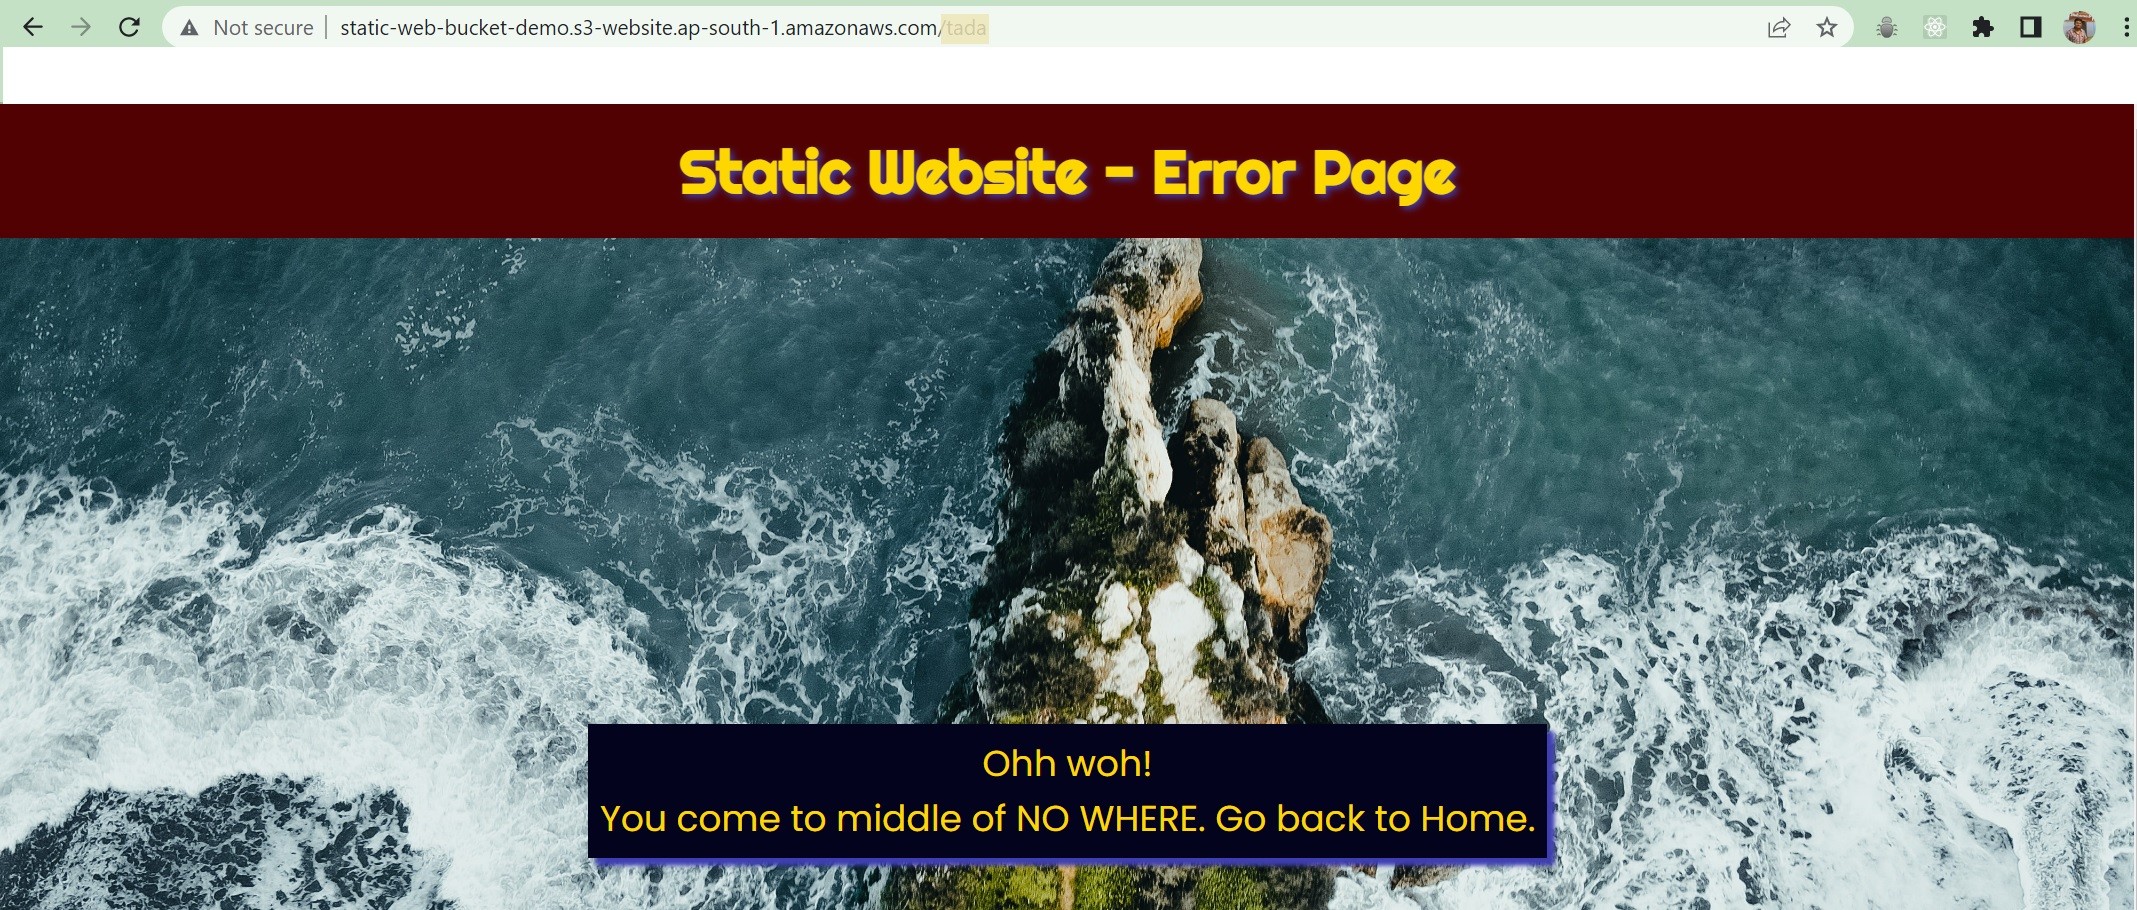 Static website hosted on AWS - Error page
Conclusion
In this article, we summarize the process for hosting static websites into Amazon S3 bucket along with the key feature of Amazon S3. Amazon S3 bucket can be used for other purpose as well like storing logs, temporary files, files with versions etc. There are several encryptions features for Amazon S3 available for data security. You can check out AWS Official Documentation for Amazon S3 for more details.
Now, you are able to host your static website on AWS Cloud for free using Amazon S3. Ignite your imagination on Cloud.
Please share your feedback, suggestion to me at – bhar.debaditya@gmail.com